User Guide for Fusion OLED Display
Quick guide for the Fusion OLED Display, covering installation, connection to FusionAmps, brightness settings, and remote control operation.
Table of contents
Manual images
Jump to the sectionQuick guide from the manual
The Fusion OLED Display is an accessory designed for use with Fusion Amps and DSP313 modules. This guide covers the assembly, connection, and configuration of the display. Key safety note: The module contains electrostatic sensitive devices; handle with care. Do not expose to moisture or rain.
Parts and assembly
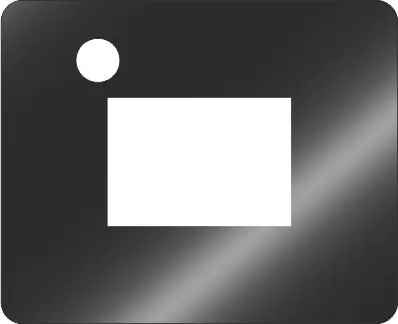
The package includes the OLED display, a Z5C125L1 cable, and mounting materials. The display features a protective foil, an IR remote receiver, and a flex-cable for connection to the DSP.


- Step 1: Remove the protective foil from the display.
- Step 2: Connect the provided cable to the J1 connector on the display.
- Step 3: Mount the display into your enclosure, ensuring the flex-cable is not compromised.
- Step 4: Connect the other end of the cable to the J15 connector on the FusionAmp.
- Step 5: Remove the final protective layer from the display surface.
Settings and configuration
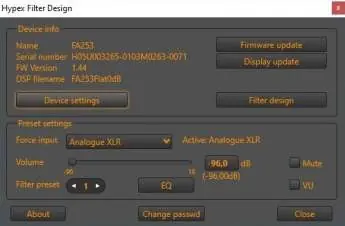
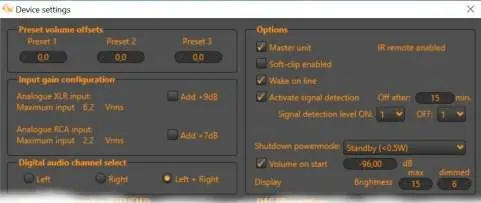
Brightness can be adjusted via the Hypex Filter Design (HFD) software (v4.97 or higher). Connect the FusionAmp to a computer via USB and navigate to Device settings. You can set max brightness (for active use) and dimmed brightness (for idle). To prevent OLED burn-in, it is recommended to set the brightness level to 6 or lower.
Remote control
The display supports the Hypex Remote. Functions include power on/off, preset selection (1-3), input switching, volume control, and mute. The device uses RC5 codes (Device code: 16).
Notifications
The display provides visual feedback for status, including:
- Default: Startscreen, Power Standby, Auto source scanning, and warnings (High Temperature, Clipping).
- Feedback: Volume level, Mute, Equalizer status, and Preset number.
- Source: Displays active input (XLR, RCA, SPDIF, AES, TOSLINK, etc.).
- Notice: Temperature warnings and fan status.
Troubleshooting
If the display shows no power, verify that the FusionAmp or DSP is powered on and that the display cable is connected correctly to both the display and the amplifier module.
Practical help
Common problems
Check if the FusionAmp/DSP is powered on and ensure the cable is securely connected to both the display and the amplifier.
Set the brightness level to 6 or lower to prevent permanent discolouration from static logos.
This is normal; the system performs a graceful shutdown, causing a slight delay.
Before use
- Ensure the FusionAmp is powered off before installation.
- Handle the display with ESD precautions.
- Verify the cable is not damaged.
- Ensure the display is mounted away from heat sources.
- Install HFD software v4.97 or higher for configuration.
Images and diagrams
- The assembly sequence (1-5) shows the step-by-step connection of the flex-cable to the display and the FusionAmp.
- The J1 connector pinout defines the power (+3V3), IR output, ground, and LED control signals.
Model compatibility
- Designed exclusively for use with Fusion Amps and DSP313.
- In a master/slave setup, only the master device needs the display; slaves will not respond to IR commands.

Manual page author
David Miller
Documentation analyst
Organizes user manual content into clear summaries, with attention to model details, product context, and everyday usability.