Home Appliances / Small Kitchen Appliances
User Manual for GLEN SA 4017 Cold Press Slow Juicer
Quick guide for the GLEN SA 4017 Cold Press Slow Juicer. Learn how to assemble, operate, clean, and troubleshoot your juicer for optimal performance and longevity.
Table of contents
Manual images
Click an image to enlargeQuick guide from the manual
The GLEN SA 4017 is a cold press slow juicer designed for household use. To ensure optimal performance and safety, please note the following key operational limits:
- Continuous Operation: Do not operate the machine for more than 20 minutes continuously. Allow a 20-30 minute rest period after each use to extend the motor's service life.
- Ingredient Preparation: Cut fruits and vegetables into small pieces. Remove hard seeds, kernels, and thick skins before juicing.
- Incompatible Ingredients: Do not attempt to juice sugar cane, guava, or mango.
- Safety: Always disconnect the power supply before assembling, disassembling, or cleaning the unit. Do not use wet hands to operate the switch.
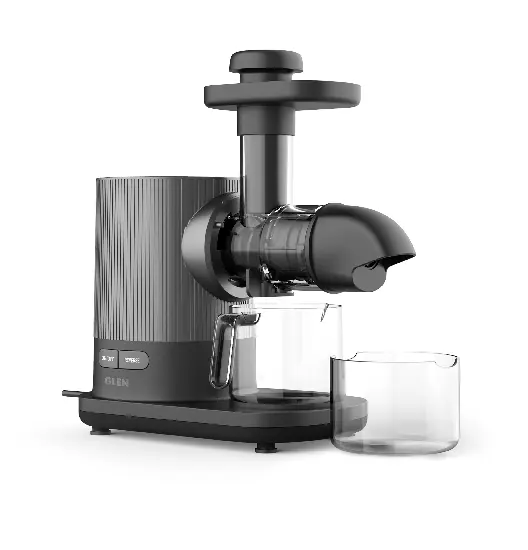
Product Overview
The juicer consists of several key components, including the motor base, juicing body, auger, fine strainer, and pusher. The control panel features an ON/OFF switch and a Reverse function. The Reverse function is used if the machine gets stuck; press and hold the Reverse key for about 3 seconds to clear the blockage, then release and press ON to resume.

Assembly and Operation
Follow these steps to assemble the unit:
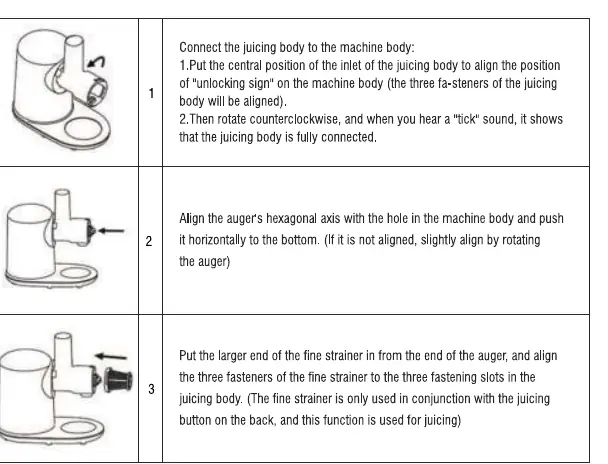
- Attach Juicing Body: Align the juicing body with the "unlocking sign" on the machine base. Rotate counterclockwise until you hear a "tick" sound to lock it in place.
- Install Auger: Align the auger's hexagonal axis with the hole in the machine base and push it horizontally to the bottom.
- Insert Strainer: Place the fine strainer over the auger and align the three fastening slots with the juicing body.
- Secure Cover: Place the juicing body cover on the juicing body, align the slots, and rotate counterclockwise to lock.
- Final Setup: Place the juice cup and pomace cup under their respective outlets. Attach the hopper to the top of the feeding barrel.
Once assembled, ensure the switch is OFF before plugging in the power. Turn the power ON and feed ingredients slowly using the pusher. Do not force the ingredients; let the auger do the work.
Cleaning and Maintenance
Proper cleaning is essential for hygiene and machine longevity:
- Turn off and disconnect the power supply before cleaning.
- Do not wash the main motor base with water; wipe it with a dry cloth.
- Disassemble the juicing body, cover, strainer, and auger in reverse order of assembly.
- Wash removable parts with clear water. Do not use hot water (over 80°C), abrasive cleaners, or steel wool.
Troubleshooting
If you encounter issues, refer to these common solutions:
- Machine does not work: Check if the power plug is connected properly or if the outlet is faulty.
- Machine stops during operation: This may be due to low voltage or excessive/hard ingredients. Allow the motor to cool down.
- Noise during operation: Ensure the auger and fine strainer are fully installed. Note that some rubbing sound from food is normal.
- Difficult to unscrew juicing body: Clean the surface of the juicing body cover and use the reverse button to clear any remaining ingredients.
Technical Specifications
- Supply Voltage: 230 V AC
- Rated Frequency: 50 Hz
- Power: 150 W
- Capacity: 500 ml
Practical help
Common problems
Machine stops during operation
Check if voltage is too low or if ingredients are too hard/excessive. Allow the motor to cool down before restarting.
Noise at work
Ensure the auger and fine strainer are fully installed. Some rubbing sound from food is normal.
Difficult to unscrew juicing body
Clean the surface of the juicing body cover and use the reverse button to clear ingredients.
Machine does not start
Check if the power plug is connected properly or if the outlet is faulty.
Before use
- Ensure all parts are clean and dry.
- Check power cord and plug for damage.
- Ensure removable parts (auger, strainer, body) are fully installed.
- Cut fruits and vegetables into small pieces.
- Remove hard seeds, kernels, and thick skins.
Specs in practice
- Continuous Working Hours
- Maximum 20 minutes; allow 20-30 minutes rest to prevent overheating.
Images and diagrams
- 1-3: Assembly of the juicing body and auger.
- 4-7: Attaching the cover, cups, and hopper.
- 8-12: Operation steps including feeding ingredients.
Model compatibility
- Not suitable for sugar cane, guava, or mango.
- For household use only.
- Do not use with hot water over 80°C.

Manual page author
David Miller
Documentation analyst
Organizes user manual content into clear summaries, with attention to model details, product context, and everyday usability.