Globo Lighting 21506W Table Lamp
Quick guide for the Globo Lighting 21506W and 21506B table lamp. Includes assembly instructions, bulb requirements, and electrical specifications.
Quick answers from the manual
Quick answer
- The Globo Lighting 21506W/21506B is a table lamp that requires a 230V power supply and an E14 bulb with a maximum wattage of 40W. p. 1
Key actions
- Assemble the lamp body, install an E14 bulb (max 40W), and connect to a 230V power source. p. 1
Technical specifications
| Parameter | Value | Meaning | Pages |
|---|---|---|---|
| Bulb Socket | E14 | Small screw base | p. 1 |
| Max Power | 40W | Maximum bulb wattage | p. 1 |
| Voltage | 230V~ 50Hz | Mains voltage | p. 1 |
Show 1 more answers Show less
Where to find it in the PDF
- Assembly and Specifications p. 1
Table of contents
Quick guide from the manual
This document provides the assembly and installation instructions for the Globo Lighting 21506W and 21506B table lamp. The lamp requires a standard E14 bulb with a maximum power rating of 40W and operates on a 230V 50Hz power supply.
Assembly and Installation
Follow these steps to assemble and prepare your lamp for use:
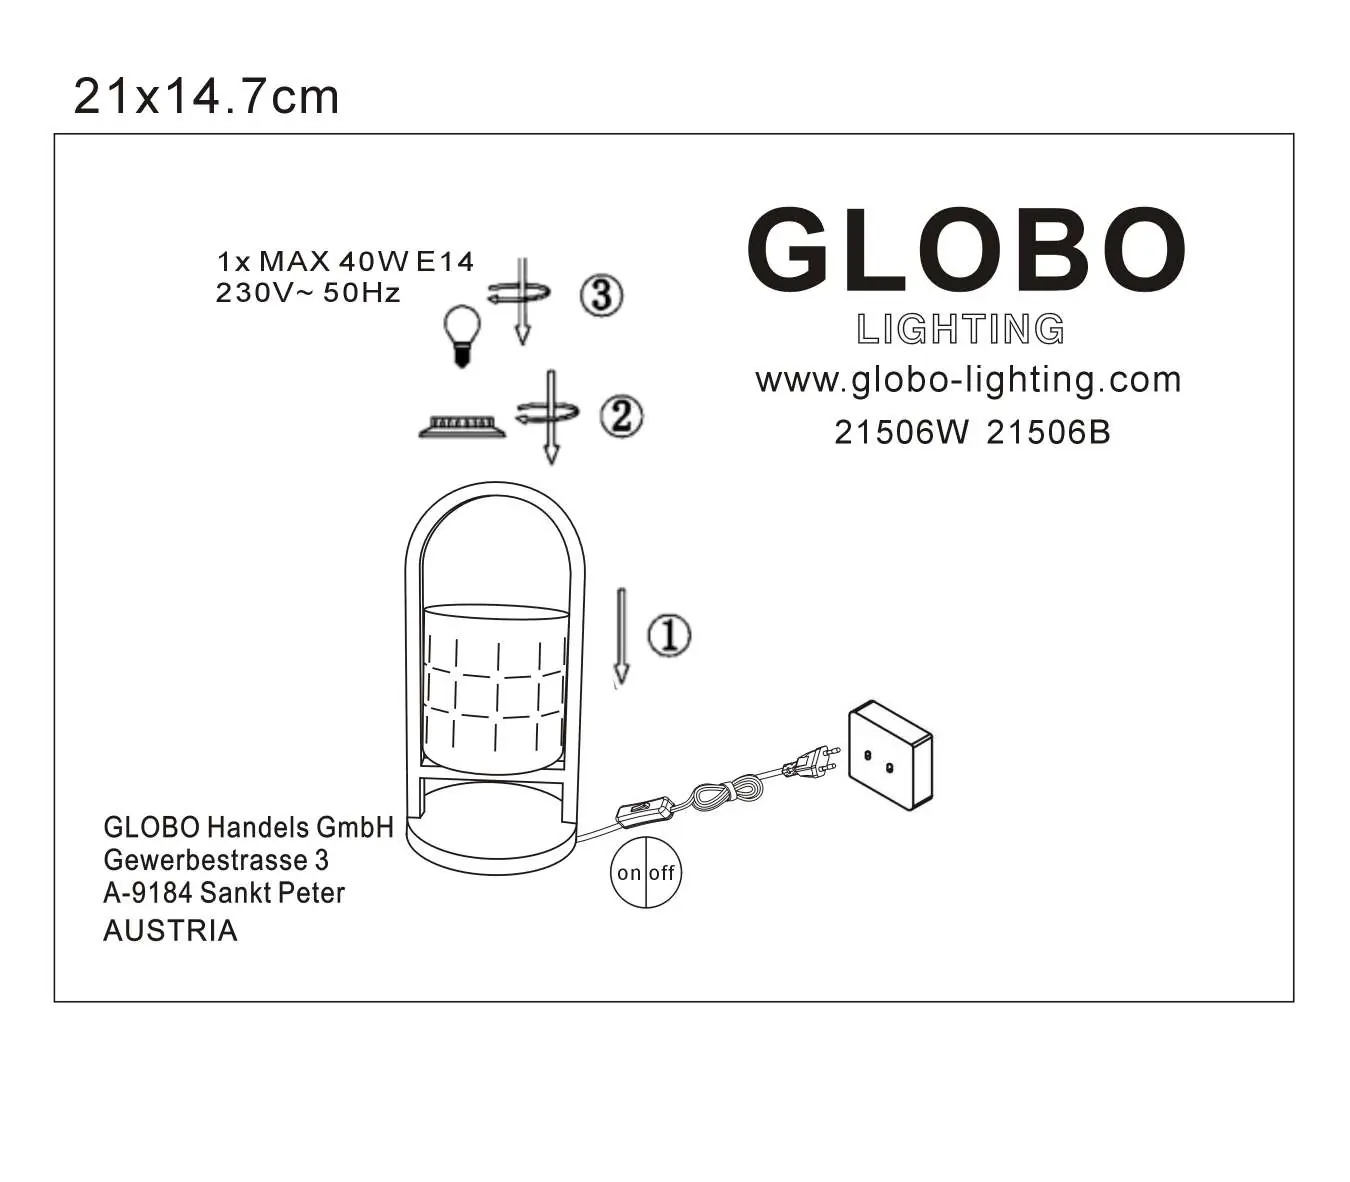
- Step 1: Assemble the main body of the lamp as indicated in the diagram.
- Step 2: Prepare the socket area for the bulb installation.
- Step 3: Insert a compatible E14 bulb into the socket.
- Connection: Connect the power cord to a standard 230V wall outlet. Use the integrated on/off switch on the cord to operate the light.
Technical Specifications
- Bulb Type: E14
- Maximum Wattage: 40W
- Voltage: 230V~ 50Hz
Manufacturer information
Globo Lighting
Practical help
Before use
- Ensure the power supply is 230V~ 50Hz.
- Verify you have an E14 bulb.
- Ensure the bulb wattage does not exceed 40W.
- Check that the lamp is fully assembled before plugging it in.
Images and diagrams
- The diagram illustrates the assembly sequence: 1 (Main body assembly), 2 (Socket preparation), and 3 (Bulb insertion).
- The diagram shows the power cord with an inline on/off switch.

Manual page author
David Miller
Documentation analyst