Furniture / Sofas & Couches
Assembly and User Manual for Gymax 2-Drawer Storage Cabinet
Complete assembly guide and care instructions for the Gymax 2-Drawer Storage Cabinet. Includes step-by-step installation, parts list, and maintenance tips to keep your furniture in top condition.
Quick answers from the manual
Quick answer
- This manual provides assembly instructions for the Gymax 2-Drawer Storage Cabinet, including a parts list, step-by-step assembly guide, and care instructions. p. 1
Key actions
- Assemble the cabinet frame and drawers using the provided hardware, ensuring screws are not fully tightened until assembly is complete. p. 1
- Tighten screws periodically to maintain stability. p. 1
Problems and fixes
Surface damage
Do not use water or solvents. Use a soft, clean cloth.
p. 1Maintenance and reset
- Check bolts/screws periodically and tighten them if necessary. p. 1
Where to find it in the PDF
- Assembly and Care p. 1
Table of contents
Manual images
Click an image to enlargeQuick guide from the manual
This document provides the necessary steps to assemble your Gymax 2-Drawer Storage Cabinet. Please read all instructions carefully before beginning. Important: Do not tighten the screws until you have completed the assembly to ensure proper alignment. Do not use power tools, as they may scratch or damage the parts.
Before you start
- Work in a spacious area, preferably on a carpet, to protect the furniture finish.
- Verify that all parts are included and labeled.
- Keep hand tools close at hand.
- Do not return the item if you encounter issues; contact the customer service department via email at [email protected].
Assembly instructions
The assembly process consists of four main steps:
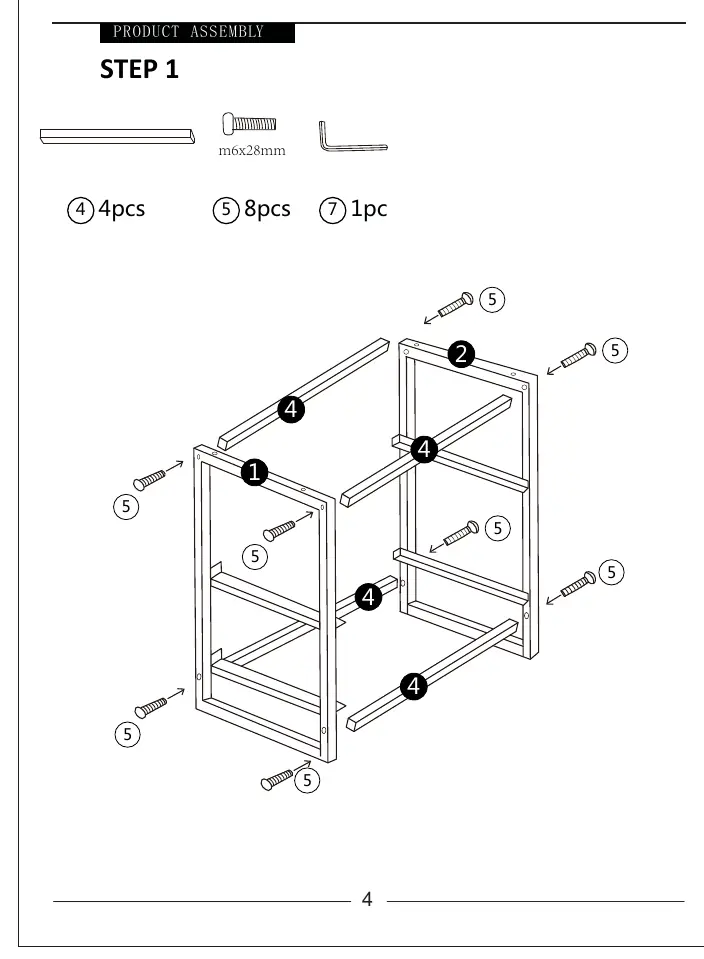
- Step 1: Assemble the main frame using the provided screws (M6x28mm) and dowels.
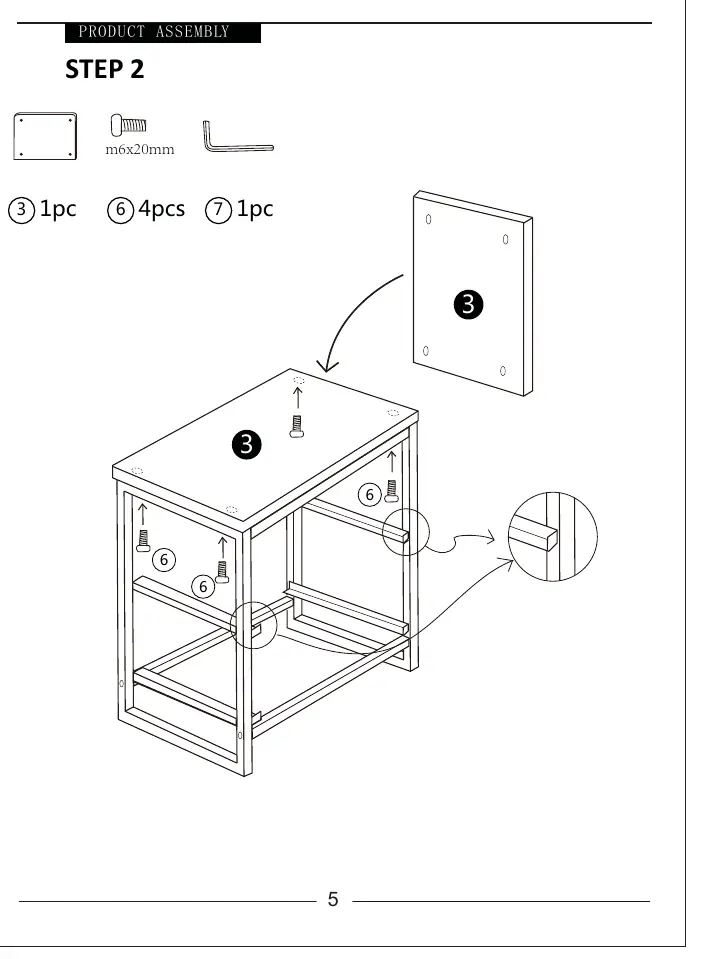
- Step 2: Attach the back panel to the frame using the specified screws (M6x20mm).
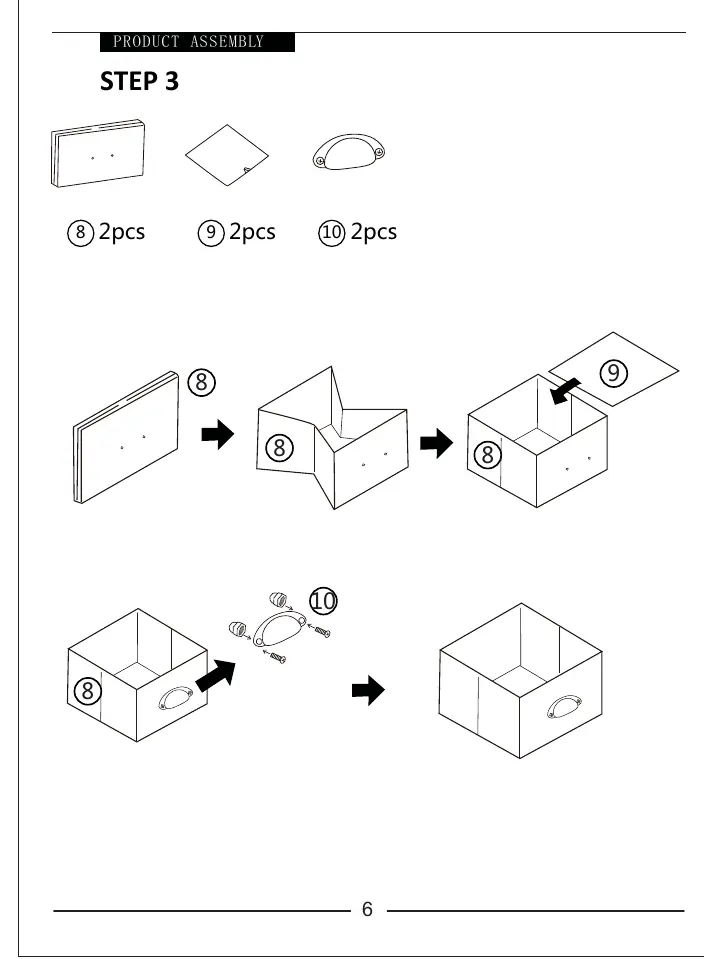
- Step 3: Assemble the drawer components, attaching the sides and front panel.
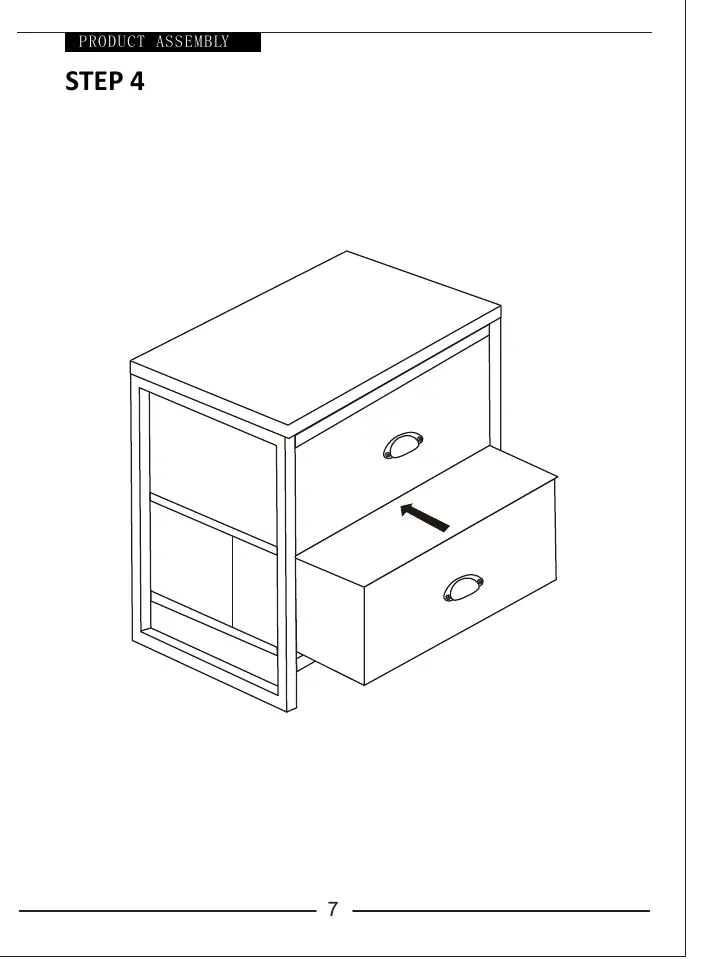
- Step 4: Insert the completed drawers into the main frame.
Care and maintenance
To ensure the longevity of your furniture:
- Keep the furniture in a climate-controlled environment to prevent warping, shrinking, or splitting caused by extreme temperature and humidity changes.
- Keep away from direct sunlight.
- Use a soft, clean cloth for dusting. Furniture polish is generally not necessary; if used, test on an inconspicuous area first.
- Never use water or solvents to clean the furniture, as they may damage the finish.
- Blot liquid spills immediately with a soft, clean cloth; avoid rubbing.
- Periodically check bolts and screws and tighten them if necessary.
Practical help
Common problems
Wobbly or unstable cabinet
Check all bolts and screws periodically and tighten them if necessary.
Surface damage during cleaning
Do not use water or solvents. Use a soft, clean cloth and blot spills gently.
Before use
- Ensure all parts are present and labeled.
- Prepare a spacious, carpeted workspace.
- Have hand tools ready.
- Do not use power tools.
Images and diagrams
- Step 1: Frame assembly using M6x28mm screws.
- Step 2: Back panel attachment using M6x20mm screws.
- Step 3: Drawer assembly.
- Step 4: Final drawer insertion.
Model compatibility
- Keep in a climate-controlled environment to prevent wood warping or splitting.

Manual page author
David Miller
Documentation analyst
Organizes user manual content into clear summaries, with attention to model details, product context, and everyday usability.