Industrial / Electrical
Hinkley 15288TT Taper LED Bollard Installation Guide
Comprehensive installation, wiring, and maintenance instructions for the Hinkley 15288TT Taper LED Bollard, including concrete, wood, and deck mounting options.
Table of contents
Product Overview
The Hinkley 15288TT Taper LED Bollard is a high-quality outdoor lighting fixture designed for durability and performance. This manual provides detailed instructions for professional installation and maintenance.
Installation Methods
The fixture supports three distinct installation methods depending on the mounting surface:
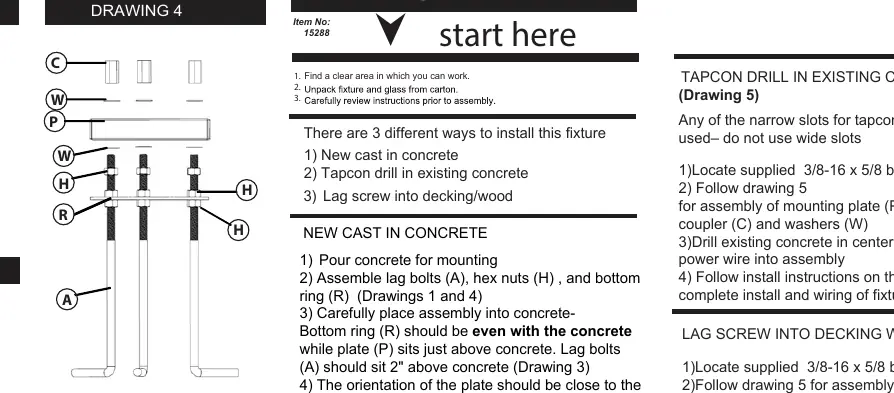
- New Cast in Concrete: Requires pouring concrete and setting the mounting assembly before the concrete cures.
- Tapcon Drill in Existing Concrete: Utilizes narrow slots on the mounting plate for secure attachment to existing concrete surfaces.
- Lag Screw into Decking/Wood: Allows for mounting on wooden decks or platforms by securing the plate directly to the surface.
For all methods, ensure the mounting plate is level and wires are routed through the center of the plate. The orientation of the plate should be finalized before the concrete sets or the fixture is fully secured.
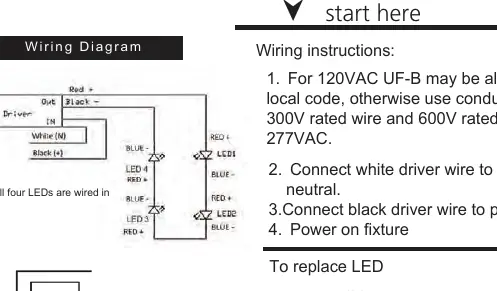
Wiring and Electrical
The fixture must be wired according to local electrical codes. For 120VAC, UF-B cable may be permitted; otherwise, use conduit with appropriate 300V or 600V rated wire for 277VAC applications. The driver is programmed to 700mA. All four LEDs are wired in series. Ensure the earth ground is connected properly. Dimming wires (0-10V, purple/grey) should be capped off if not in use.
Maintenance and LED Replacement
To replace a failed LED module:
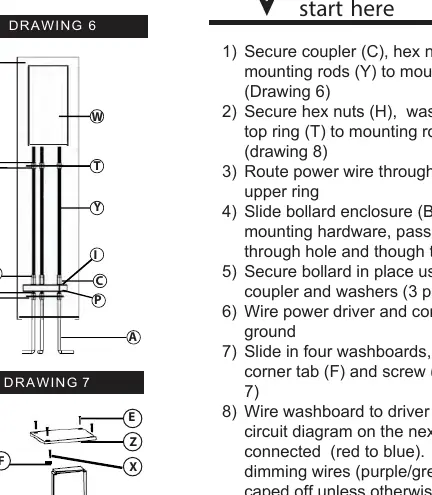
- Turn off power to the fixture.
- Remove the top cover and washboards to access the internal components.
- Disconnect the wiring between the LED and the driver.
- Remove the screws holding the faulty LED, replace it with a new unit, and secure it using the original screws.
- Reconnect the wiring and restore power.
Important: The fixture is supplied with silicone-filled wire nuts intended for one-time use only. Ensure all connections are secure and weather-resistant.
Related manuals
Related manuals from the same brand or category.