Power / Batteries Chargers
Itechworld 12V Mini Power Box User Guide
Quick guide for the Itechworld 12V Mini Power Box, covering installation, technical specifications, safety warnings, and fuse replacement procedures.
Table of contents
Quick guide from the manual
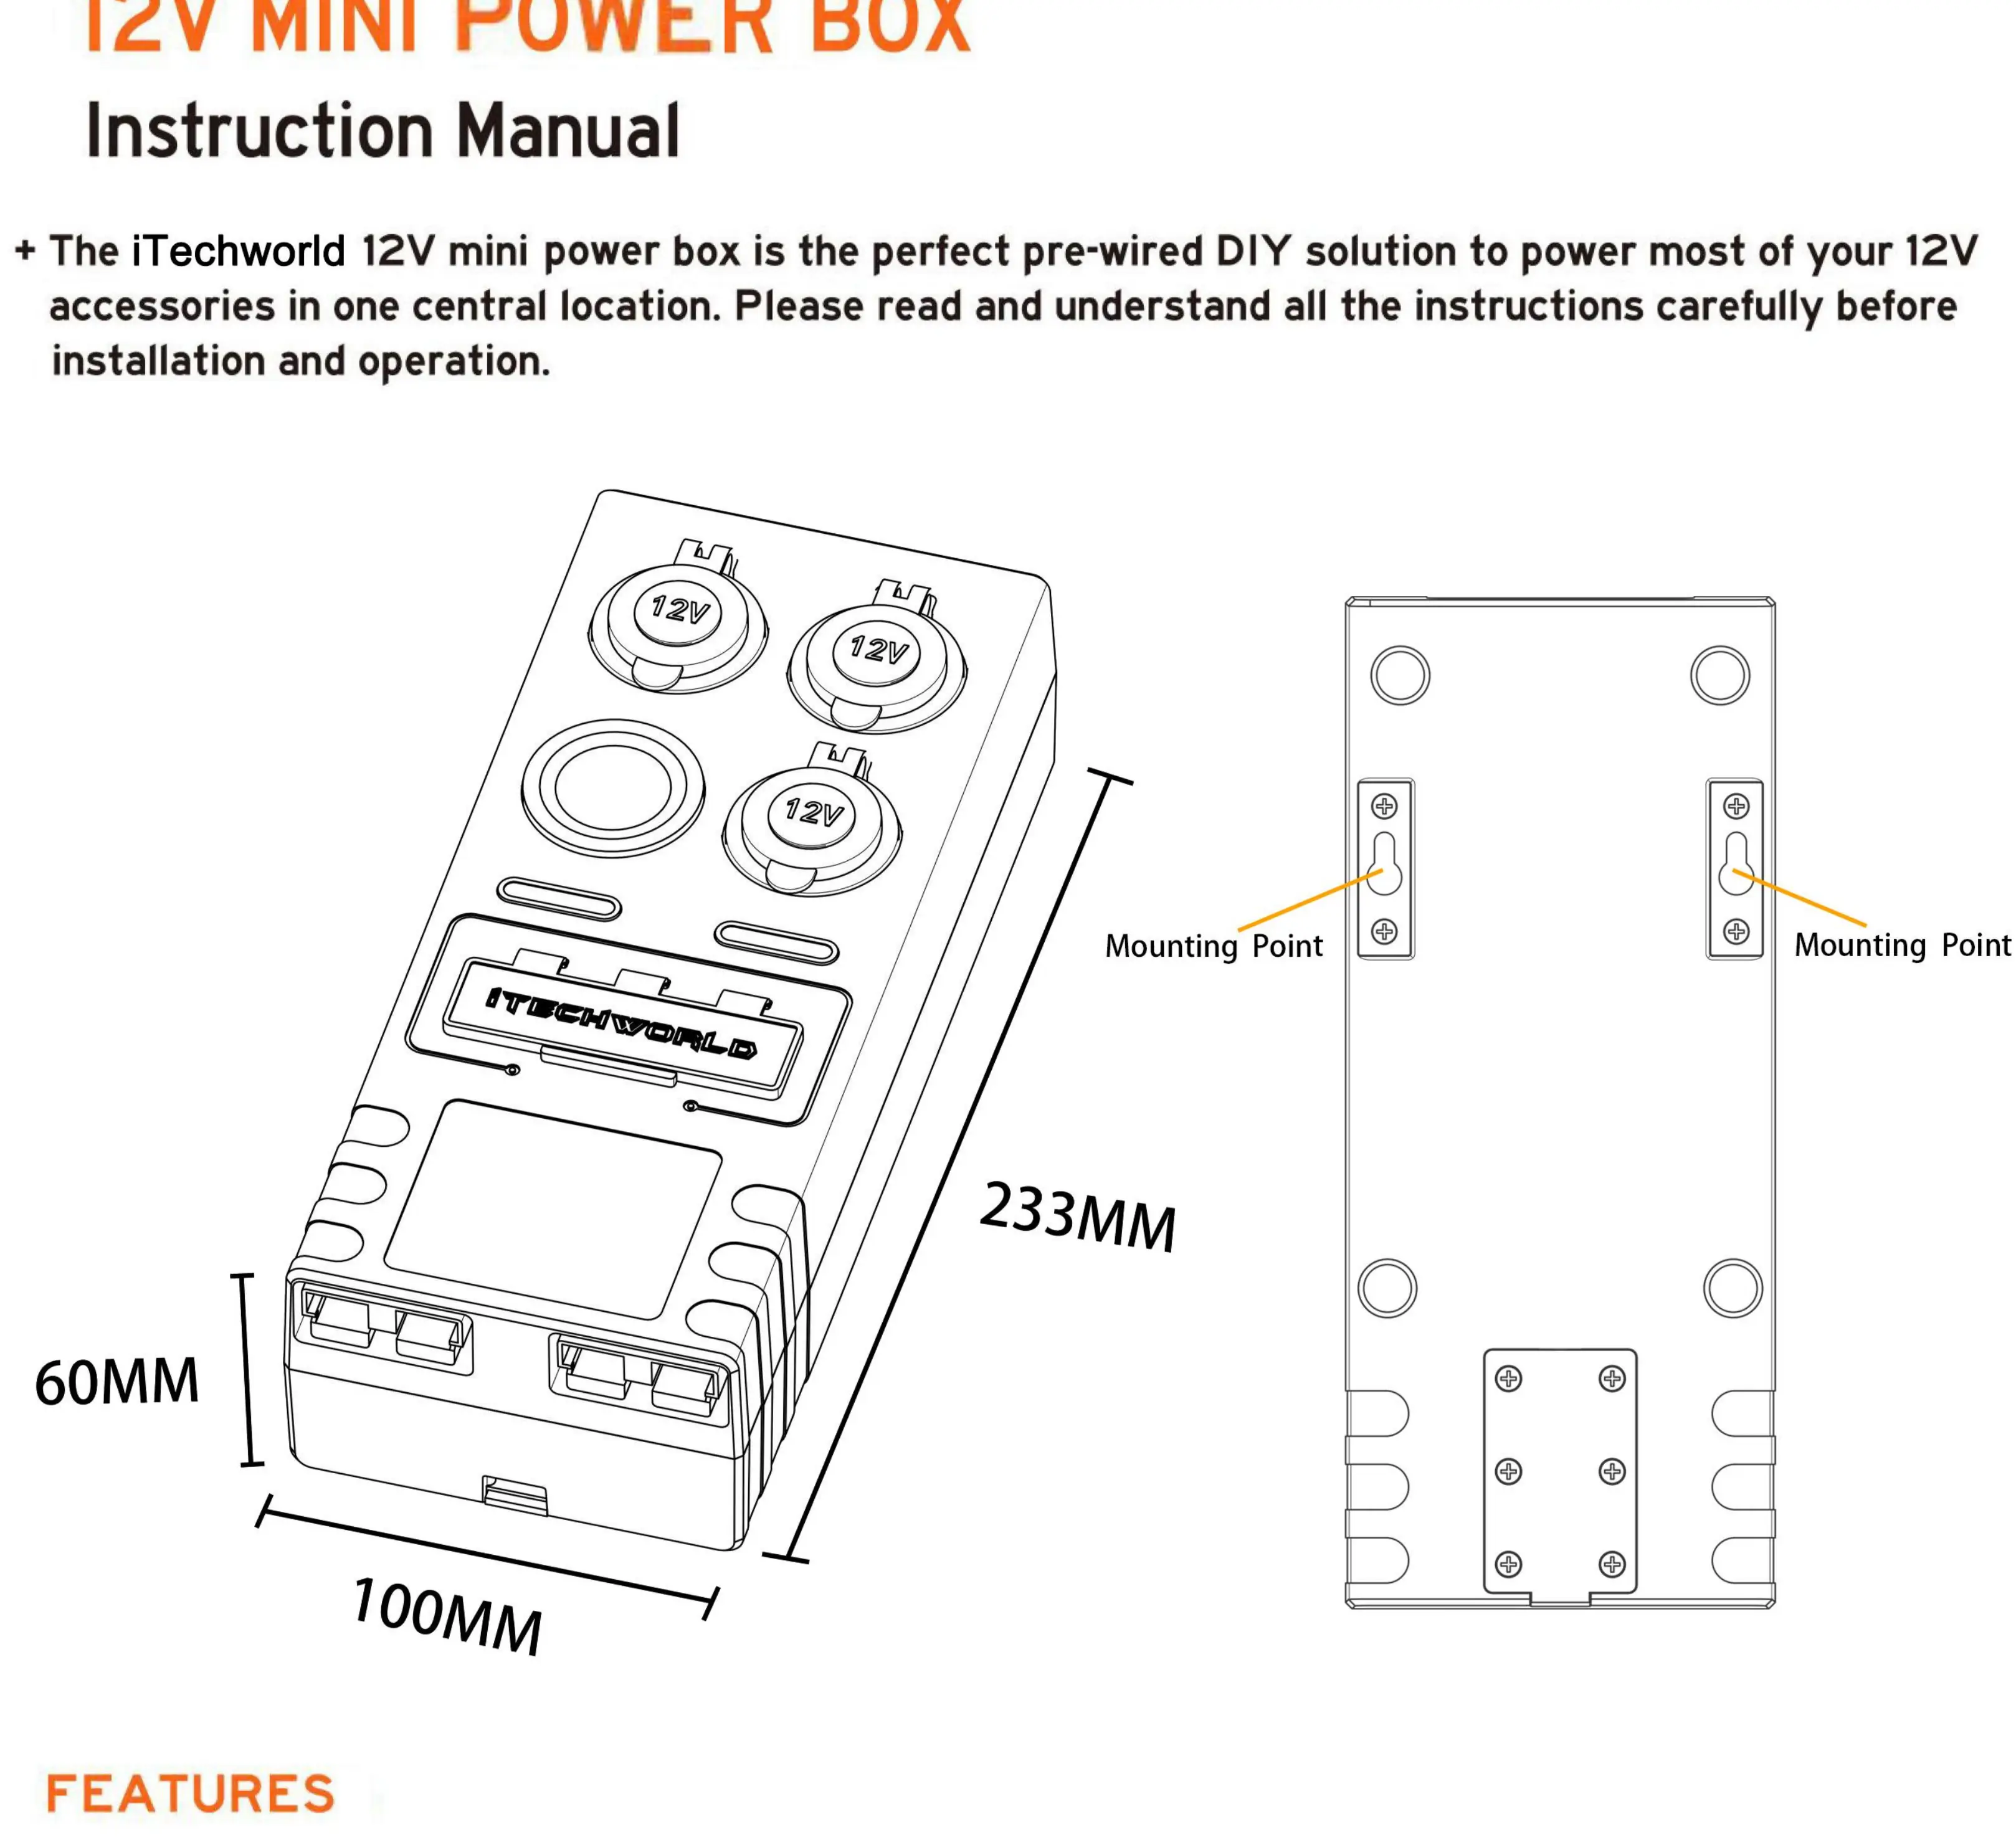
The Itechworld 12V Mini Power Box is a pre-wired DIY solution designed to centralize power for 12V accessories in vehicles, trailers, or caravans. This guide provides essential information for safe installation and operation. Always ensure the unit is installed on a flat surface and, if possible, by a licensed auto electrician.
Device Overview
The unit features a comprehensive control panel including:
- 4 x USB ports
- 1 x Type-C port
- 1 x QC3.0 port
- 3 x Cigarette lighter sockets
- LED Voltmeter with multi-colour display
- Built-in LED light
- 50A Quick connect plug with 90cm cable
Installation Instructions
Follow these steps to install the power box:
- Ensure the installation area is a flat surface with unobstructed access.
- Use the mounting points on the back of the unit to secure it.
- Use M4 screws to fasten the unit to the surface. Use a hand screwdriver only and do not over-tighten the screws.
- Connect the 12V supply via the input quick connect plug. This can be a permanent battery connection or an extension cable from a portable battery box.
Safety Warnings
- Keep children and pets away from the control box.
- Always disconnect power sources (e.g., car battery) before starting electrical work.
- Do not insert any objects or tools into components.
- Ensure all exposed wires are covered.
- Do not expose the unit to wet weather.
- Provide adequate ventilation to prevent heat accumulation.
Fuse Replacing Instruction
If the unit loses power, check your cabling and connections first. If a fuse has blown:
- Disassemble the unit from the wall or mounting surface.
- Unscrew the screws to open the box casing.
- Remove the melted fuse and replace it with a new 30A fuse.
Manufacturer information
iTechworld
Practical help
Common problems
No power to the panel
Check cabling, wiring, and ensure the 12V switch is on. Test using a 12V multimeter or contact a licensed auto electrician.
Blown fuse
Disassemble the unit, open the casing, and replace the melted fuse with a new 30A fuse.
Before use
- Ensure the installation surface is flat.
- Verify the 12V power source is suitably fused.
- Check that all exposed wires are properly covered.
- Ensure the installation area is well-ventilated.
- Disconnect the battery before performing any electrical work.
Specs in practice
- Maximum Cumulative Amp
- 50A total capacity for the unit.
- Operating Temperature
- The unit is designed to function between -5°C and 45°C.
- Pre-wired Fuse
- 30A fuse dedicated to the 3 cigarette lighter sockets.
- Circuit Breaker
- Automatic reset, 50A breaker for the main input plug.
Images and diagrams
- The unit features two mounting points on the rear for secure installation.
- The front panel includes dedicated switches for the voltmeter and LED lights.
- Input/Output ports use 50A quick connect plugs for easy power management.
Model compatibility
- Suitable for most 4WD, trailer, or caravan applications.
- Input requires connection to a suitably fused power source to protect the wiring.

Manual page author
David Miller
Documentation analyst
Organizes user manual content into clear summaries, with attention to model details, product context, and everyday usability.