General / Other Manuals
La Crosse Technology C82929V2 Wi-Fi Projection Alarm Clock User Guide
Quick guide for the La Crosse Technology C82929V2 Wi-Fi Projection Alarm Clock. Learn how to set up the device, connect to the La Crosse View app, configure projection, alarms, nap timers, and troubleshoot common connectivity issues.
Table of contents
Quick guide from the manual
This document provides instructions for the La Crosse Technology C82929V2 Wi-Fi Projection Alarm Clock. The device functions as a standalone clock but offers enhanced features like internet weather forecasts, custom data streams, and remote monitoring when connected to the La Crosse View app via a 2.4GHz Wi-Fi network.
Setup
1. Connect the power cord to the alarm clock.
2. Remove the insulation tab from the CR2032 battery compartment on the bottom of the clock.
3. Download the La Crosse View app from the App Store or Google Play.
4. Follow the in-app instructions to connect the clock to your Wi-Fi network.
Button Functions
- ALARM: Activate/deactivate alarm; hold to set alarm time.
- EXTRA SENSOR: View sensor options; hold to add new sensors.
- PROJ INFO: Adjust projection brightness; hold to alternate projection display.
- + or -: Adjust values; hold both to search for Wi-Fi signal.
- SET: View Wi-Fi status; hold to enter settings menu.
- NAP: Start nap countdown; hold to set nap duration.
- SNOOZE/LIGHT: Adjust backlight; hold to set Auto Dim time.
- ALARM + NAP: Hold both for factory reset.
Projection
The projection tube can be rotated 270 degrees. Use the button on the top to adjust intensity (HI-MED-LO-OFF). Press PROJ INFO to select what is projected (Time, Indoor Temp/Humidity, Internet Outdoor Temp, or Extra Sensor info).
Alarms and Nap Timer
To set an alarm, hold the ALARM button for 3 seconds. You can configure the hour, minutes, and snooze duration (up to 120 minutes). The alarm uses a crescendo sound and lasts for 2 minutes. The Nap Timer is set similarly by holding the NAP button; it defaults to 30 minutes.
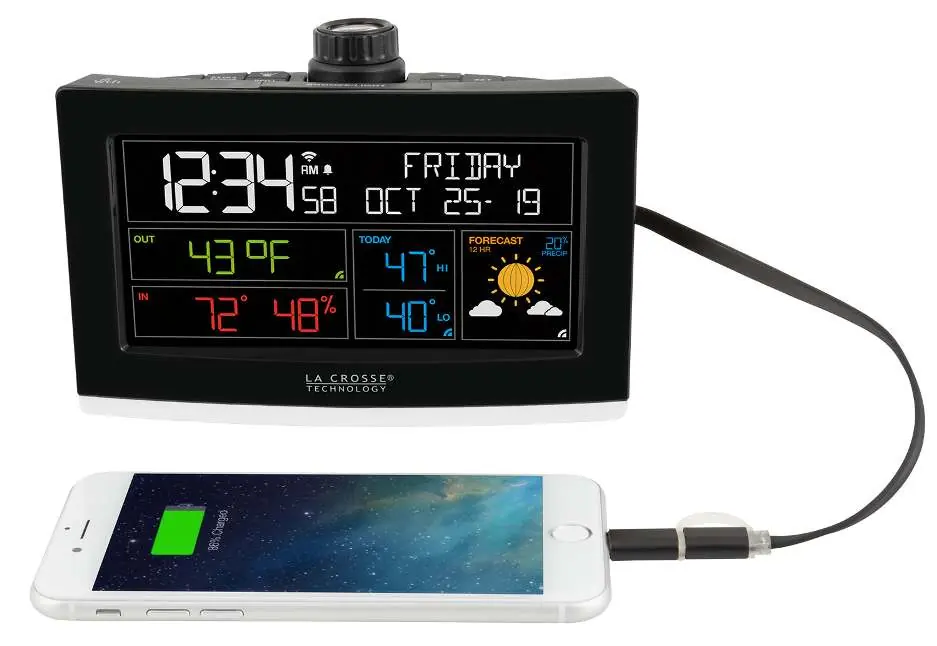
USB Charging
The clock features a 1 Amp USB charging port on the back. The power cord must be connected to the clock for this feature to work.
Care and Maintenance
Do not mix old and new batteries or different battery types. Ensure correct polarity during installation. Remove batteries if the device will not be used for an extended period.
Manufacturer information
La Crosse Technology
Practical help
Common problems
Wi-Fi connection issues
Ensure your mobile device is on a 2.4GHz network. Hold + and - buttons together for 3 seconds to search for Wi-Fi.
Alarm not ringing
Check if the alarm icon is visible on the display. If not, press the ALARM button to activate it.
Auto Dim feature not working
If you manually adjust the backlight using the LIGHT button, the Auto Dim feature will resume at the next scheduled time.
Sensor not reading
Hold the EXTRA SENSOR button for 3 seconds to force a search. Ensure the sensor has fresh batteries and the TX button has been pressed.
Before use
- Connect the power cord to the clock.
- Remove the battery insulation tab from the CR2032 compartment.
- Download the La Crosse View app.
- Ensure your router is broadcasting a 2.4GHz Wi-Fi signal.
Specs in practice
- Indoor Temperature Range
- 32°F to 99°F (0°C to 37°C)
- USB Power Output
- 1A maximum current for charging devices.
- Battery Backup
- CR2032 battery maintains time and date settings during power loss.
Images and diagrams
- The projection tube on the back rotates 270 degrees to adjust the angle of the projected image.
- The projection arm can be tilted back and forth to position the image on the ceiling.
Model compatibility
- Requires 2.4GHz Wi-Fi network for app connectivity.
- USB charging requires the main power cord to be plugged in.
- Some sensors may be compatible with the app only, while others work with both the clock and the app.

Manual page author
Emily Carter
User documentation editor
Prepares concise manual descriptions and highlights the most useful setup, operation, and maintenance information for readers.