Furniture / Home Furnishing
Installation Guide for Leitner 00-GLB2X-1753 Ineos Grenadier Load Bar Kit
Quick installation and usage guide for the Leitner Ineos Grenadier Load Bar Kit. Includes step-by-step mounting instructions, torque specifications, and safety guidelines for roof load management.
Table of contents
Manual images
Jump to the sectionQuick guide from the manual
This document provides installation and safety instructions for the Leitner Ineos Grenadier Load Bar Kit (Part numbers 00-GLB2X-1753 and 00-GLB1X-1752). The installation requires approximately 1 hour and basic hand tools. Always adhere to the vehicle manufacturer's maximum roof load limits, which take precedence over the rack's capacity.
Tools required
- Torque wrench
- T30 Torx bit socket
- 13mm wrench
- 3mm Allen wrench
Installation steps
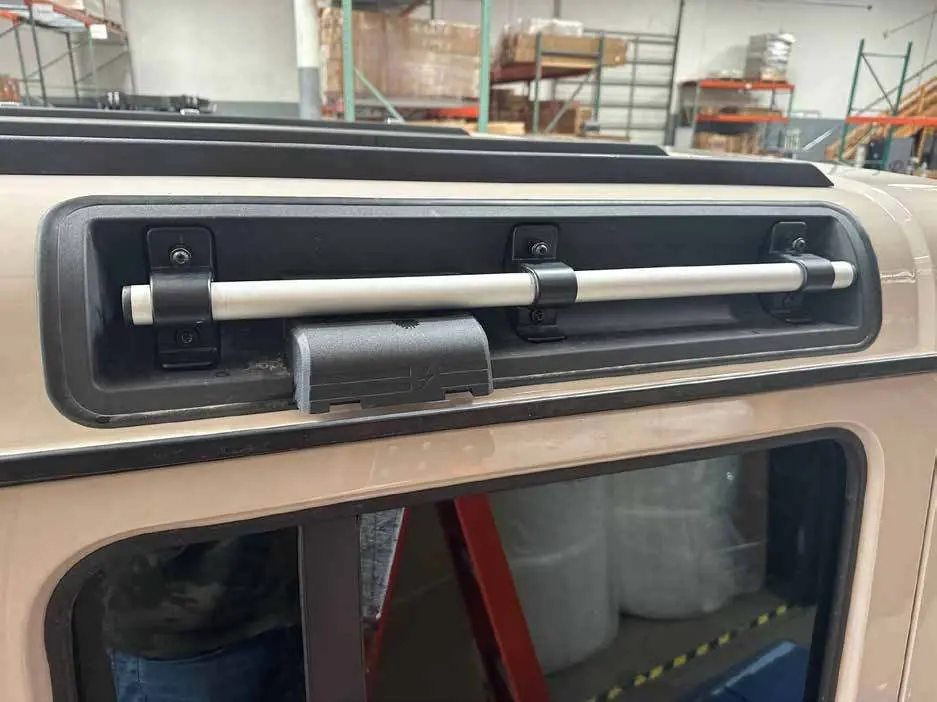
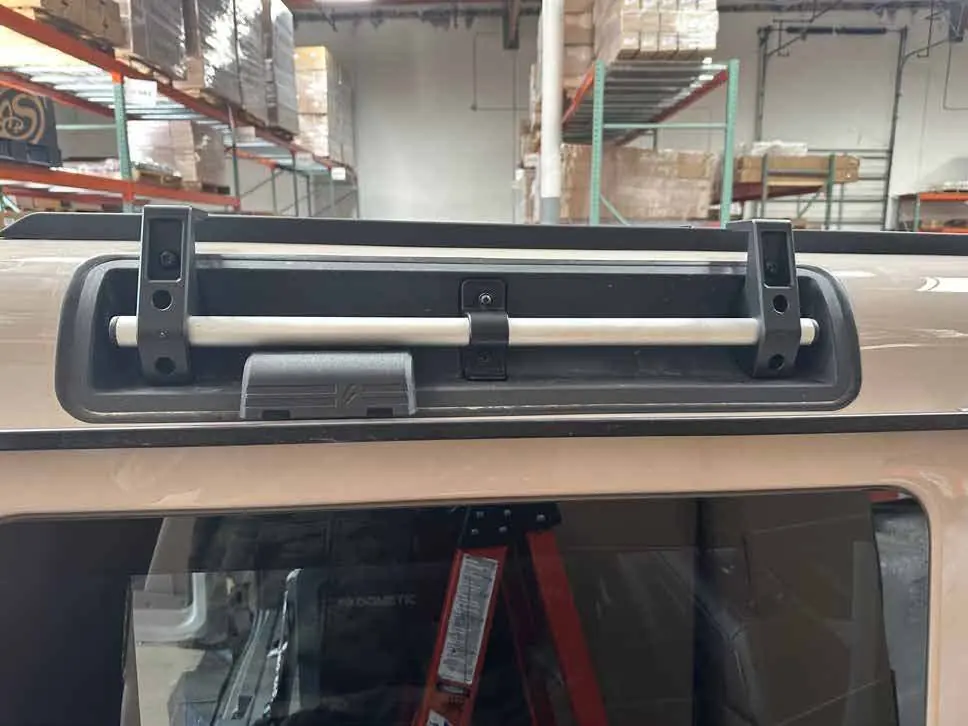
- Remove existing hardware: Use a T30 wrench to remove all factory hand rail brackets (12 brackets, 24 screws).
- Install mounting brackets: Attach the Leitner mounting brackets. Ensure the tab on the factory bracket is oriented downwards. Use the supplied blue threadlocker on all factory M6 bolts.
- Secure brackets: Tighten all 6mm screws to 10 ft-lb (13 Nm). Snug down the 5mm set screws using a 3mm Allen wrench.
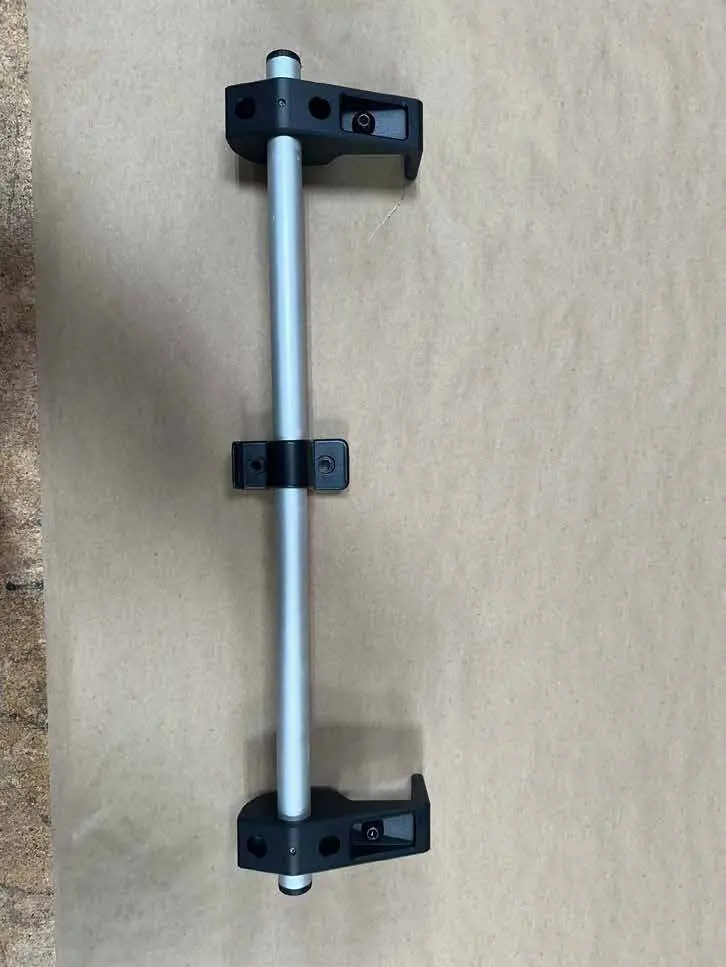
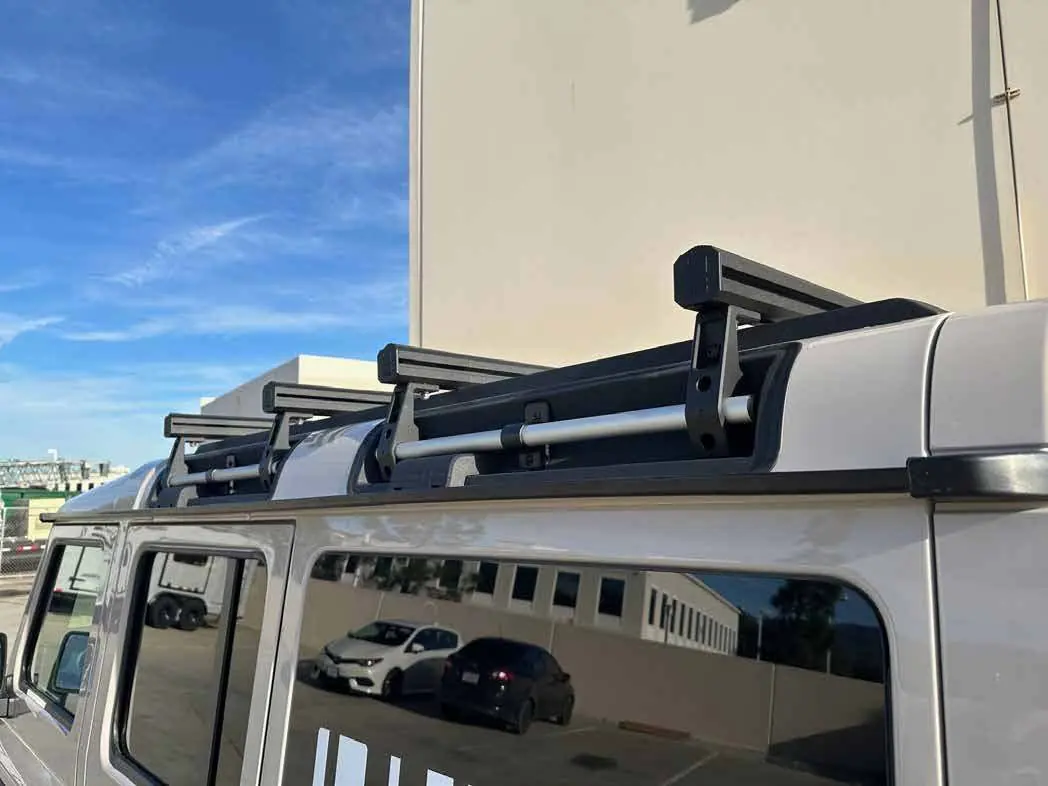
- Install load bars: Insert 2 T-bolts into one rail per load bar. Align the bars so they are centered on the vehicle. Torque all M8 locknuts to 16 ft-lb using a 13mm wrench.
- Final assembly: Push the rubber tread strip into the upper cross bar channel (use Windex as a lubricant if necessary). Install the end caps into the ends of the cross bars.
Safety and usage guidelines
- Load limits: Maximum load is 150 lbs off-road and 300 lbs on-road, but always follow the vehicle manufacturer's lower limit.
- Maintenance: Periodically inspect all knobs, bolts, and locks for wear or corrosion. Ensure all fasteners are tight before every trip.
- Driving precautions: Be aware of increased vehicle height and width. Long loads (kayaks, lumber, etc.) must be tied down at both front and rear.
- Locks: Use graphite or dry lubricant to maintain smooth operation of locks.
Contact information
For support or warranty claims, contact Leitner Designs at 949-395-3049 or email [email protected].
Practical help
Common problems
Difficulty inserting rubber tread strip
Use Windex (glass cleaner) as a lubricant to help slide the strip into the T-slot.
Damage to rack or vehicle
Avoid high-speed off-road driving with heavy loads; ensure all fasteners are checked at stops.
Before use
- Verify all M8 locknuts are torqued to 16 ft-lb.
- Ensure all 6mm screws are torqued to 10 ft-lb (13 Nm).
- Check that all factory M6 bolts have blue threadlocker applied.
- Confirm the tab on the center factory bracket is oriented downwards.
- Ensure all fasteners are properly tightened before every trip.
Specs in practice
- 10 ft-lb (13 Nm)
- Required torque for all 6mm screws.
- 150# (off-road)
- Maximum recommended load capacity for off-road conditions.
Images and diagrams
- The assembly overview shows the placement of the load bar, load bar pad, endcap, and mounting bracket.
- Hardware diagrams distinguish between the 2-bar kit (4 sets of hardware) and the single-bar kit (2 sets of hardware).
Model compatibility
- If carrying a roof top tent, place the two load bars as far apart as possible (at the furthest front and rear grab handle brackets).
- Extra load bars should be placed as close to the center as possible to support the tent.
- Maximum of 6 load bars can be added.

Manual page author
Michael Turner
Technical manual editor
Reviews PDF manuals for structure, safety notes, and practical product details so readers can find the right information quickly.