Electronics / Projectors
User Manual for Philips NeoPix 130C Smart Projector
Quick start guide and user manual for the Philips NeoPix 130C Smart projector. Learn how to set up, connect devices, adjust focus, and operate your projector.
Table of contents
Manual images
Click an image to enlargeQuick guide from the manual
This guide provides essential information for setting up and using your Philips NeoPix 130C Smart projector. Please follow the steps below to ensure proper operation.
Box contents
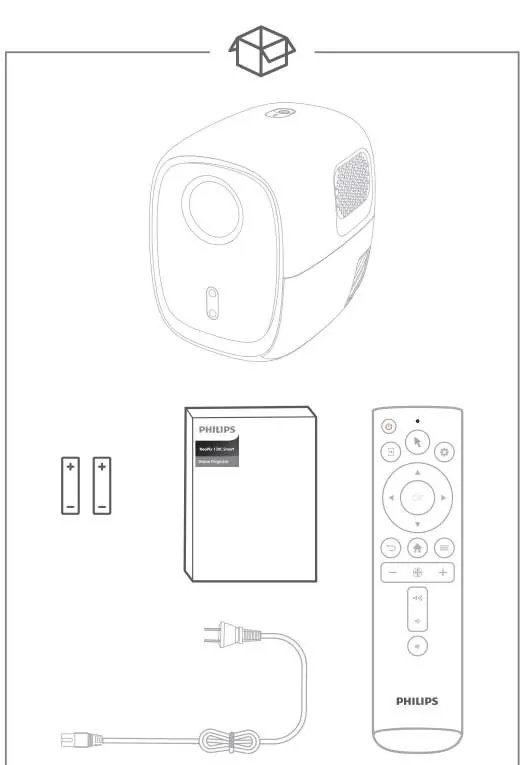
- Projector
- Remote control
- Batteries
- Power cable
Connections
The projector features various ports for connectivity:
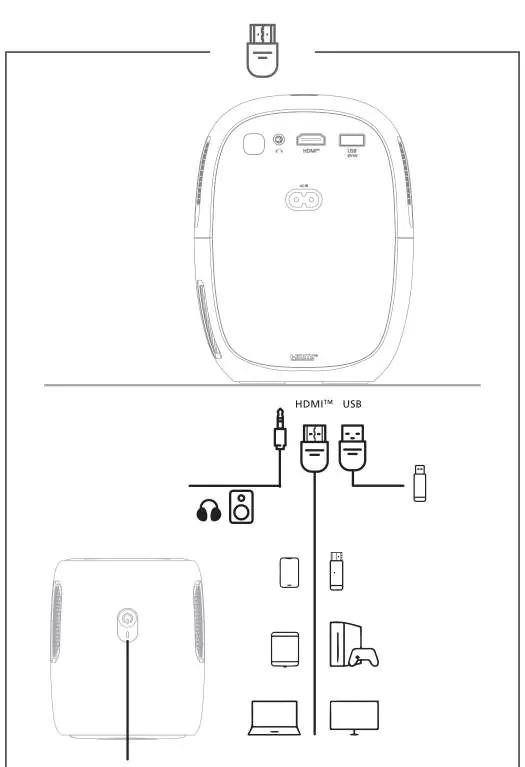
- HDMI port
- USB port
- Audio output
- Power input
You can connect devices such as smartphones, tablets, computers, game consoles, and Blu-ray/DVD players.
Remote control
The remote control allows you to navigate the interface and adjust settings:
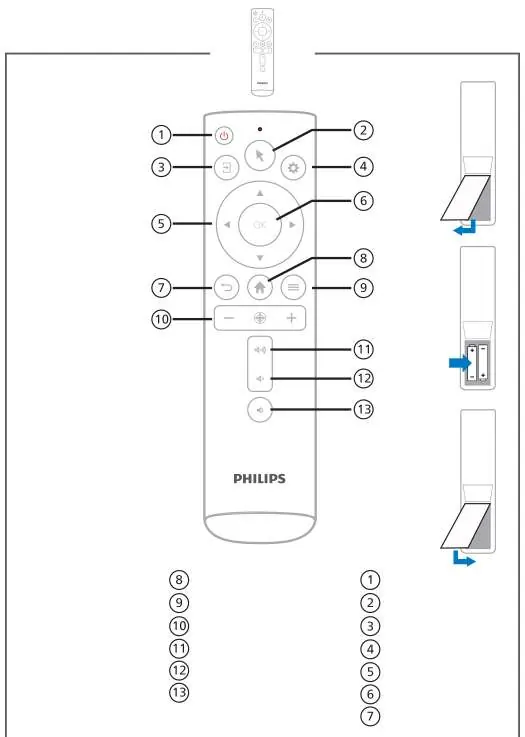
- Power on/off
- Mouse pointer
- Input source selection
- Settings
- Navigation (Up, Down, Left, Right)
- OK (Confirm)
- Back
- LuminOS Home
- Additional options
- Focus button
- Volume control (+/-)
- Mute
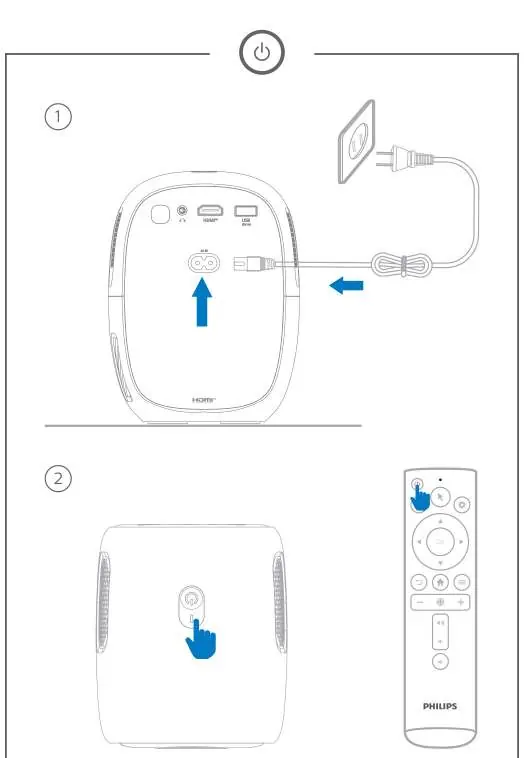
Powering on
Connect the power cable to the projector and a power outlet. Press and hold the power button on the projector or remote for 2 seconds to turn it on.
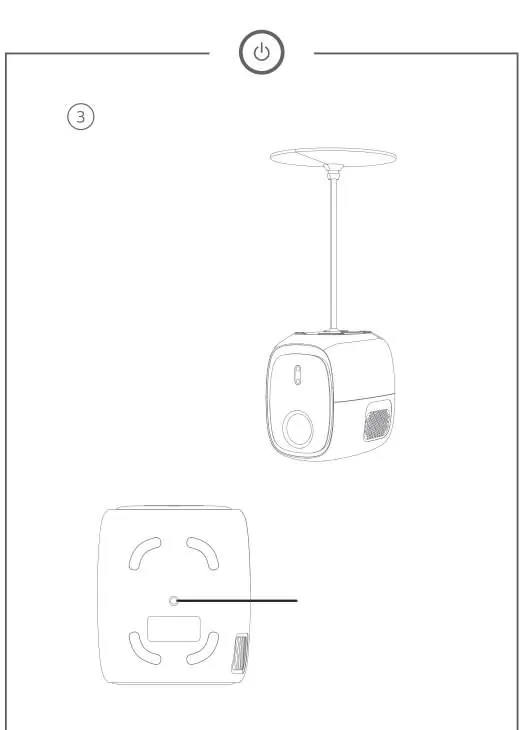
Mounting
The projector features a screw hole on the bottom for mounting purposes, such as ceiling installation.
Focus adjustment
Auto focus: Place the projector 1.2 to 3 meters from the wall. Press the focus button on the remote. Ensure Autofocus Displacement is enabled in the menu.
Manual focus: Press and hold the + or - buttons on the remote to adjust the focus manually.
Safety information
Ensure the power voltage matches the specifications on the power supply. Do not touch the power supply with wet hands. Keep the device away from high temperatures, direct sunlight, and moisture. The power supply is for indoor use only.
Manufacturer information
Philips
Practical help
Common problems
Projector not turning on
Ensure the power cable is securely connected and hold the power button for 2 seconds.
Image is blurry
Use the focus button on the remote for auto-focus or the + and - buttons for manual adjustment.
Before use
- Check box contents
- Connect power cable
- Insert batteries into remote
- Place projector 1.2-3m from the wall
Images and diagrams
- Remote control layout
- Connection ports
- Mounting point
Model compatibility
- Supports HDMI and USB devices
- Compatible with smartphones, tablets, computers, game consoles, and Blu-ray/DVD players

Manual page author
Michael Turner
Technical manual editor
Reviews PDF manuals for structure, safety notes, and practical product details so readers can find the right information quickly.