Tools / Power Tools
Chuck Sleeve Replacement Guide for Skil X-Drive 18V Cordless Drill Model 2887
A step-by-step repair guide for replacing the chuck sleeve on the Skil X-Drive 18V Cordless Drill (Model 2887), including required tools and disassembly procedures.
Table of contents
Manual images
Jump to the sectionQuick guide from the manual
This document provides instructions for replacing the chuck sleeve on the Skil X-Drive 18V Cordless Drill (Model 2887). Before starting, ensure you have the necessary tools and that the battery is removed from the drill to prevent accidental activation.
Tools required
- Phillips #2 screwdriver
- T40 Torx key
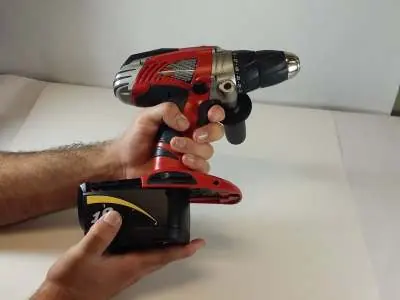
Battery removal
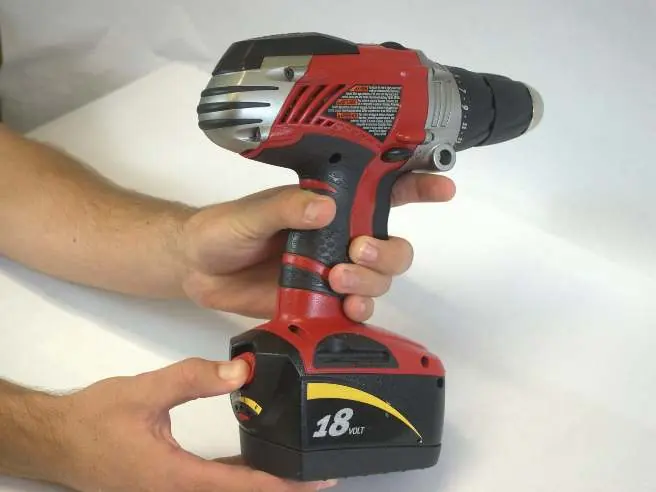
- Grip the drill firmly.
- Locate the red locking switch on the back of the battery and hold it down.
- Slide the battery towards the back of the drill until it is fully detached.
Handle removal
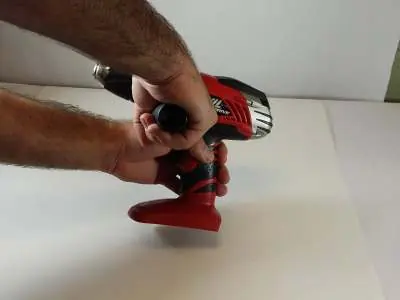
- Grip the cordless drill firmly with your left hand.
- Grip the handle firmly with your right hand.
- Rotate the handle counterclockwise to remove it from the drill.
Chuck sleeve replacement
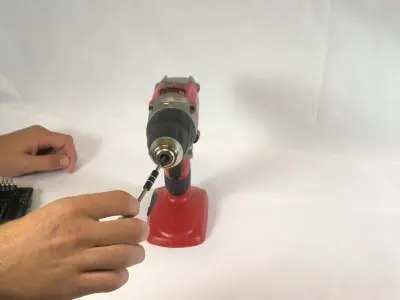
- Remove the screw: The chuck sleeve is secured by a 20mm Phillips #2 screw in the center. Note that this screw is reverse threaded. Use a Phillips #2 screwdriver and rotate it clockwise to loosen and remove it.
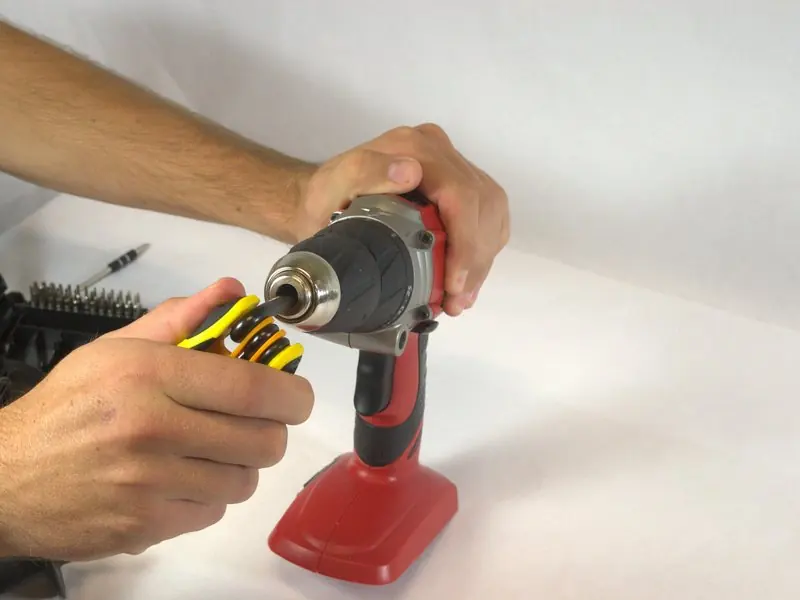
- Remove the sleeve: The threaded hole revealed after removing the screw is shaped like a 6-point star. Insert a T40 Torx key into this hole and rotate it clockwise to loosen and remove the chuck sleeve.
Reassembly
To reassemble your device, follow the disassembly steps in reverse order.

Manufacturer information
SKIL
Practical help
Common problems
Screw will not loosen
Ensure you are rotating the screwdriver clockwise, as the screw is reverse threaded.
Before use
- Remove the battery from the drill before beginning any work.
- Ensure you have a Phillips #2 screwdriver.
- Ensure you have a T40 Torx key.
Specs in practice
- 20mm Phillips #2 screw
- The specific fastener securing the chuck sleeve; requires a standard #2 Phillips driver.
- Reverse threaded screw
- The screw loosens when turned clockwise, contrary to standard fasteners.
- 6-point star hole
- The internal profile of the chuck assembly that requires a T40 Torx key for removal.
Images and diagrams
- The guide uses sequential photos to demonstrate the battery release mechanism.
- Images illustrate the correct hand positioning for removing the handle.
- Close-up photos show the specific screw location and the use of the T40 Torx key.
Model compatibility
- This guide is specifically for the Skil X-Drive 18V Cordless Drill Model 2887.

Manual page author
David Miller
Documentation analyst
Organizes user manual content into clear summaries, with attention to model details, product context, and everyday usability.