Furniture / Storage Cabinets
Assembly Instructions for Tchibo Slatted Garden Arch 728 261
Complete assembly and maintenance guide for the Tchibo Slatted Garden Arch (Model 728 261). Includes step-by-step installation instructions, safety warnings, and care tips for outdoor use.
Table of contents
Manual images
Click an image to enlargeImportant Information from the Manual
This garden arch is designed for outdoor use in private households. It is made of Chinese fir, a fast-growing wood that may emit a natural, intense odor, especially shortly after assembly. The planter boxes are lined with perforated film and feature a galvanized steel sheet at the bottom, which is slightly inclined to ensure proper water drainage. Ensure the drainage opening is positioned on the lower side during assembly.
Safety Instructions
- Danger to children: Keep packaging materials (bags, films) away from children to prevent suffocation. Small assembly parts can be a choking hazard; keep children away during assembly.
- Stability: Always place the product on a level, non-sloping surface. Avoid areas where puddles form.
- Usage: Do not stand, sit, or hang on the product. It is not designed for commercial use.
- Maintenance: Regularly check all screw connections and tighten them if necessary.
Assembly Preparation
Assemble the product on a soft, level surface (e.g., the transport cardboard) to prevent scratching. If using a cordless screwdriver, use the lowest possible torque setting to avoid damaging the wood.
Assembly Steps
The assembly process involves building the two planter boxes first, then attaching the arch sides, and finally connecting the top crossbars and bracing.
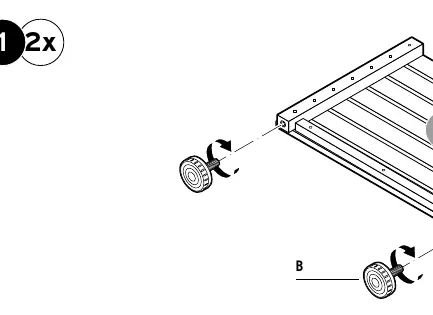
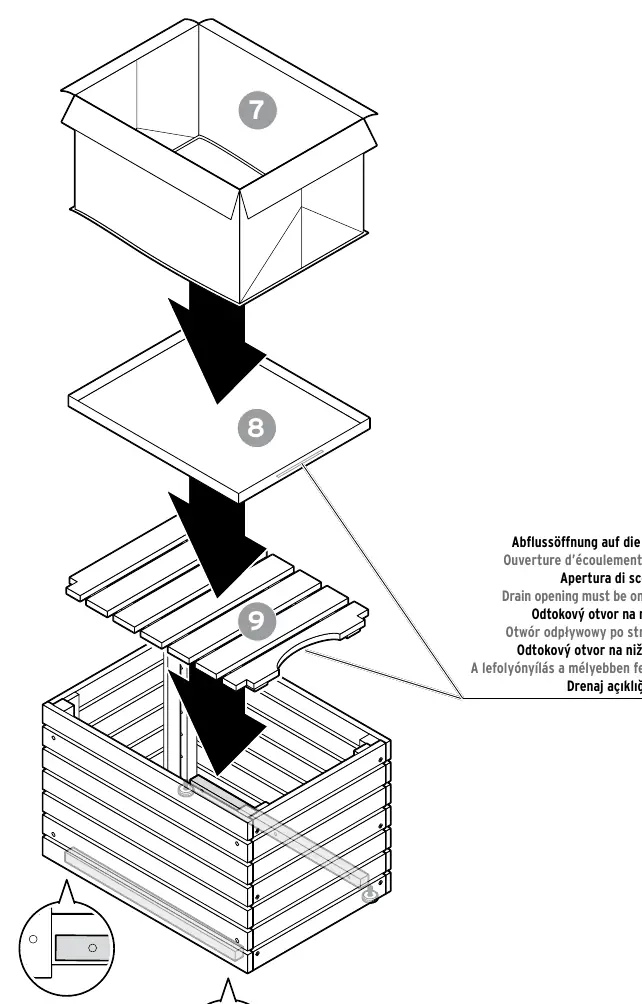

- Planter Boxes: Assemble the base and sides using the provided screws. Ensure the galvanized steel sheet is installed with the drainage opening at the lower end.
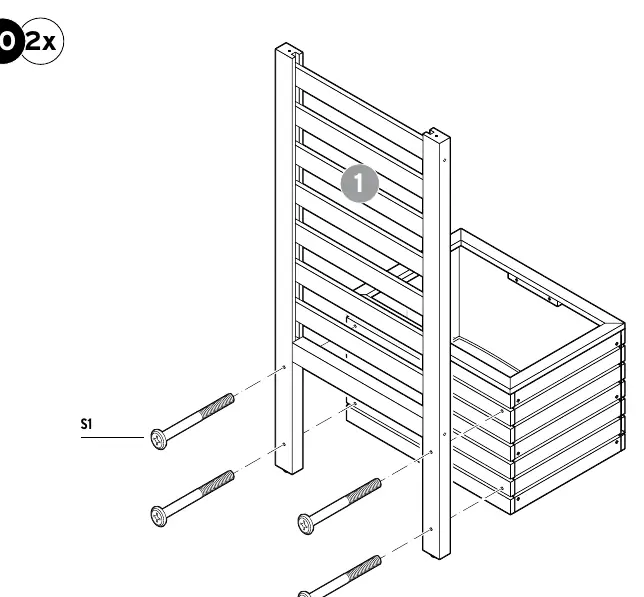
- Arch Structure: Attach the side panels to the planter boxes.
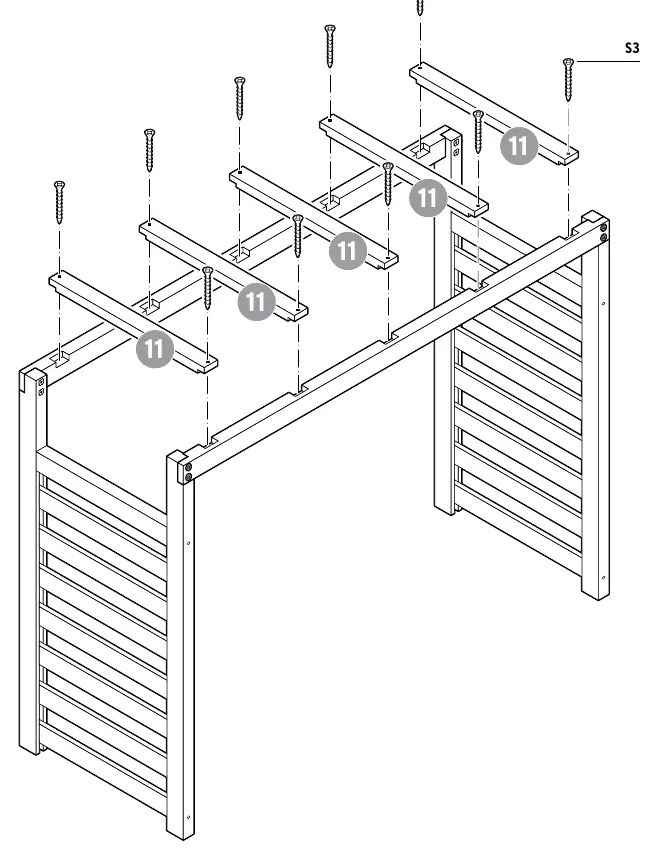
- Top Section: Connect the two sides using the top crossbars.
- Final Bracing: Secure the structure with the provided metal braces to ensure stability.
Care and Maintenance
Clean surfaces with a slightly dampened cloth and wipe dry. Do not use abrasive cleaners or hard brushes. To prolong the life of the wood, treat it with a suitable wood glaze once a year. Wood is a natural product; color variations and fine cracks due to heat or dryness are normal and do not affect the product's quality or function.
Service and Support
If a part is missing or defective, refer to the service information on the back of the manual. You will need the article number (728 261) and the specific part number from the parts list when contacting customer service.
Manufacturer information
Tchibo GmbH
Practical help
Common problems
Intense wood odor after assembly
This is natural and harmless due to the essential oils in the Chinese fir wood; it will dissipate over time.
Water accumulation in planter boxes
Ensure the galvanized steel sheet at the bottom is installed with the drainage opening on the lower-lying side.
Missing or damaged parts
Check the parts list on page 22 and contact Tchibo customer service with the article number 728 261.
Before use
- Verify all parts are present using the parts list.
- Prepare a soft, level surface for assembly.
- Keep children away from the assembly area.
- Set cordless screwdrivers to the lowest torque setting.
- Ensure the product is placed on a level, non-sloping surface.
Specs in practice
- Max load (top bar)
- 7 kg
- Max load (planter boxes)
- 50 kg each
Images and diagrams
- Steps 1-8: Assembly of the two planter boxes.
- Steps 9-12: Attaching the arch sides to the planter boxes.
- Steps 13-15: Installing the top crossbars and final bracing.
- Step 16: Final leveling and adjustment.
Model compatibility
- For outdoor use only.
- Not suitable for commercial or professional use.

Manual page author
Michael Turner
Technical manual editor
Reviews PDF manuals for structure, safety notes, and practical product details so readers can find the right information quickly.