Installation Manual for Terma CKF Mounting Bracket
Step-by-step installation guide for the Terma CKF mounting bracket. Includes tool requirements, wall drilling instructions, and procedures for attaching the bracket to the radiator.
Table of contents
Manual images
Click an image to enlargeInstallation Overview
This document provides instructions for the correct installation of the Terma CKF mounting bracket. The process involves two main phases: preparing the wall and mounting the bracket to the radiator.
Required Tools
- PZ1 screwdriver
- PZ3 screwdriver
- 4mm hex key
- 14/22mm wrench
- 10mm drill bit
Wall Installation
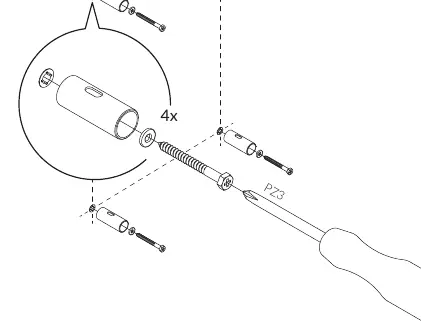
- Mark the mounting points on the wall according to the dimensions D and E.
- Use a 10mm drill bit to drill holes at the marked locations (10x80mm).
- Insert the wall plugs into the drilled holes.
- Secure the mounting components to the wall using the provided screws and the PZ3 screwdriver.
Radiator Installation
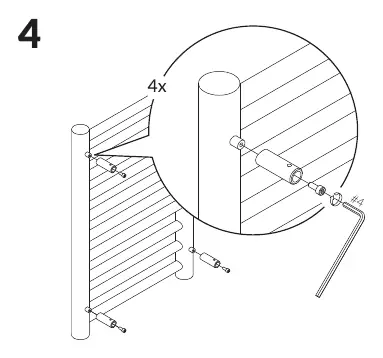
- Position the bracket components against the radiator mounting points.
- Use the 4mm hex key to secure the bracket to the radiator.
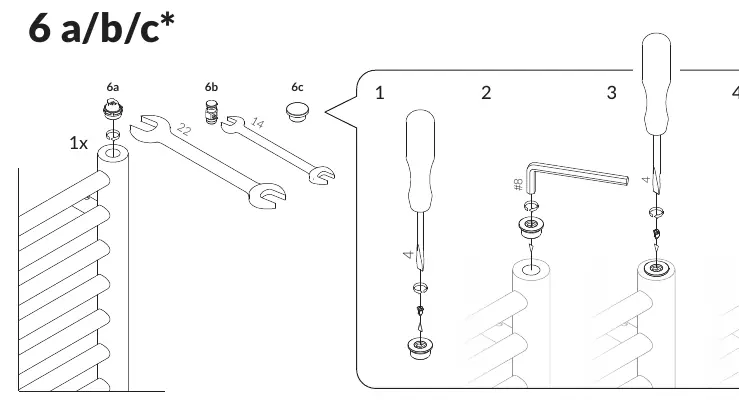
- For final assembly, use the 14/22mm wrench to tighten the nuts (6a/6b/6c) as indicated in the diagram.
- Ensure all components are firmly attached and aligned.
Version Notes
Some components, marked with an asterisk (*), are specific to water and dual fuel versions of the radiator. Ensure you identify the correct parts for your specific radiator model before beginning installation.
Practical help
Before use
- Verify you have all required tools: PZ1, PZ3, 4mm hex key, 14/22mm wrench, and a 10mm drill bit.
- Check the wall surface for suitability for drilling.
- Identify if your radiator is a water or dual fuel version to use the correct marked components.
- Measure the mounting distance (D and E) carefully before drilling.
Images and diagrams
- Steps 1-3 illustrate the wall preparation and bracket mounting process.
- Steps 4-6 illustrate the attachment of the bracket to the radiator body.

Manual page author
Emily Carter
User documentation editor
Prepares concise manual descriptions and highlights the most useful setup, operation, and maintenance information for readers.