HVAC / Water Heaters
Assembly Instructions for The Home Depot SEVEN 2-Door Storage Cabinet
Complete assembly guide for The Home Depot SEVEN 2-Door Storage Cabinet. Includes parts list, hardware identification, and step-by-step assembly instructions.
Quick answers from the manual
Quick answer
- This manual provides step-by-step assembly instructions for the SEVEN 2-Door Storage Cabinet, including a full parts list and hardware identification. p. 1, 2, 3, 4
Key actions
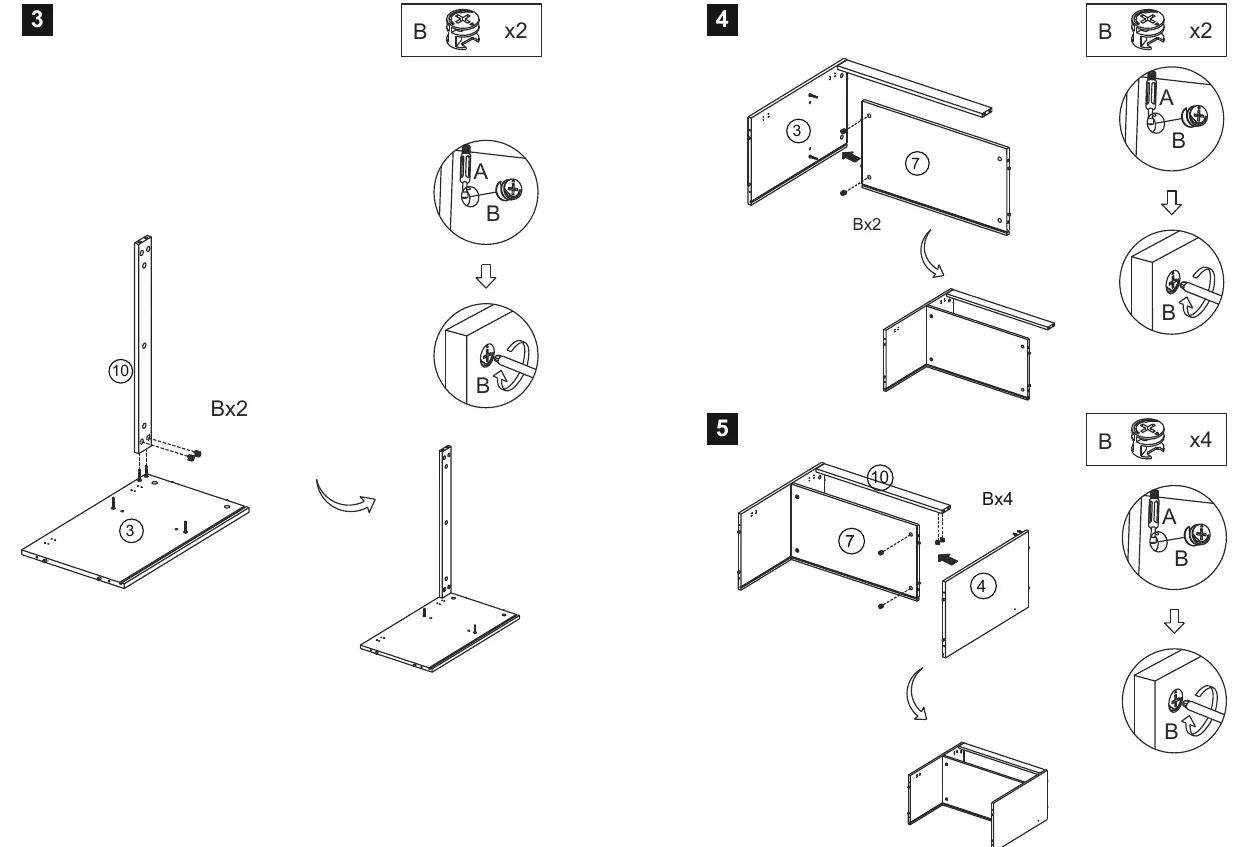
- Assemble the main frame using panels 3, 4, 7, 10 and hardware B. p. 4
- Attach doors using hinges W and hardware E. p. 6
Where to find it in the PDF
- Parts List p. 1, 2
- Assembly Steps p. 3, 4, 5, 6
Table of contents
Manual images
Click an image to enlargeQuick guide from the manual
This document provides assembly instructions for the SEVEN 2-Door Storage Cabinet. Before beginning assembly, ensure you have a clear workspace and all parts listed in the hardware inventory. The assembly requires a screwdriver and involves connecting panels using cam locks and screws.
Parts and Hardware
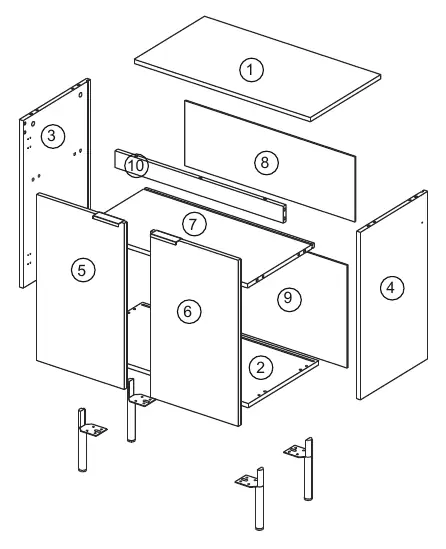
The cabinet consists of 10 main panels (labeled 1-10) and various hardware components including cam bolts (A), cam locks (B), wooden dowels (C), screws (E, Bp), hinges (W), and wall mounting hardware (H). Refer to page 2 for a complete visual inventory of all components.
Assembly Instructions
Follow these steps to assemble the cabinet:
- Step 1-2: Prepare panels 1, 3, 4, 5, 6, and 7 by installing cam bolts (A), wooden dowels (C), and hinges (W) as indicated.
- Step 3-5: Assemble the main frame by connecting panels 3, 4, 7, and 10 using cam locks (B).
- Step 6-7: Slide the back panels (8, 9) into the frame grooves and secure them using screws (L).
- Step 8-9: Attach the bottom panel (2) and top panel (1) to the frame using screws (Bp) and cam locks (B).
- Step 10-11: Attach the doors (5, 6) to the frame using hinges (W) and secure with screws (E, Y, Z).
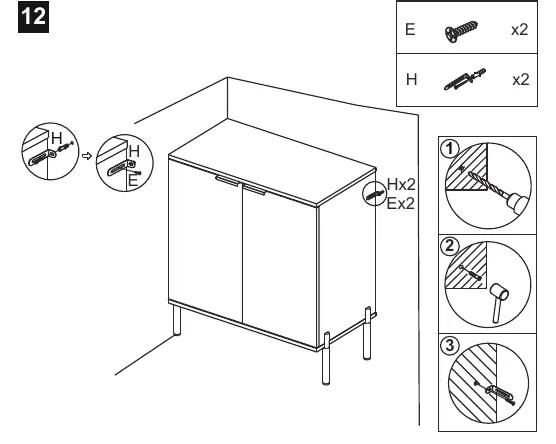
- Step 12: Secure the cabinet to the wall using the provided wall mounting hardware (H) to prevent tipping.
Manufacturer information
The Home Depot
Practical help
Before use
- Verify all 10 panels are present.
- Identify all hardware (A-Ch) using the list on page 2.
- Clear a workspace for assembly.
- Ensure you have a screwdriver available.
- Check that all cam locks are tightened correctly.
Images and diagrams
- Page 1: Exploded view of the cabinet showing panel numbering.
- Page 2: Hardware identification list.
- Pages 3-6: Step-by-step assembly sequence.
Model compatibility
- Wall mounting hardware (H) is included and should be used for safety.

Manual page author
Michael Turner
Technical manual editor
Reviews PDF manuals for structure, safety notes, and practical product details so readers can find the right information quickly.