Automotive / Parts Accessories
Assembly Instructions for Toboli 63518 Wood Stove Stand
A comprehensive assembly guide for the Toboli 63518 outdoor wood stove stand. Includes a detailed parts list, step-by-step construction sequence, and hardware requirements for proper setup.
Table of contents
Manual images
Jump to the sectionQuick guide from the manual
This document provides the necessary steps to assemble the Toboli 63518 wood stove stand. Before beginning, ensure you have all components and hardware listed in the inventory. The assembly requires basic tools provided in the kit (M6/M8 wrenches and socket wrenches). The process involves building the base frame, vertical supports, roof structure, and finally attaching the protective fabric cover.
Parts and Hardware
The kit includes various metal components (numbered 1-14) and hardware (labeled A-L). Key hardware includes M8x40, M8x35, M8x16, and M8x45 screws, 90-degree connectors, angle pieces, feet, and screw-nuts. Ensure all parts are accounted for before starting assembly.
Assembly Steps
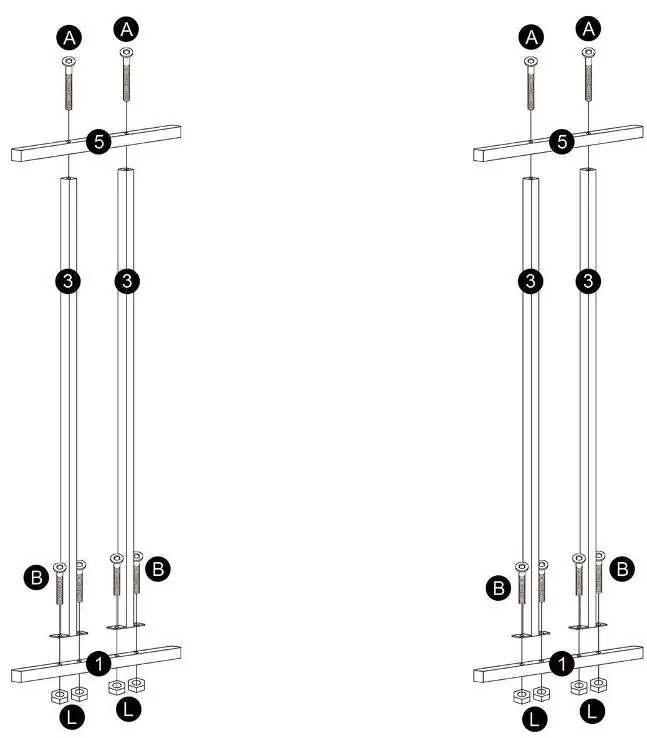
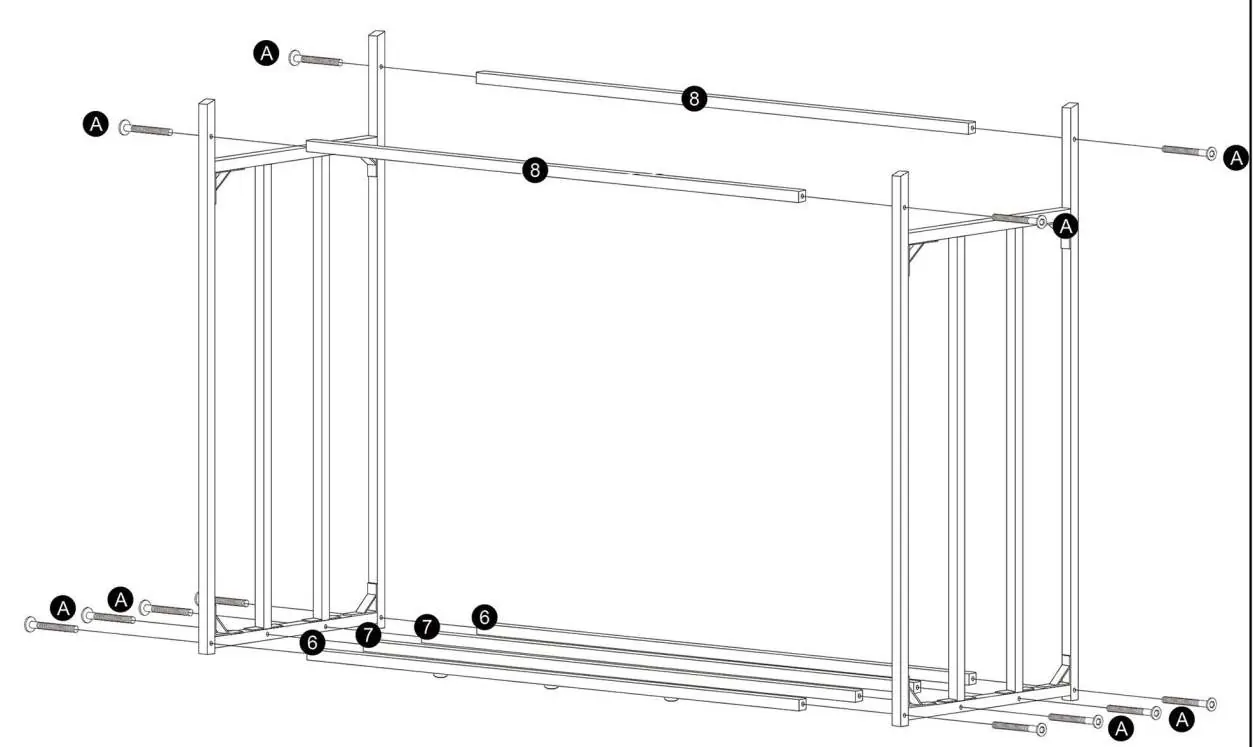

- Base and Vertical Supports: Assemble the lower and upper frame sections using screws (A, B) and nuts (L) as shown in the diagrams.
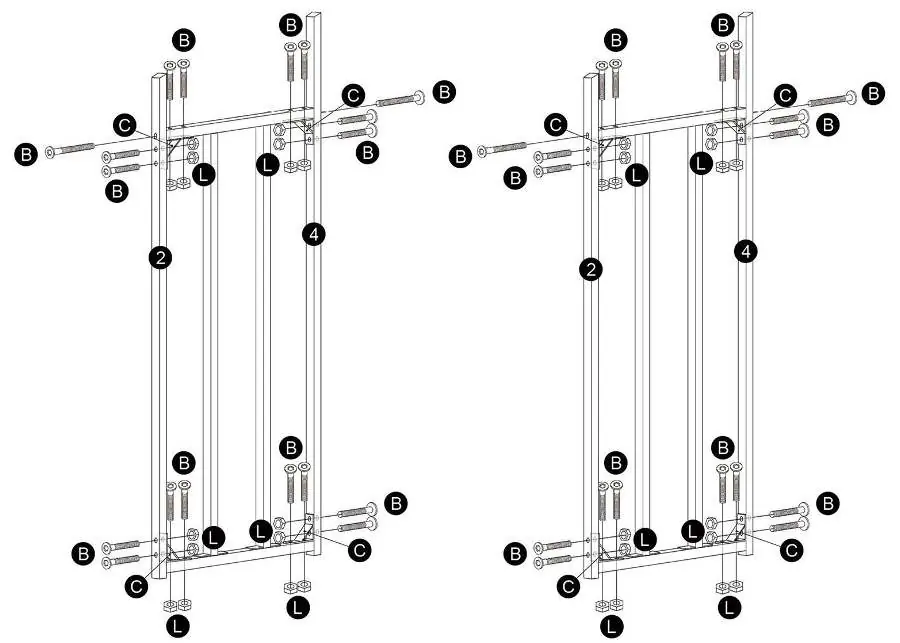
- Frame Reinforcement: Connect the vertical supports using the 90-degree connectors (C) and secure with screws (B) and nuts (L).
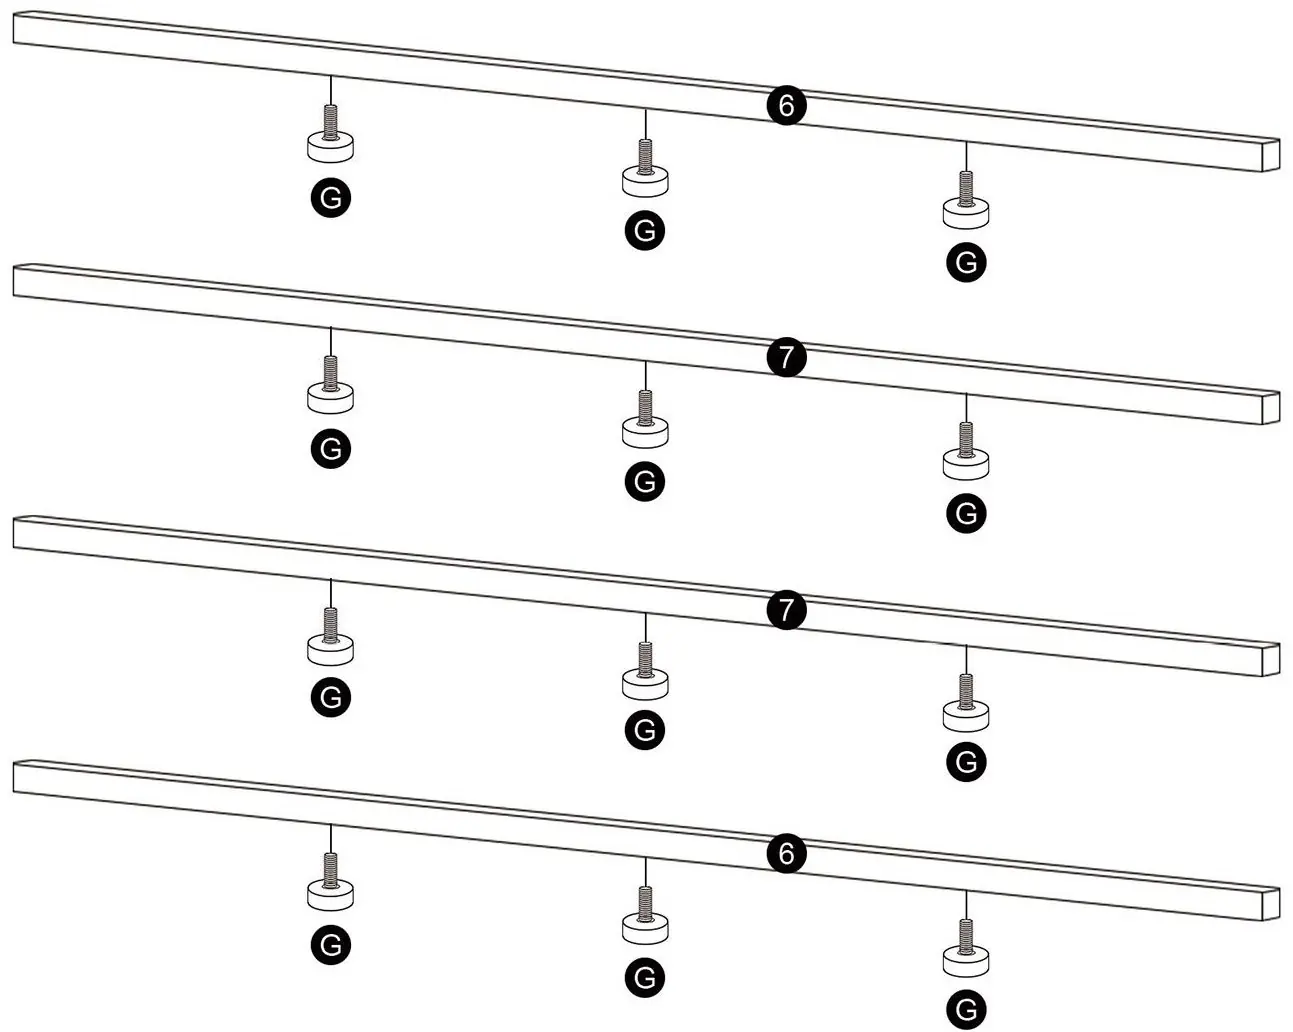
- Feet Installation: Attach the feet (G) to the bottom support bars (6, 7).
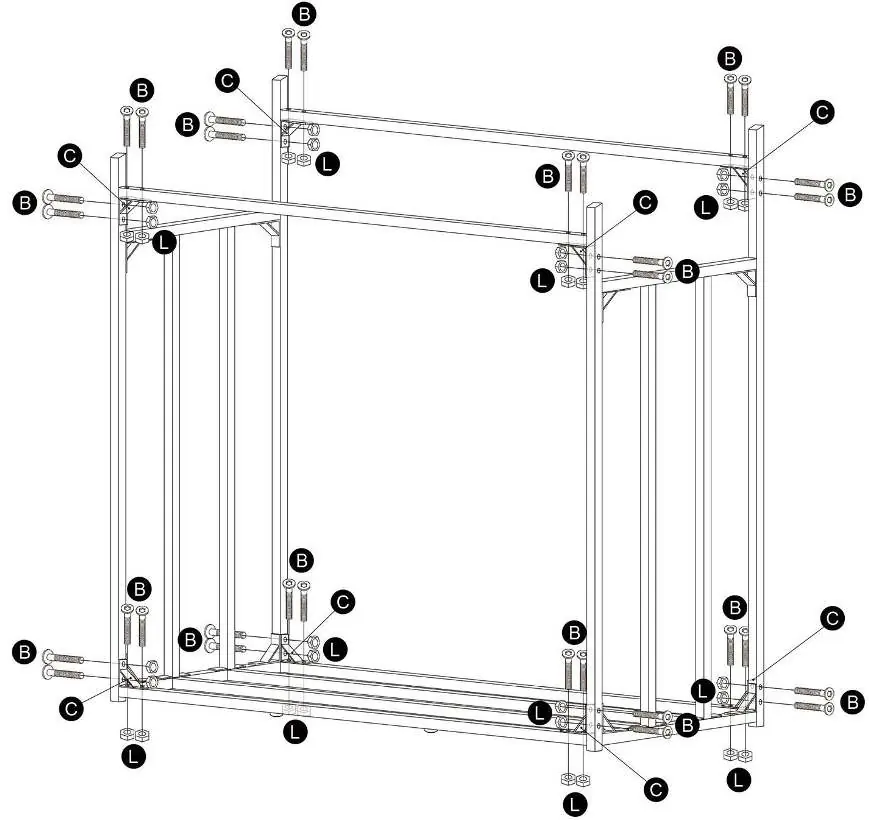
- Main Frame Construction: Connect the vertical frame sections using the provided hardware (A, B, C, L) to create the main structure.
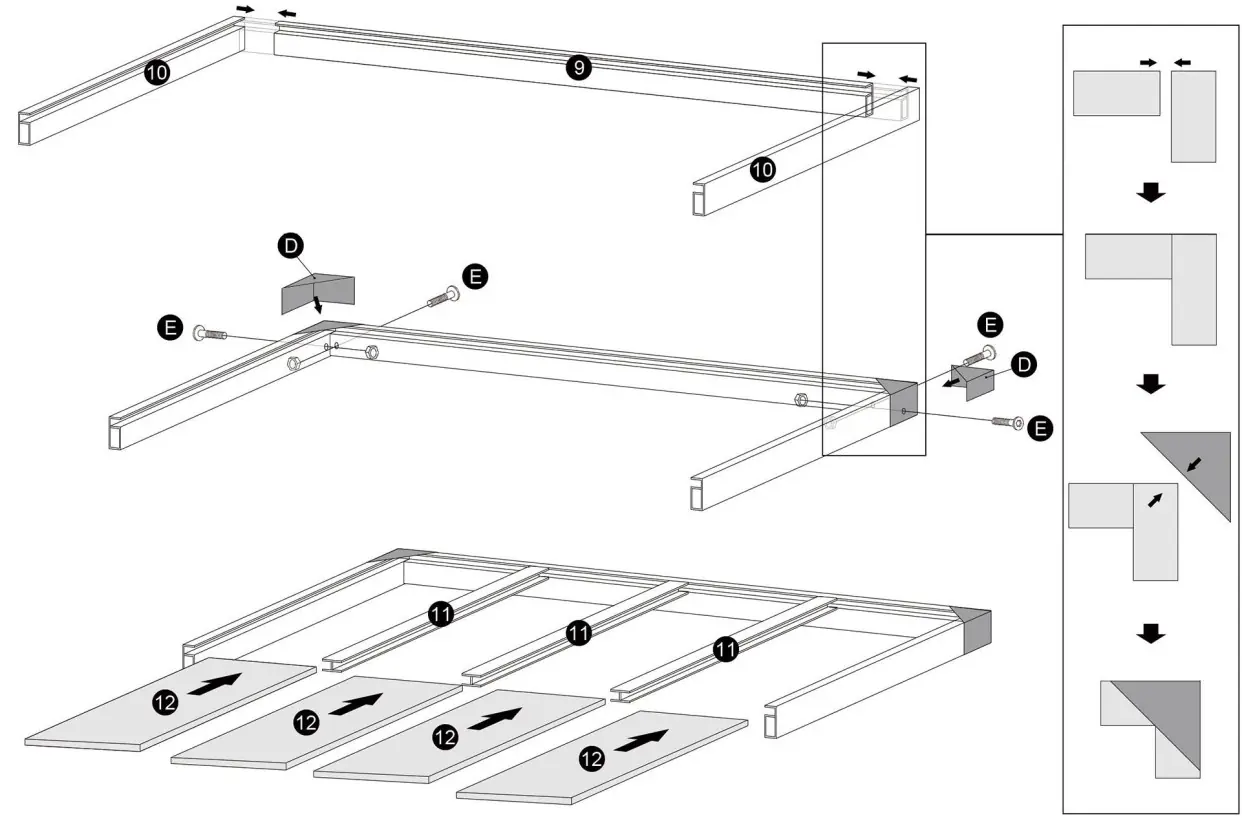
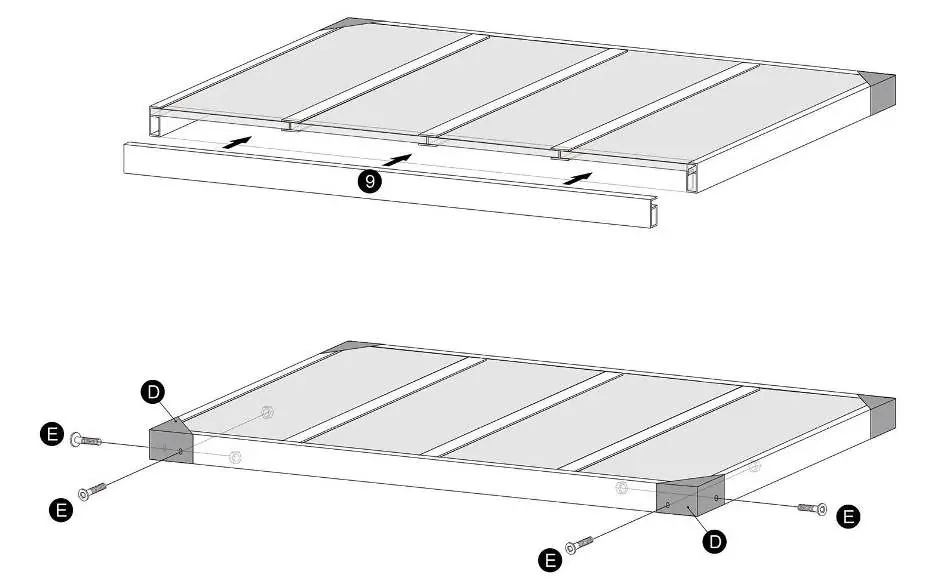
- Roof Assembly: Assemble the roof frame using components (9, 10, 11, 12) and secure with angle pieces (D) and screws (E).
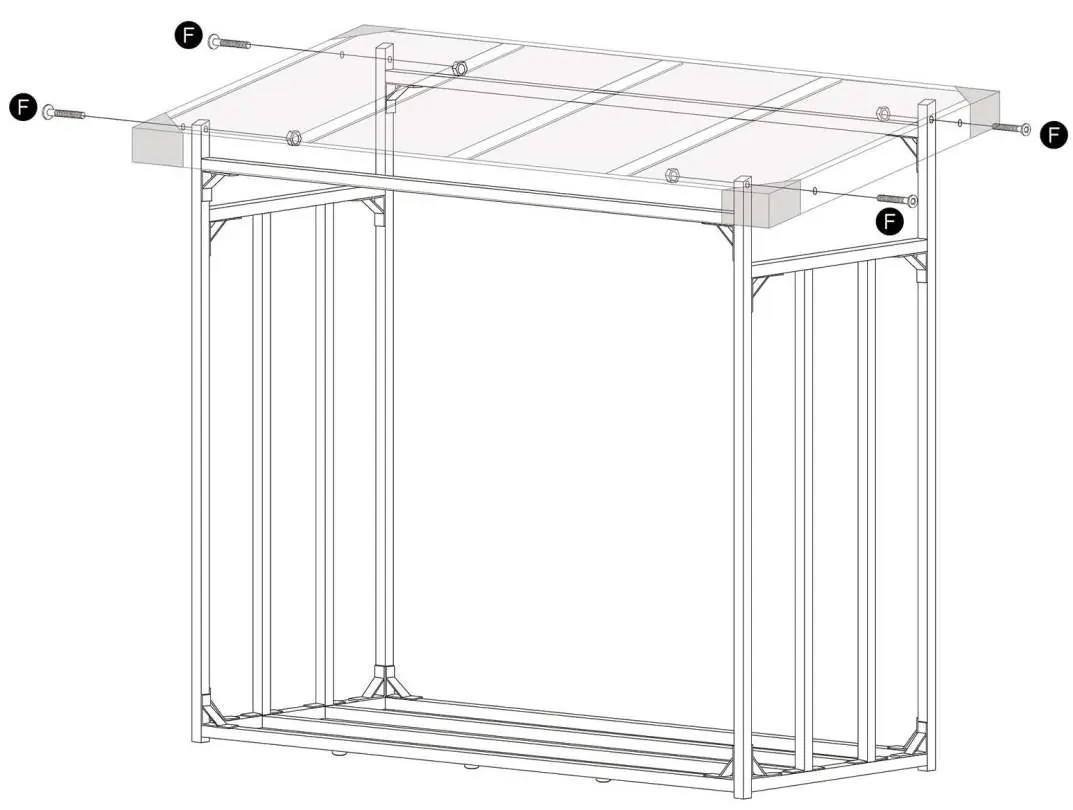
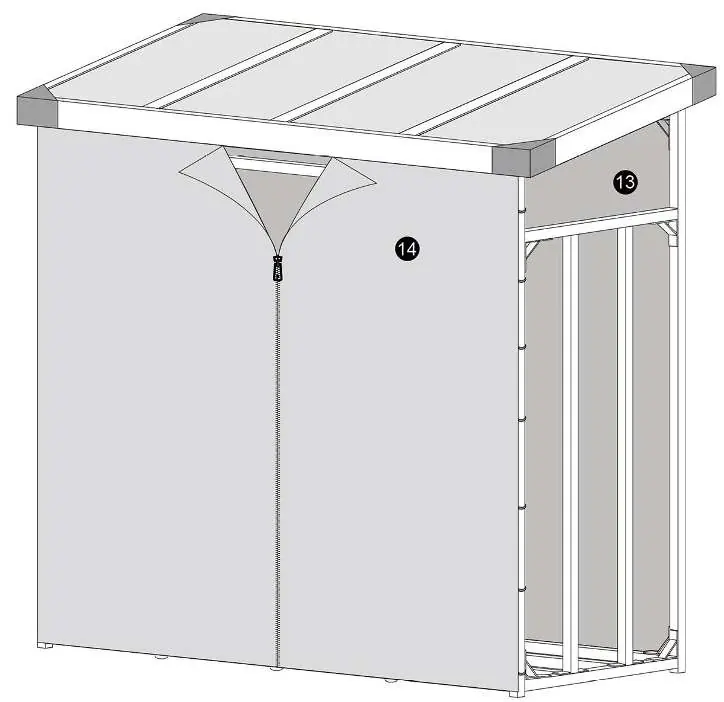
- Final Assembly: Place the roof structure onto the main frame and secure it using screws (F). Finally, attach the back and front fabric covers (13, 14).
Practical help
Common problems
Missing hardware or components
Verify all parts against the inventory list on page 1 before starting. If parts are missing, contact the manufacturer.
Difficulty aligning frame sections
Do not fully tighten screws until the entire section is aligned. Ensure all 90-degree connectors are seated correctly.
Before use
- Clear a large, flat area for assembly.
- Identify all screws (A-F) and components (1-14) using the inventory list.
- Ensure you have the provided M6 and M8 wrenches.
- Check that all nuts (L) are securely tightened after final assembly.
Images and diagrams
- Page 1: Inventory list of all screws, accessories, and metal components.
- Pages 2-7: Step-by-step visual assembly sequence from base to final cover installation.
Model compatibility
- Designed for outdoor use as a wood stove stand.
- Requires assembly by the user.

Manual page author
David Miller
Documentation analyst
Organizes user manual content into clear summaries, with attention to model details, product context, and everyday usability.