Documents / Warranty Safety
User Guide for Unold 12K Mobile Split Air Conditioner
Quick guide for the Unold 12K mobile split air conditioner, covering installation, operation, maintenance, and troubleshooting.
Table of contents
Manual images
Jump to the sectionQuick guide from the manual
This document provides essential instructions for the safe and effective operation of the Unold 12K mobile split air conditioner. Important: Always transport and store the unit in an upright position to prevent irreparable damage to the compressor. After unpacking, allow the unit to stand in its final location for at least 24 hours before initial operation to let the refrigerant settle.
Device Description
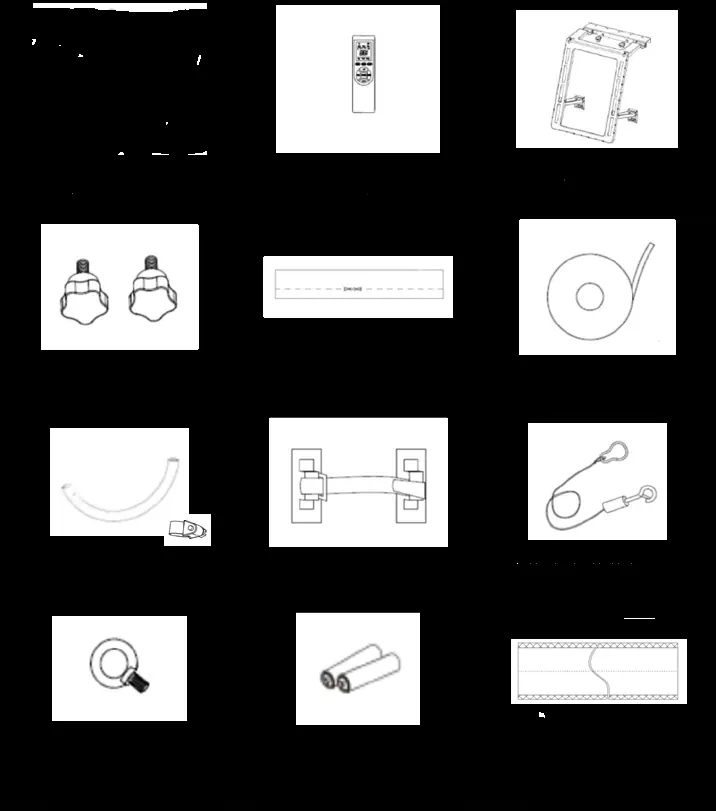
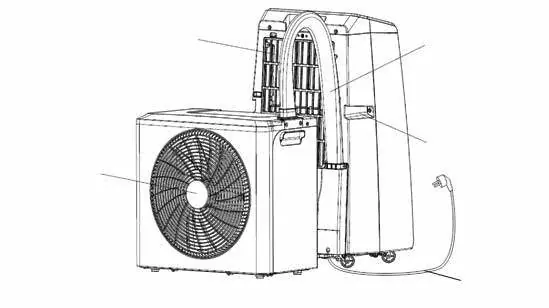
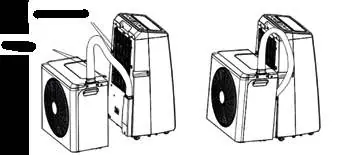
The system consists of an indoor unit and an outdoor unit connected by a hose. It features cooling, heating, ventilation, and dehumidification modes, controlled via the top-mounted control panel or the included remote control.
Installation
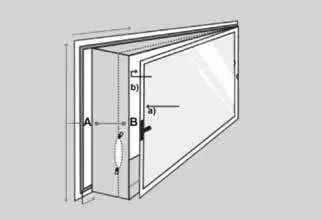
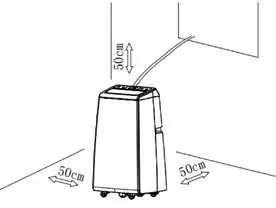
Installation should be performed by at least two people. Ensure you have protective gloves, a tape measure, and scissors. The unit must be placed on a level surface with at least 50 cm of clearance on all sides for proper air circulation. The provided window mount is designed for straight windows (up to 200 mm depth) and is not suitable for roof windows.


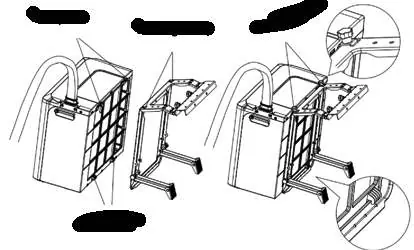

- Attach the thermal insulation sleeve to the connecting hose.
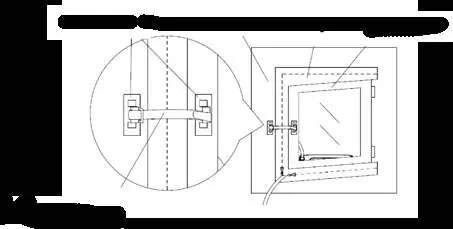
- Clean window surfaces thoroughly before applying the window seal.
- Ensure the window can still be fully closed after installing the seal.
- Hook the outdoor unit into the window mount and secure it with the knurled screws.
Operation
Connect the unit to a grounded power socket. Use the Mode button to select the desired function (Cooling, Ventilation, Dehumidification, or Heating). Adjust temperature settings (16°C to 30°C) using the Up/Down buttons. Fan speed can be adjusted in most modes. The Sleep mode provides quiet operation and automatic temperature adjustment, shutting off after 8 hours.
Cleaning and Maintenance
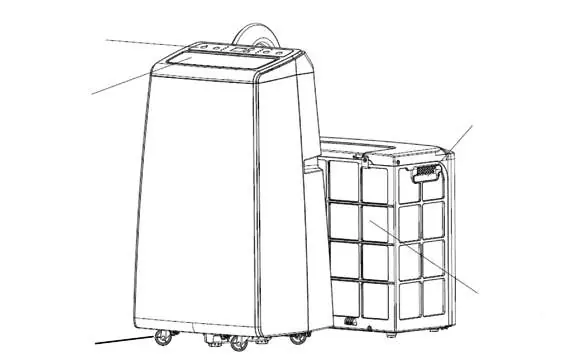
Always switch off the unit and unplug it before cleaning. Regularly clean the air filter to ensure optimal performance. If the unit will not be used for an extended period, drain all condensation, allow the interior to dry in ventilation mode, and store the unit in a cool, dry place, preferably in its original packaging.
Troubleshooting
If the unit malfunctions, check the following:
- Device not operating: Check power connection and ensure the unit is switched on.
- Low cooling effect: Check if the air filter is clogged or if air inlets/outlets are blocked. Ensure ambient temperature is between 18°C and 40°C.
- Unusual noises/vibrations: Ensure mounting brackets are secure and screws are tightened.
- Water leakage: Check if the drain plug on the indoor unit is properly inserted and that the unit is mounted horizontally.
Practical help
Common problems
Device does not operate
Check power supply and ensure the unit is switched on.
Low cooling effect
Clean the air filter, remove any blockages from air inlets/outlets, and ensure ambient temperature is within 18-40°C.
Unusual noises or vibrations
Verify that mounting brackets are secure and tighten all mounting screws.
Water leaking from indoor unit
Check that the drain plug is properly inserted and the unit is level.
Before use
- Transport and store the unit in an upright position.
- Wait at least 24 hours after installation before switching on.
- Ensure at least 50 cm clearance around the unit.
- Check that all accessories are present.
- Ensure the drain plug on the indoor unit is firmly closed.
- Verify the window mount is suitable for your window type.
Specs in practice
- Refrigerant R32
- Flammable natural gas; handle with care and do not damage the cooling circuit.
- Maximum room size 105 m³
- The maximum volume the unit is designed to effectively condition.
Images and diagrams
- The unit consists of an indoor unit and an outdoor unit connected by a hose.
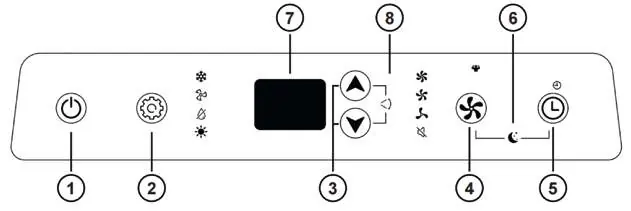
- The control panel features buttons for Power, Mode, Temperature/Time adjustment, Speed, Timer, Sleep mode, and Oscillation.
- The window seal installation involves applying hook-and-loop tape to the frame and sash.
- The outdoor unit is secured to the window using a specific bracket and knurled screws.
Model compatibility
- The supplied window mount is for straight windows up to 200 mm deep.
- The window mount is not suitable for roof windows; a separate mount is available from customer service.

Manual page author
Michael Turner
Technical manual editor
Reviews PDF manuals for structure, safety notes, and practical product details so readers can find the right information quickly.