Furniture / Beds & Mattresses
Installation Guide for Vente-Unique 02P1 Cabinet
Complete installation guide for the Vente-Unique 02P1 cabinet. Includes step-by-step assembly instructions, parts list, hardware identification, and essential safety and wall-mounting procedures.
Table of contents
Manual images
Click an image to enlargeQuick Guide for Assembly
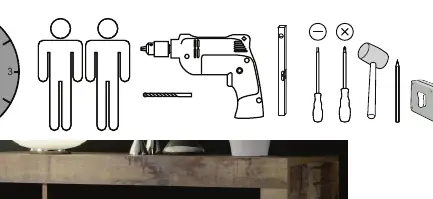
This guide provides instructions for assembling the Vente-Unique 02P1 cabinet. Before starting, ensure you have a drill, screwdriver, and hammer. Read all safety warnings carefully, particularly regarding wall mounting to prevent tipping.
Parts and Hardware
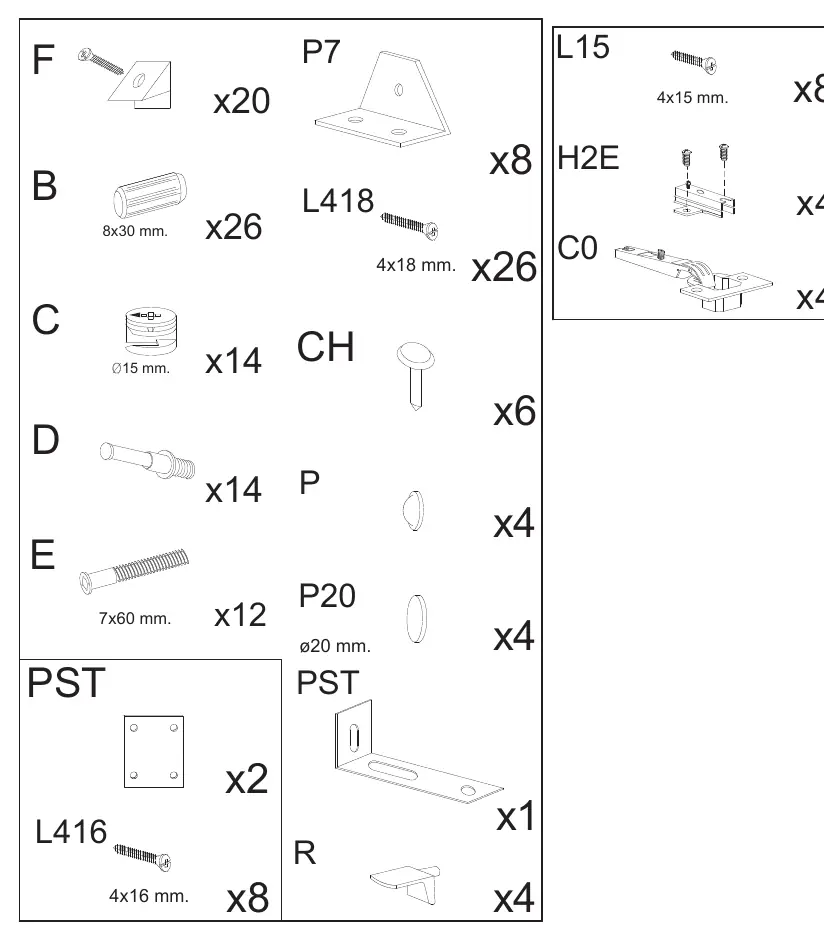
Verify all components against the lists on pages 3 and 4. The hardware list on page 5 details all screws, dowels, and fittings required. Ensure all items are present before beginning assembly.
Assembly Steps
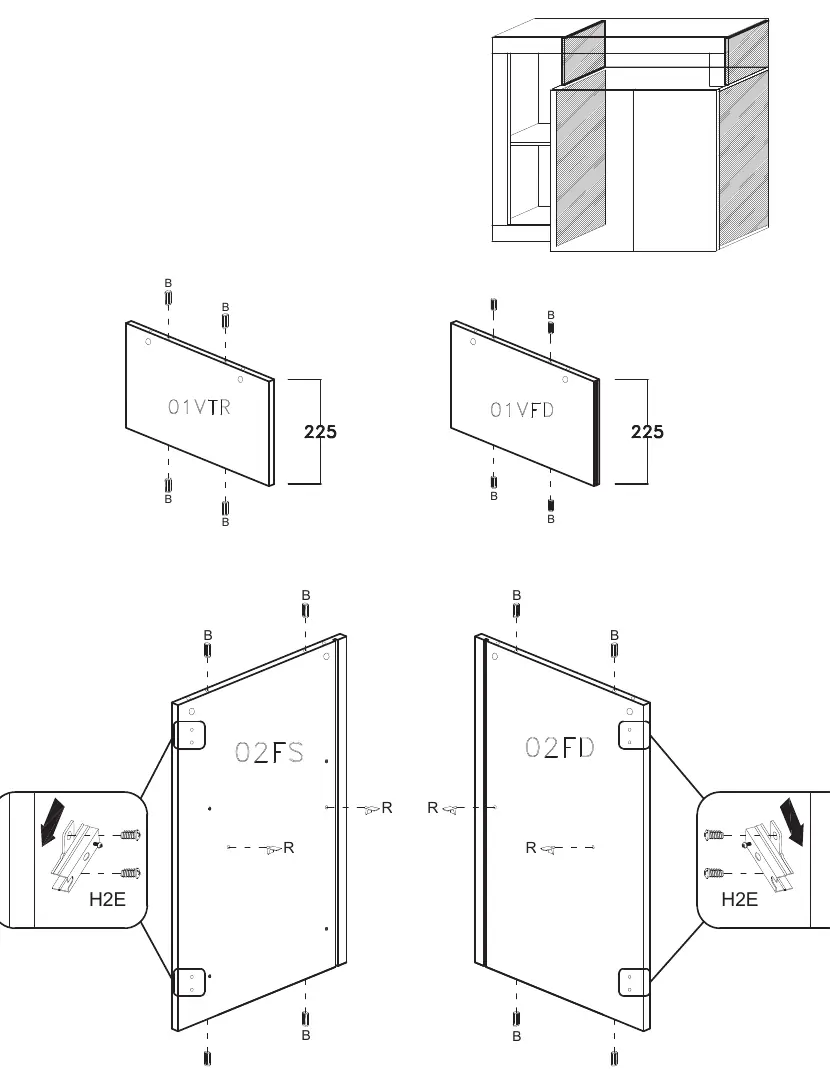
- Step 1: Prepare side panels (02FS, 02FD) and internal dividers (01VTR, 01VFD) by inserting dowels (B) and attaching hinges (H2E).
- Step 2-4: Assemble the main structure using screws (E) and cam locks (C).
- Step 5: Attach the back panels using nails (CH).
- Step 6-10: Continue assembling internal shelves and dividers.
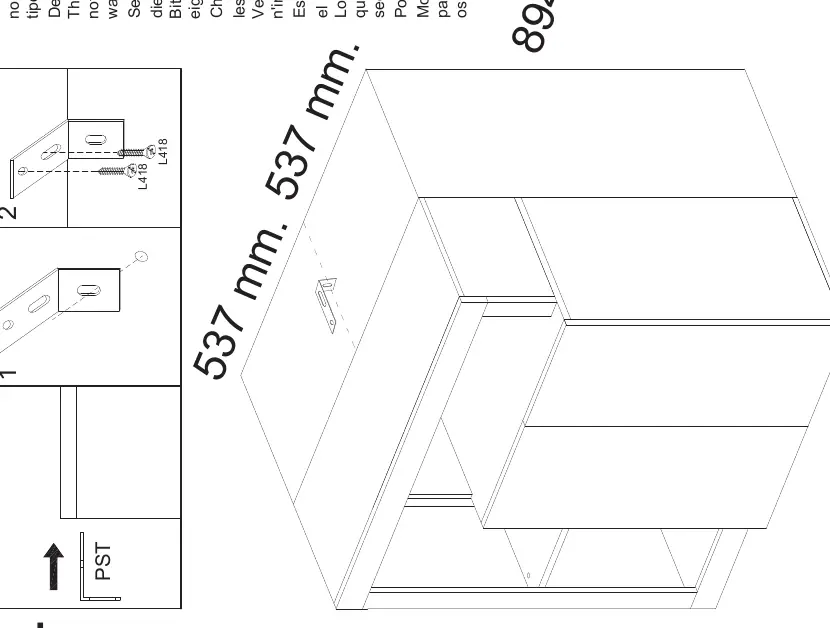
- Step 11: Attach mounting brackets (PST) to the top corners.
- Step 12: Install hinges (C0) onto the doors.
- Step 13: Attach doors to the main cabinet structure and adjust hinges.
Wall Mounting
The cabinet must be secured to the wall to prevent tipping. Wall plugs are not included as they depend on your wall type. Use appropriate plugs for your wall material and ensure the wall is suitable for the load.
Safety and Care
Do not remove the drawer locking system. Clean the unit with a clean, damp cloth. Do not use abrasive cleaners. If the product has electrical components, use only the provided power supply and adhere to the voltage specifications on the label.
Practical help
Common problems
Cabinet tipping over
Ensure the wall fastening is installed correctly as per instructions.
Missing wall plugs
Wall plugs are not included; purchase plugs suitable for your specific wall type.
Before use
- Check all parts against the parts list on pages 3-4.
- Verify all hardware is present according to page 5.
- Ensure you have a drill, screwdriver, and hammer.
- Identify a suitable wall for mounting.
Specs in practice
- Wall Mounting
- Required to prevent tipping; use appropriate plugs for your wall type.
Images and diagrams
- Pages 2-4 show the exploded view and dimensions of all wooden panels.
- Page 5 lists all screws, dowels, and fittings required for assembly.
Model compatibility
- Wall plugs are not included due to varying wall types.

Manual page author
David Miller
Documentation analyst
Organizes user manual content into clear summaries, with attention to model details, product context, and everyday usability.