Lighting / Outdoor Lighting
Assembly Manual for Winston Porter 12-Drawer Storage Cabinet
Comprehensive assembly guide for the Winston Porter 12-Drawer Storage Cabinet. Includes parts list, hardware identification, step-by-step assembly instructions, drawer installation, and wall anchoring procedures.
Table of contents
Manual images
Click an image to enlargeImportant Information
This assembly manual provides instructions for the Winston Porter 12-Drawer Storage Cabinet. Please read all instructions carefully before beginning assembly. Power tools are recommended for assembly. Some steps require at least two people to complete safely. Ensure you have a clear, spacious area to work in.
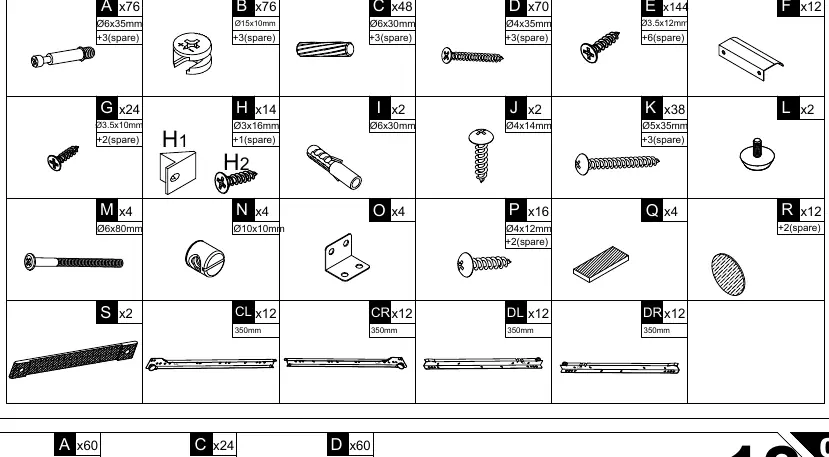
Parts and Hardware
Before starting, verify all components against the parts list provided on pages 4-6 and the hardware list on page 7. Ensure all quantities match the requirements listed in the manual. If any parts are missing or damaged, contact customer support via your order page.
Assembly Preparation
The cabinet uses a cam lock and quickfit system. To ensure a stable build:
- Quickfit: Tighten the quickfit until the shoulder is flush with the panel. Do not over-tighten or under-tighten.
- Cam Lock: Ensure the starting position is correct before inserting the quickfit. The quickfit head should be in the center of the cam lock when panels are joined. Turn the cam lock clockwise to tighten.
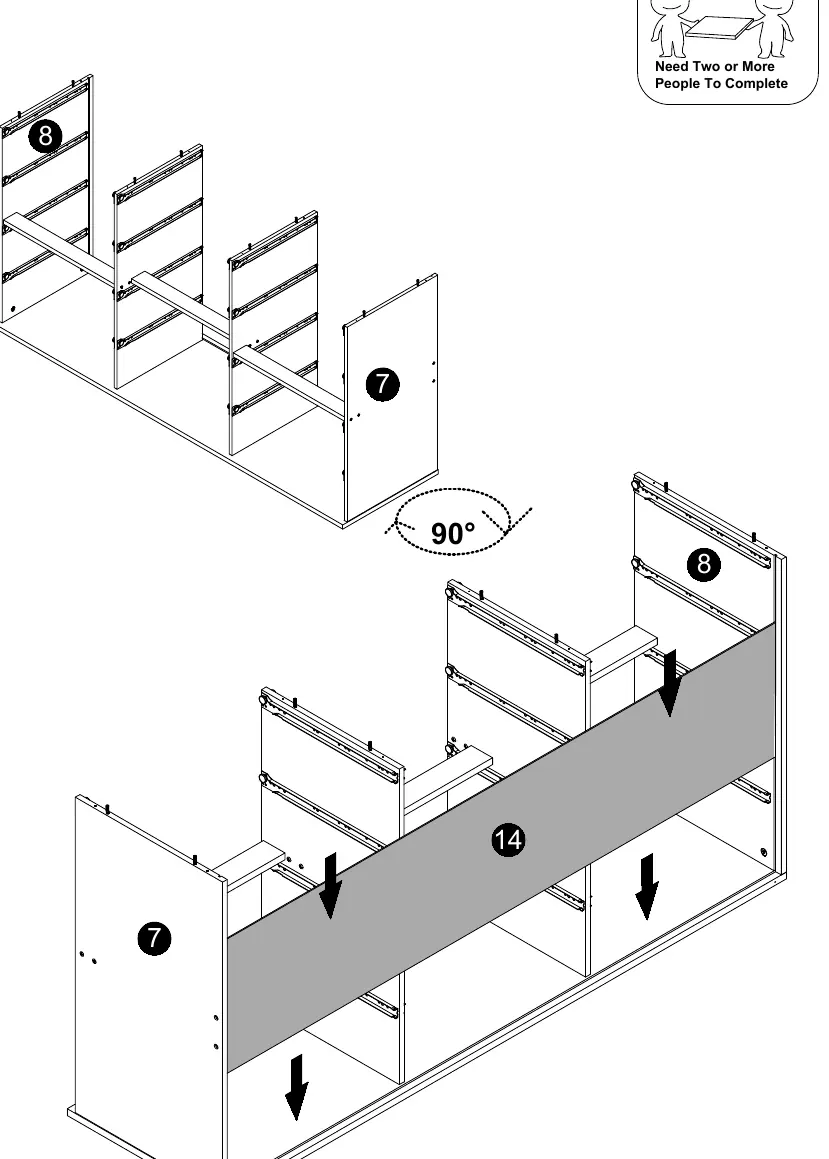
Cabinet Frame Assembly
The frame assembly involves connecting the side panels, middle dividers, and support beams. Follow the step-by-step diagrams provided in the manual (pages 9-13). Pay close attention to the orientation of panels 7, 8, and 10. Use the specified screws (K) to secure the dividers to the support plates.
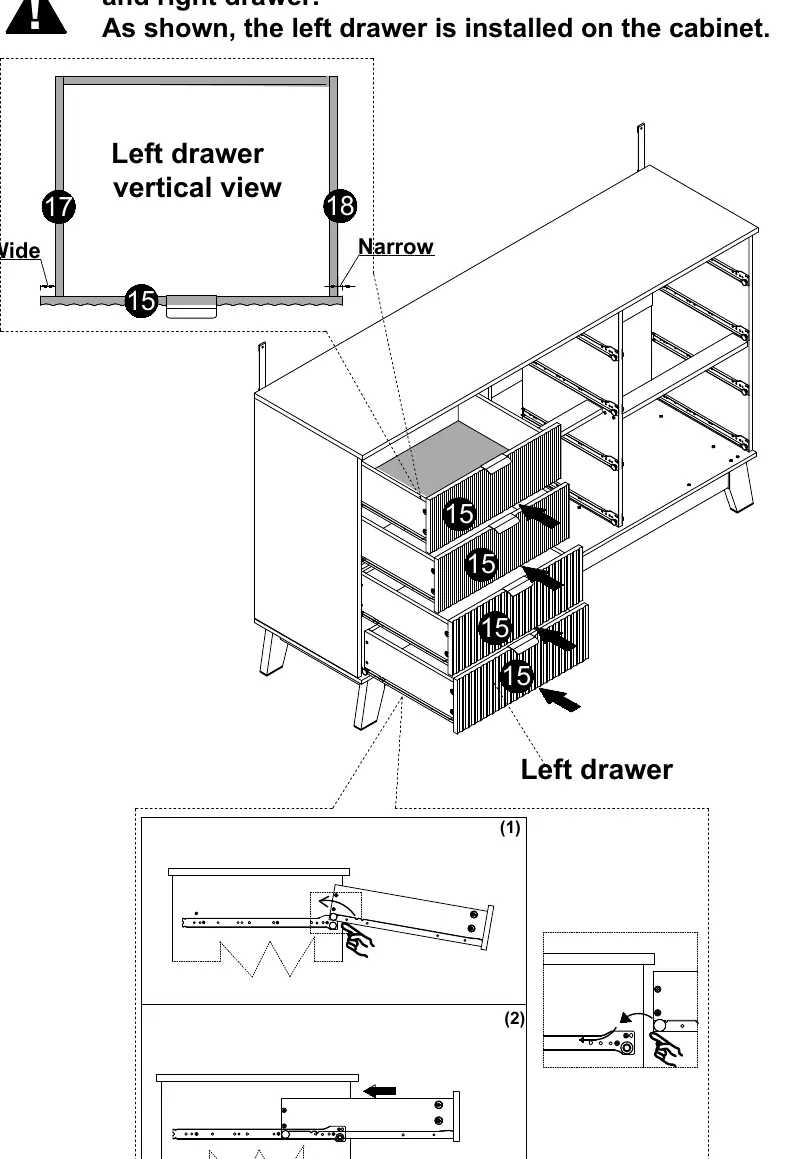
Drawer Assembly
Assemble the drawers using the provided side panels, back panels, and drawer bases. Ensure the drawer slides (CL/CR) are attached correctly to the drawer sides and the cabinet frame. The manual provides specific instructions for left, middle, and right drawers.
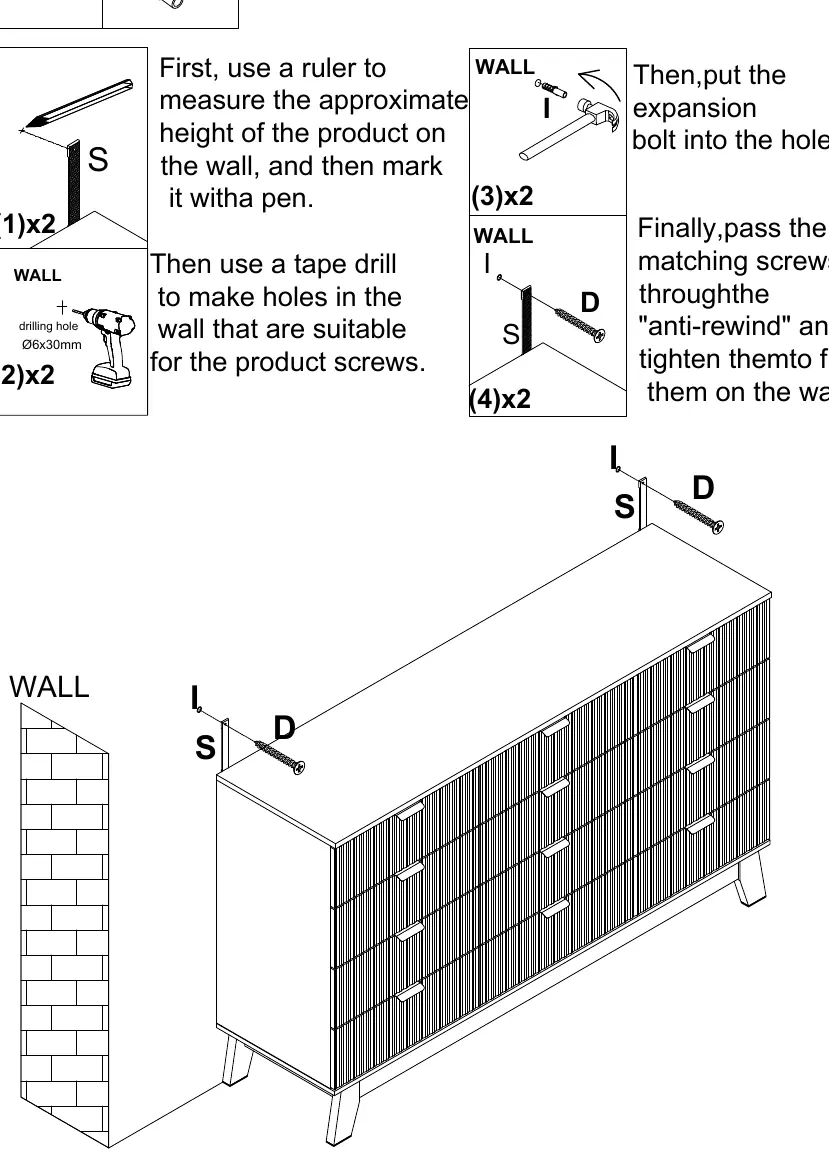
Final Assembly and Wall Anchoring
Once the frame is assembled, attach the back panels and the base/legs. If the drawers are not aligned or if there is a sinking in the middle of the cabinet, rotate the accessory 'L' under board 5 to adjust the height. Wall anchoring is required for safety. Follow the instructions on page 28 to secure the unit to the wall using the provided expansion bolts and screws.
Practical help
Common problems
Drawers are not aligned
Rotate the accessory 'L' under board 5 to adjust the height.
Sinking in the middle of the cabinet
Rotate the accessory 'L' under board 5 to level the unit.
Difficulty with cam locks
Ensure the quickfit head is in the center of the cam lock before tightening. Turn clockwise to lock.
Before use
- Verify all parts against the parts list (pages 4-5).
- Ensure you have a screwdriver (power tools recommended).
- Clear a large workspace for assembly.
- Have at least two people available for assembly steps.
- Identify all hardware types (A-S) before starting.
Images and diagrams
- Cam Lock and Quickfit: Shows correct alignment and tightening method.
- Drawer Assembly: Shows how to attach sides to the base and back.
- Wall Anchoring: Shows how to secure the unit to the wall for safety.
Model compatibility
- Wall anchoring is required for safety.
- Drawers are specific to left, middle, and right positions.

Manual page author
Emily Carter
User documentation editor
Prepares concise manual descriptions and highlights the most useful setup, operation, and maintenance information for readers.