Industrial / Agricultural Equipment
Operations and Parts Manual for Braber Equipment 15-Gallon and 25-Gallon Trailer Sprayer
Quick guide for the Braber Equipment 15-Gallon and 25-Gallon Trailer Sprayer. Includes assembly instructions, operation, maintenance, cleaning procedures, and detailed parts diagrams.
Table of contents
Manual images
Click an image to enlargeQuick guide from the manual
This manual provides essential instructions for the assembly, operation, and maintenance of the Braber Equipment 15-Gallon and 25-Gallon trailer sprayers. Proper care, specifically keeping the unit clean, is critical for longevity and performance.

Assembly
- Preparation: Remove the sprayer from the carton and place it on a flat surface.
- Wheels: Slide wheels onto axles. Secure each axle push-nut by hitting it lightly with a hammer.
- Tongue and Hitch: Attach the tongue to the unit using pre-installed bolts. Bolt the upper and lower hitch to the tongue using the provided 5/16" bolts and nuts. The hitch can be reversed to adjust height.
- Boom Mount: Attach boom mount uprights to the back of the frame with (4) 5/16" bolts and nuts. Attach the pre-assembled boom to the uprights with (2) 5/16" bolts and nuts. Thread the hose fitting from the boom onto the garden hose valve on the pump manifold.
- Spray Gun: Screw gun clips onto the side of the tank using (2) 10-24 screws. Attach the spray gun hose to the barbed fitting on the pump manifold and secure with a hose clamp using pliers.
- Cap Tether: Slide the "T" end of the cap tether through the hole on the tank top and the hole in the cap. Secure the tank drain cap tether over the drain opening threads.
- Wiring: Plug the wiring harness into the pump.
Operation
The sprayer requires a 12-Volt direct power source. Connect the red wire to the positive (+) terminal and the black wire to the negative (-) terminal.
Important: Before using chemicals, fill the tank half full with plain water to familiarize yourself with the sprayer and prevent wasting expensive chemicals.
Cleaning and Storage
The most important aspect of maintenance is keeping the sprayer clean. Most spray materials are highly corrosive.
- Cleaning: Pump several rinses of clean water through the tank, pump, hoses, and boom after each use. If chemicals are persistent, use a neutralizing agent like Nutra-Sol, detergent, or household ammonia as recommended by the chemical manufacturer.
- Storage: Clean the sprayer thoroughly before storing at the end of the season. Adding permanent-type anti-freeze to the final rinse will leave a rust-inhibiting film on internal parts.
- Nozzles: Never use metal objects to open clogged nozzles.
Practical help
Common problems
Clogged nozzles
Do not use metal objects to clear clogs. Flush the system thoroughly.
Chemical residue buildup
Flush the system with clean water immediately after every use. Use a neutralizing agent if necessary.
Chemical incompatibility
Flush the sprayer completely when changing chemicals to avoid undesirable reactions.
Before use
- Ensure the tank is half-filled with water for the initial test run.
- Verify the 12V power source connection (Red to +, Black to -).
- Check that all hose clamps are secure.
- Ensure the boom and spray gun are properly attached.
- Verify the drain cap is tightened.
Specs in practice
- Power Source
- 12-Volt DC system.
- Nozzle Filter
- 50 mesh filter recommended for standard application rates.
Images and diagrams
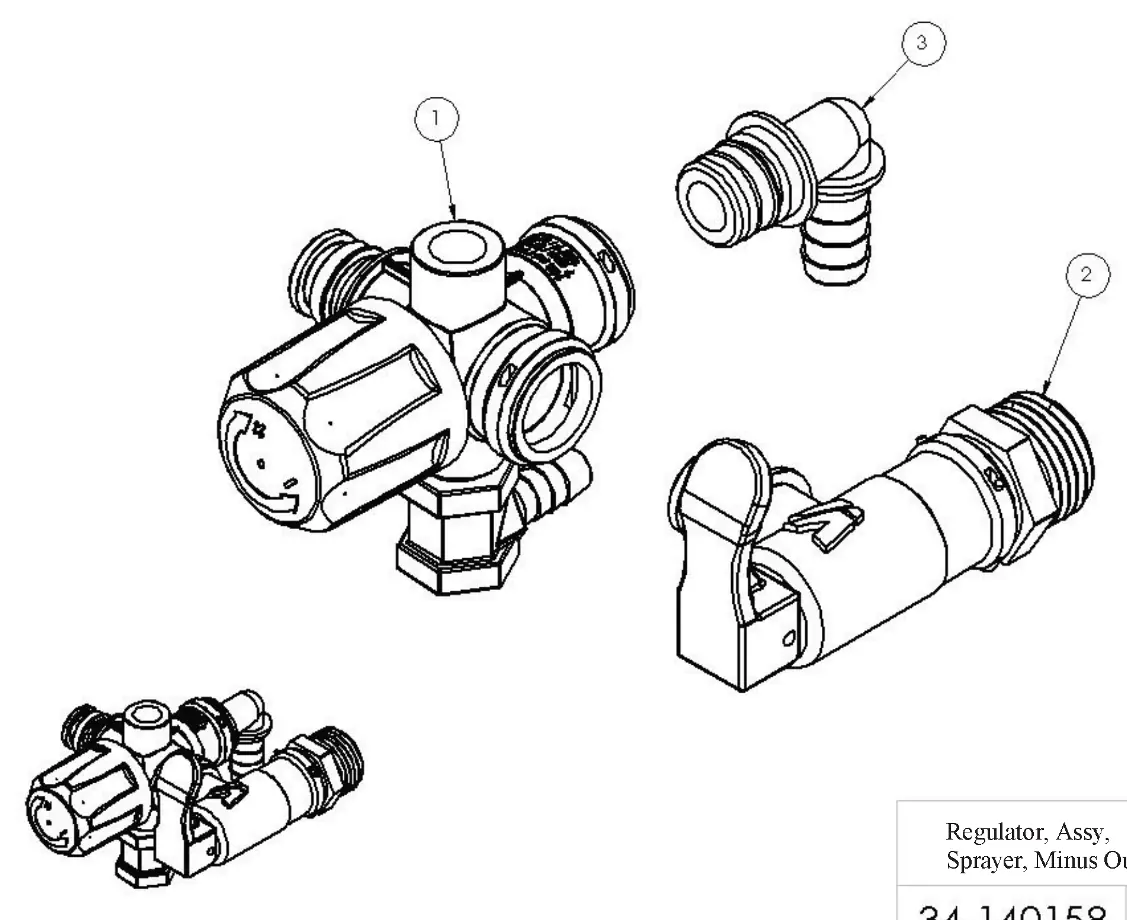
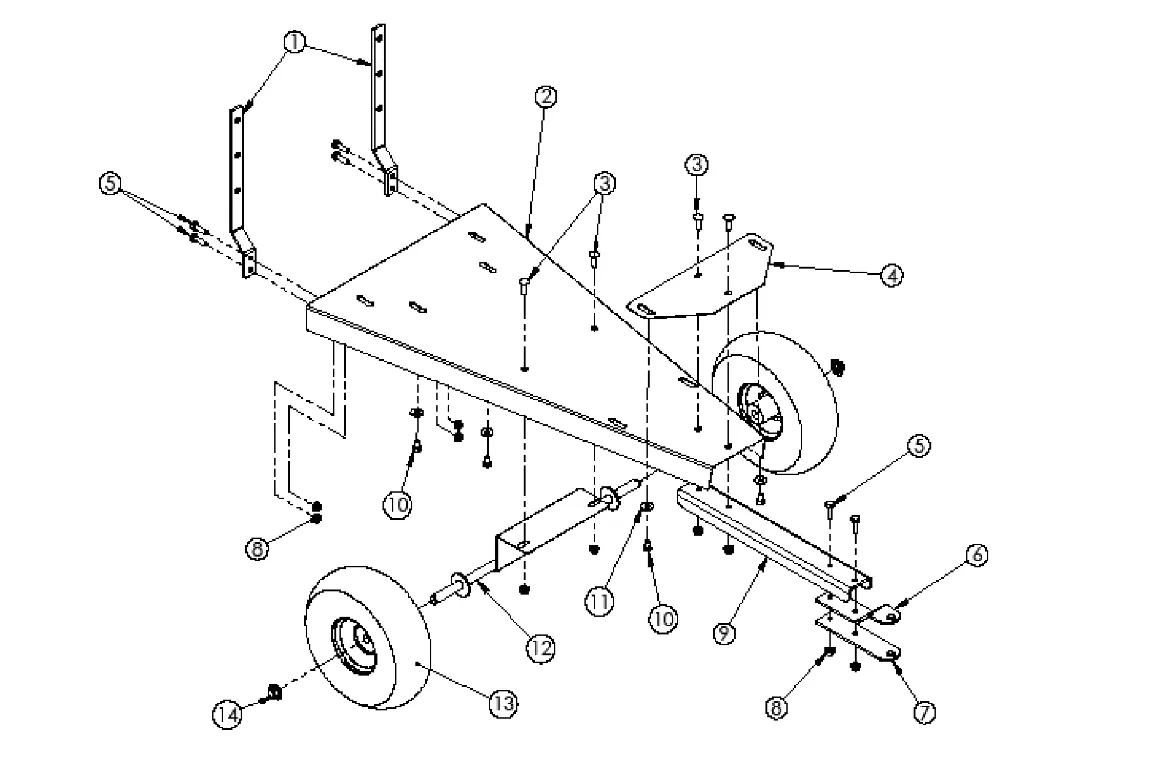
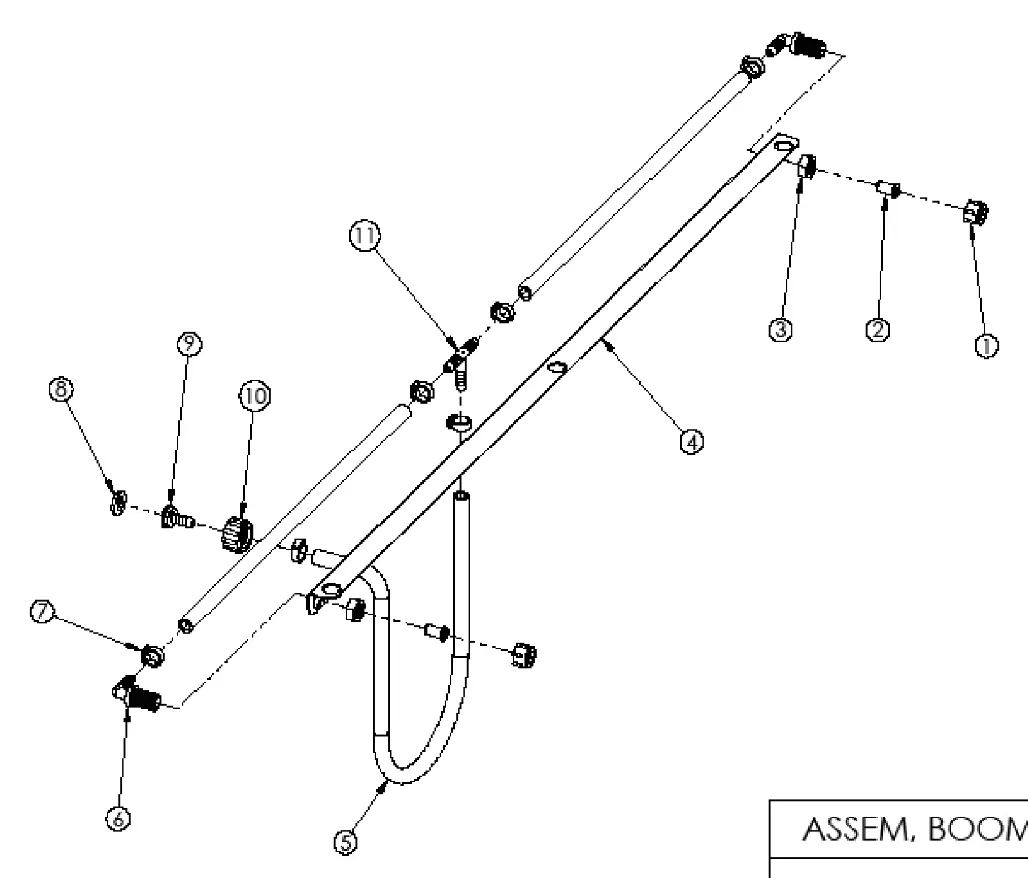
- The parts lists provide exploded views of the Sprayer, Frame, Boom, and Regulator assemblies to assist in identifying replacement components.
- Reference the REF NO. in the diagrams to match parts with the corresponding description and quantity in the tables.

Manual page author
Emily Carter
User documentation editor
Prepares concise manual descriptions and highlights the most useful setup, operation, and maintenance information for readers.