Furniture / Home Furnishing
Assembly Guide for Canopia Dallas 12x14 Garden Gazebo
Comprehensive assembly and installation guide for the Canopia Dallas 12x14 garden gazebo, including site preparation, foundation types, safety advice, and step-by-step assembly instructions.
Table of contents
Manual images
Jump to the sectionQuick guide from the manual
This document provides essential instructions for the assembly and installation of the Canopia Dallas 12x14 garden gazebo. Before starting, ensure you have a level surface and a solid foundation. The assembly requires at least two people and should take approximately one day. Always follow the safety guidelines and check local building regulations for any required permits.
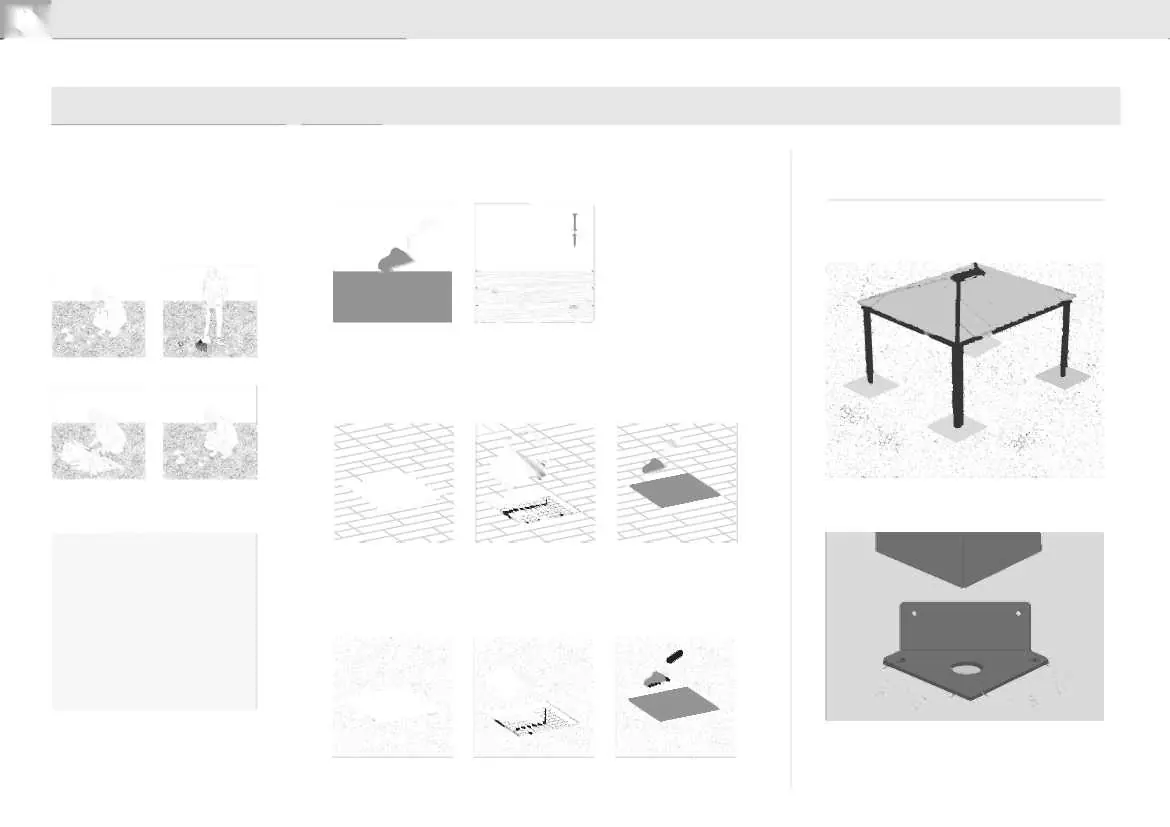
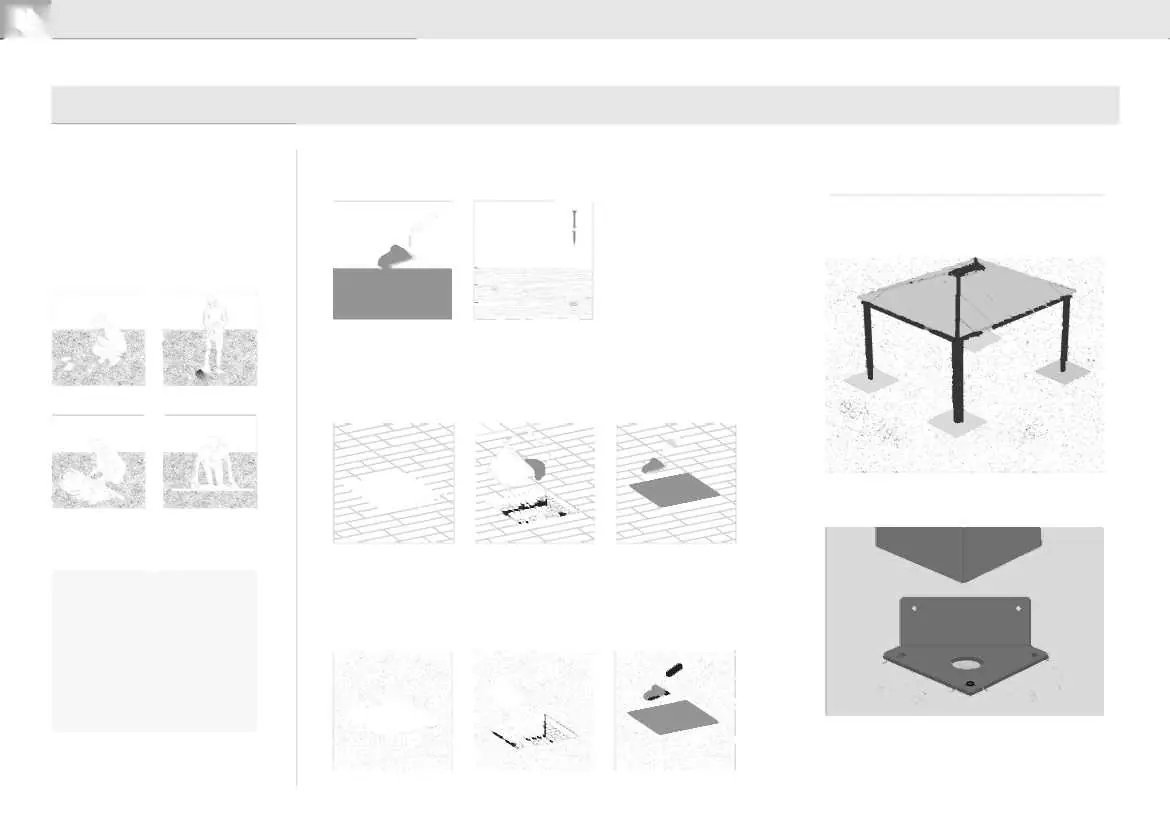
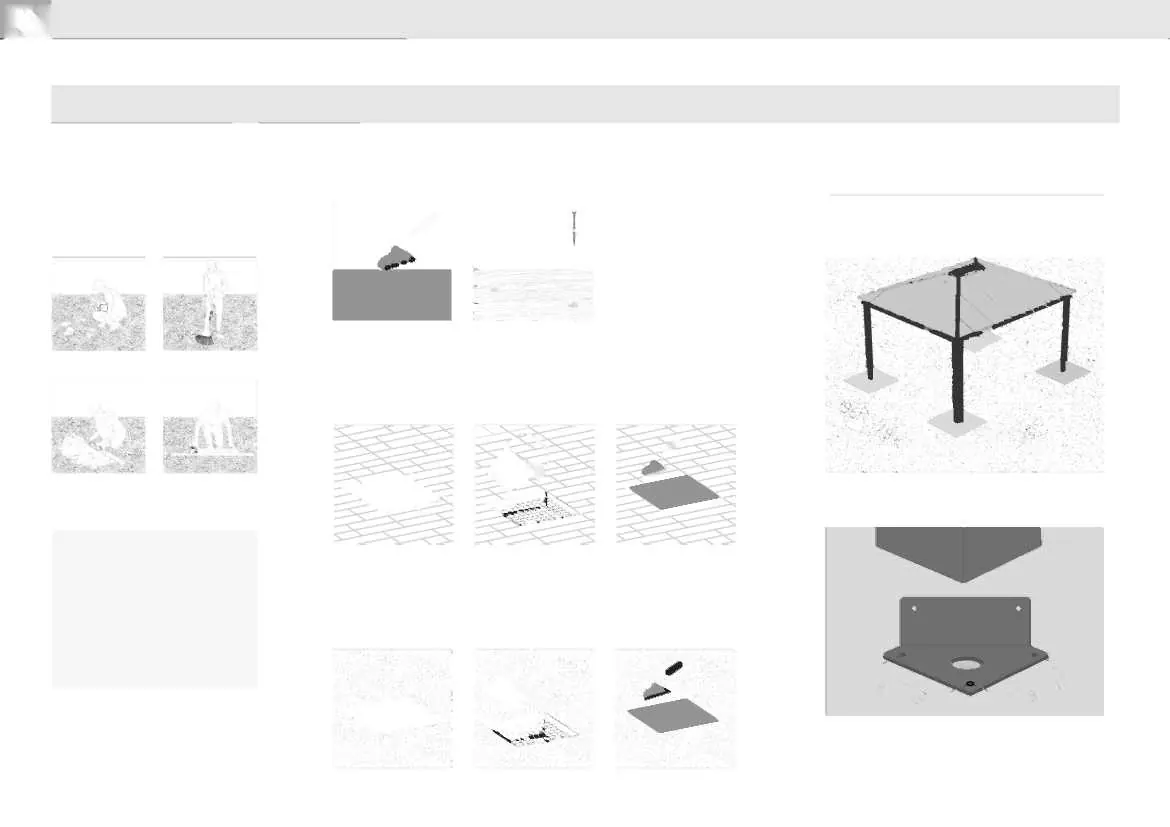
Site preparation and foundation
The gazebo must be installed on a level, solid surface. Choose a sunny location away from overhanging trees. Foundation options include concrete, wooden surfaces, paving stones, or solid ground/asphalt. For concrete or wooden surfaces, use the supplied screws and masonry anchors. For other surfaces, consult an expert for appropriate fasteners.

Safety advice
- Always wear work gloves and safety goggles during assembly.
- Do not attempt to assemble the product in windy or wet conditions.
- Keep children away from the assembly area.
- Do not climb or stand on the roof.
- Ensure there are no hidden pipes or cables in the ground before anchoring.
- The product must be anchored directly to a solid foundation to increase stability and wind resistance.
Assembly process
Before starting, unpack all components and check them against the parts list. Keep small parts (screws, etc.) in a bowl to avoid losing them. During assembly, use a soft surface below the parts to prevent scratches. Use a rubber mallet if necessary. Ensure all panels with the stamped words THIS SIDE OUT are facing outward to provide full UV protection. Remove the plastic covering film from both sides of the panels.


Care and maintenance
Clean the product using a mild detergent solution and rinse with cold clean water. Do not use acetone, abrasive cleaners, or other special detergents to clean the panels. Clean the product once assembly is complete.
Important assembly steps
- Step 2 (c): Connect profiles #9516 by pushing while closing screws #9487.
- Step 3 (c): Connect profiles #9324 by pushing while closing screws #9487.
- Step 8 (a): Use a pencil to mark around the bottom of the leg.
- Step 8: Ensure the frame is perfectly rectilinear by measuring the diagonals and verifying they are the same.
- Step 11 (a): Level the profile legs by releasing the screws partially, adjusting the profiles, and re-tightening the screws.
- Step 17: Hold the top vent cover until completing assembly.
Manufacturer information
Palram Canopia
Practical help
Common problems
Difficulty sliding panels into profiles
Use a silicone lubricant spray on the frame to help the panels slide into the profiles.
Frame not square
Measure the diagonals of the frame and adjust until they are equal.
Missing parts
Use the self-service form at canopia.shop/part_request to submit a request.
Before use
- Choose a level, solid foundation site.
- Ensure at least two people are available for assembly.
- Unpack all parts and verify against the parts list.
- Check local authorities for required building permits.
- Ensure sufficient side space for inserting roof panels.
Specs in practice
- UV Protection
- Panels are UV protected; ensure the side marked THIS SIDE OUT faces outward.
Images and diagrams
- The manual includes detailed step-by-step illustrations for frame assembly, panel insertion, and anchoring.
- Icons indicate whether the installer should be inside or outside the structure during specific steps.
- Icons indicate when to tighten screws or when temporary tightening is sufficient.
Model compatibility
- Supplied screws and masonry anchors are suitable for concrete fixing only.
- Consult an expert for fasteners suitable for other foundation types.

Manual page author
Michael Turner
Technical manual editor
Reviews PDF manuals for structure, safety notes, and practical product details so readers can find the right information quickly.