Software / Apps Services
User Manual for Cantaloupe ePort Engage Payment Terminal
Quick start and installation guide for the Cantaloupe ePort Engage payment terminal. Learn how to install, connect, and troubleshoot your device.
Table of contents
Manual images
Click an image to enlargeQuick guide from the manual
The Cantaloupe ePort Engage is a payment terminal designed for vending equipment. This guide covers the installation, connection, and initial setup of the device. Important: Upon first power-up, the device may need to download and process software updates. Do not power down the unit during this process, as it may cause unexpected behavior. Ensure you have a signed ePort Connect Services Contract and a bank account assigned to the device before attempting to accept credit card transactions.
Tools Required for Installation
- Power Drill (corded or battery operated)
- 11/32" Nut Driver (10 mm)
- Phillips Head Screwdriver
- 8mm Metric Wrench
- Wire Cutters
- Safety Glasses
- Pliers
- 5/32" Drill Bit (4 mm)
- Zip Ties
- Step Bit (1/2", 3/4", and 1" drill bits)
Installation Kit Contents
- Engage Device
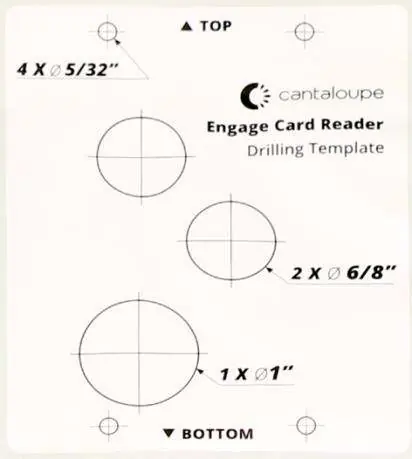
- Drilling Template
- NPC4 Cable
- Antenna
- DEX Zero Cable
- DEX AB Cable
- MDB Cable
- Bracket
- Spacer
- Decals
Installation of the ePort Engage Device
Drilling into your vending equipment
- Select a flat surface on your vending equipment, ensuring it is close to the height of the bill acceptor and does not cover any company logos.
- Open the equipment to check for clearance (remove light bulbs if necessary).
- Apply the drilling template. Drill pilot holes using a 5/32" bit, then complete the drilling process.
Installing the device
- Mount the antenna on top of the vending equipment. Drill a 1/2" hole, feed the wiring through, and fasten the nut tightly.
- Attach the gasket to the back of the Engage device to create a mechanical seal.
- Connect the antenna cable to the Engage device using an 8mm wrench.
- Mount the device to the front surface using the provided 10mm screws. Connect all four screws before tightening them fully.
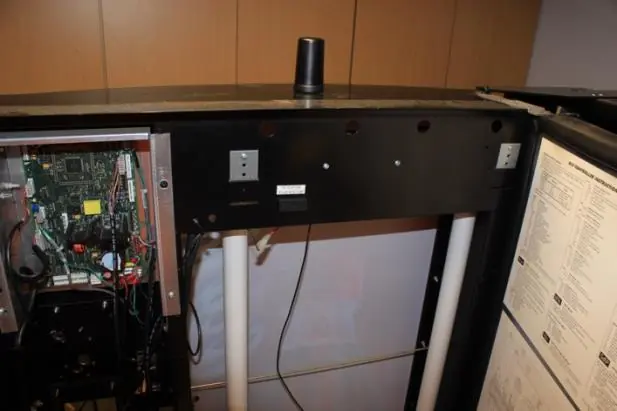
System connection
- Connect the MDB and DEX cables to their respective ports on the Engage device.
- Connect the DEX cable to the DEX port inside the vending equipment. If using a door frame DEX port, ensure the cable hangs freely to avoid damage.
- Connect the MDB cable directly to the main board. The Engage device should be 'first in line' to the board.
- Power on the equipment and allow several minutes for the device to reboot, gather its IP address, and load files.
Expected Start-Up Behaviors
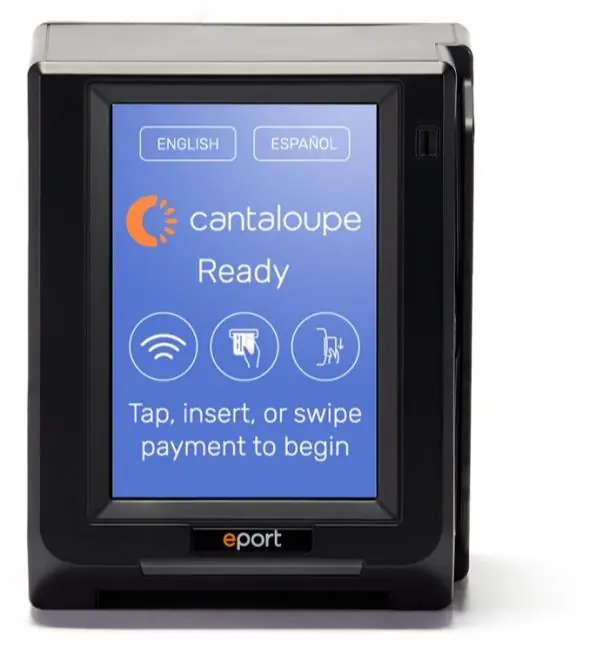
The start-up sequence can take up to 20 minutes. The screen will cycle through initialization, loading, and finally display the 'Ready' state. It is recommended to perform a test swipe using a pass card the first time the device is powered up. If the test fails, wait for the device to return to the 'Ready' state and try again. If it still fails, power cycle the machine.
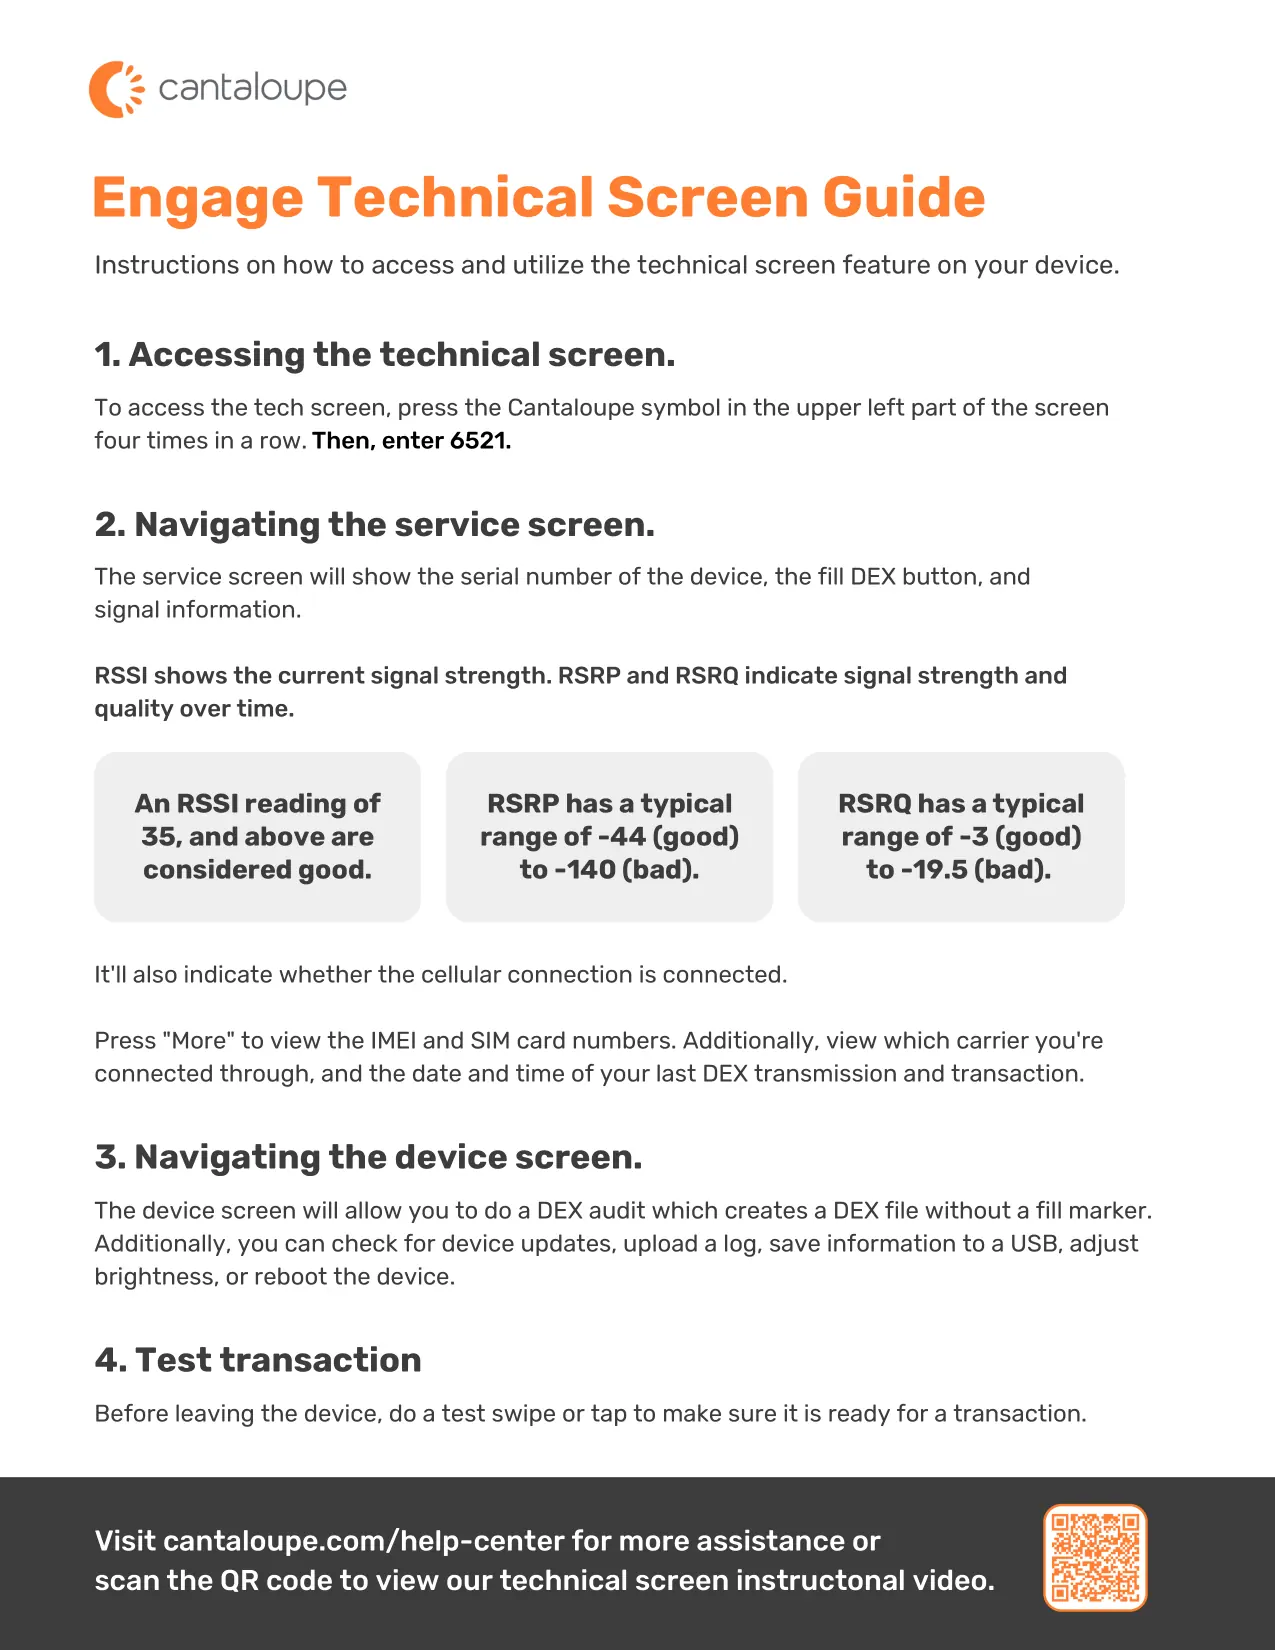
Technical Screen Guide
To access the technical screen, press the Cantaloupe symbol in the upper left part of the screen four times in a row, then enter 6521. This screen allows you to view signal strength (RSSI, RSRP, RSRQ), check cellular connection status, view IMEI/SIM numbers, perform a DEX audit, or reboot the device.
Practical help
Common problems
Device not ready after power-up
Allow the system to fully complete software updates. Do not power down the unit during this process.
Test swipe fails
Wait for the device to return to the 'Ready' state and reattempt. If it fails again, power cycle the machine and try a third time.
DEX cable damage
If using a door frame DEX port, disassemble the frame and let the cable hang to prevent it from hitting the back of the vending equipment.
Before use
- Ensure you have a signed ePort Connect Services Contract.
- Verify a bank account is assigned to the device.
- Plan the mounting spot to avoid moving parts.
- Ensure power to the vending equipment is turned off before installation.
- Check for clearance issues (e.g., light bulbs) inside the vending machine.
Images and diagrams
- The drilling template indicates the exact hole sizes and locations required for mounting.
- Figure 2.3 illustrates the antenna mounting process on top of the machine.
- Figure 2.4 shows the rear port layout for cable connections.
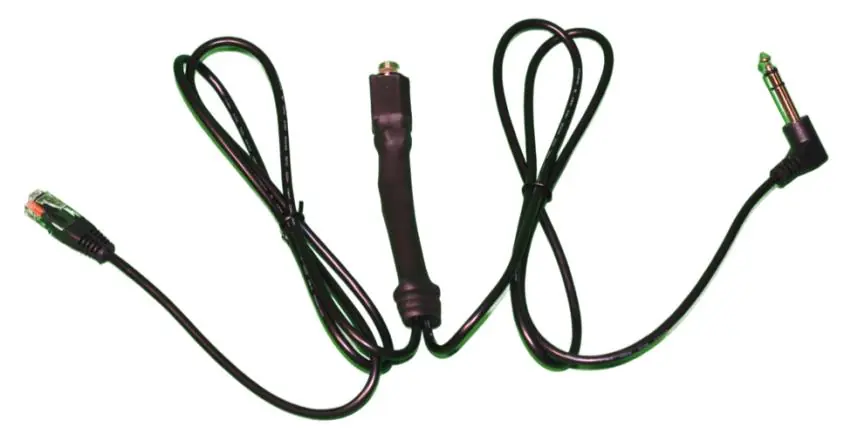
- Figure 2.5 shows the optional DEX Y cable configuration.
Model compatibility
- Some older machines may require firmware updates or additional accessories.
- Visit the Cantaloupe website to access the ePort Engage Compatibility Chart.

Manual page author
Michael Turner
Technical manual editor
Reviews PDF manuals for structure, safety notes, and practical product details so readers can find the right information quickly.