Computers / Printers
User Manual for Elegoo Centauri Carbon 2 Combo 3D Printer
Quick start guide and user manual for the Elegoo Centauri Carbon 2 Combo 3D printer. Includes setup, installation, filament loading, software configuration, and maintenance instructions.
Table of contents
Manual images
Click an image to enlargeQuick guide from the manual
This manual provides instructions for the Elegoo Centauri Carbon 2 Combo 3D printer. It covers setup, installation, filament management, and software configuration.
Important safety notes
- Do not place the printer in highly vibrating or unstable environments.
- Avoid touching the nozzle or heated bed during operation to prevent burns.
- Ensure the machine is properly grounded to avoid electrical leakage.
- Supervise children when using the machine.
- Turn off and unplug the power cord if the machine is not in use for an extended period.
Installation
Follow these steps to set up your printer:
- Remove all foam, the touchscreen, and the toolbox from the printer.
- Open the glass door to remove the thermal cover, nozzle wiper assembly, and CANVAS module.
- Unlock the heated bed by removing the 3 screws marked in blue using the 2.5 mm Allen key.
- Install the touchscreen by connecting the FPC cable and locking it into the slot.
- Attach the nozzle wiper assembly to the rear panel using the provided screws.
- Install the CANVAS mounting bracket, feeding module, and filament hub.
- Mount the spool holder brackets and spool holders to the side panel.
- Connect the PTFE tubes and the 4-pin cable between the printer and the CANVAS unit.
Loading filament
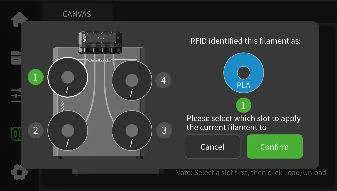
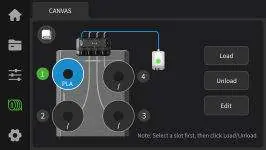
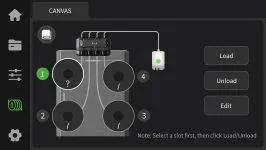
The CANVAS system supports RFID-enabled spools for automatic detection. For non-RFID spools, you must manually enter the filament details (brand, type, color) on the touchscreen. Ensure spools are fully seated against the retaining edge to prevent tangling.
Software and printing
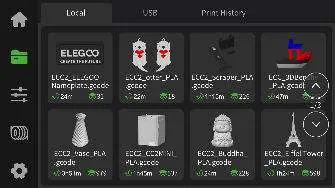
Install ElegooSlicer from the included USB drive. Use the setup wizard to configure your printer. For multi-color models, drag and drop files into the slicer, add filament, use the Color painting tool, and slice the plate. You can print via USB drive or over the network (LAN) by connecting the printer to Wi-Fi.
Maintenance
Regularly clean the machine body with a dry cloth and inspect/clean cooling fans. Apply lubricating oil to the Z-axis lead screws as needed. Clean the build plate with warm water and dish soap to maintain adhesion.
Practical help
Common problems
Printer vibrations affecting print quality
Do not place the printer in a highly vibrating or unstable environment.
Filament tangling
Ensure the spool is fully seated and secured against the retaining edge of the holder.
Electrical leakage risk
Ensure the machine is properly grounded for safe operation.
Nozzle burns
Avoid direct contact with the nozzle; use residual heat to clean filament residue with a tool.
Before use
- Check that the device is in good condition and all accessories are included.
- Remove all foam and packaging materials from the printer.
- Unlock the heated bed by removing the 3 blue-marked screws.
- Ensure the machine is properly grounded.
- Install the touchscreen and nozzle wiper assembly.
- Install the CANVAS module and spool holders.
- Connect the PTFE tubes and 4-pin cable.
Specs in practice
- Build Volume
- 256x256x256mm
- Printing Speed
- Up to 500mm/s
- Max Nozzle Temp
- 350°C
- Max Heated Bed Temp
- 110°C
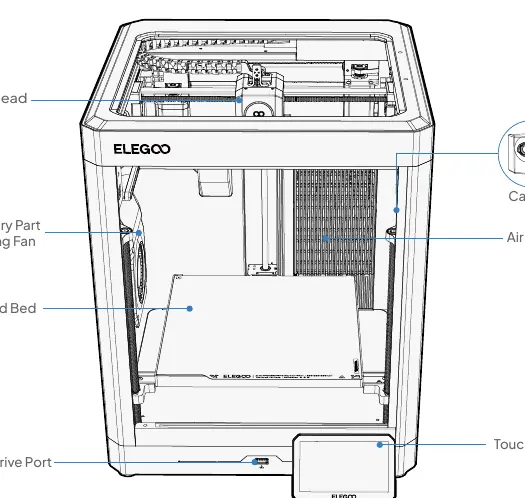
Images and diagrams
- Mainboard Connections: Shows locations for motors, sensors, fans, and power inputs.
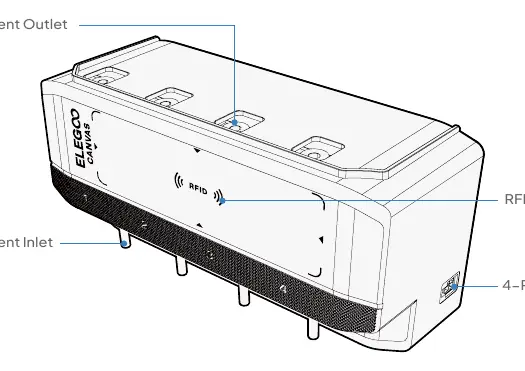
- CANVAS Component: Identifies filament inlets, outlets, and RFID reader.
Model compatibility
- Slicer Software: ElegooSlicer recommended.
- Input Formats: STL, OBJ, 3MF, STEP.

Manual page author
Emily Carter
User documentation editor
Prepares concise manual descriptions and highlights the most useful setup, operation, and maintenance information for readers.