Computers / Printers
User Manual for Elegoo Phecda Laser Engraver and Cutter
Comprehensive user guide for the Elegoo Phecda laser engraver and cutter. Learn how to operate the device, adjust laser focus, load files, use the touch screen interface, and perform maintenance.
Table of contents
Manual images
Click an image to enlargeQuick guide from the manual
The Elegoo Phecda laser engraver is a powerful tool that requires strict adherence to safety protocols. Always wear laser goggles when the machine is in operation and ensure no pets or unauthorized persons are nearby. The device operates using .nc files stored in the root directory of a TF card. Before starting any project, ensure the laser focus is correctly set using the provided kickstand and that the Home position is defined to prevent the laser module from colliding with the frame.
Device overview and setup
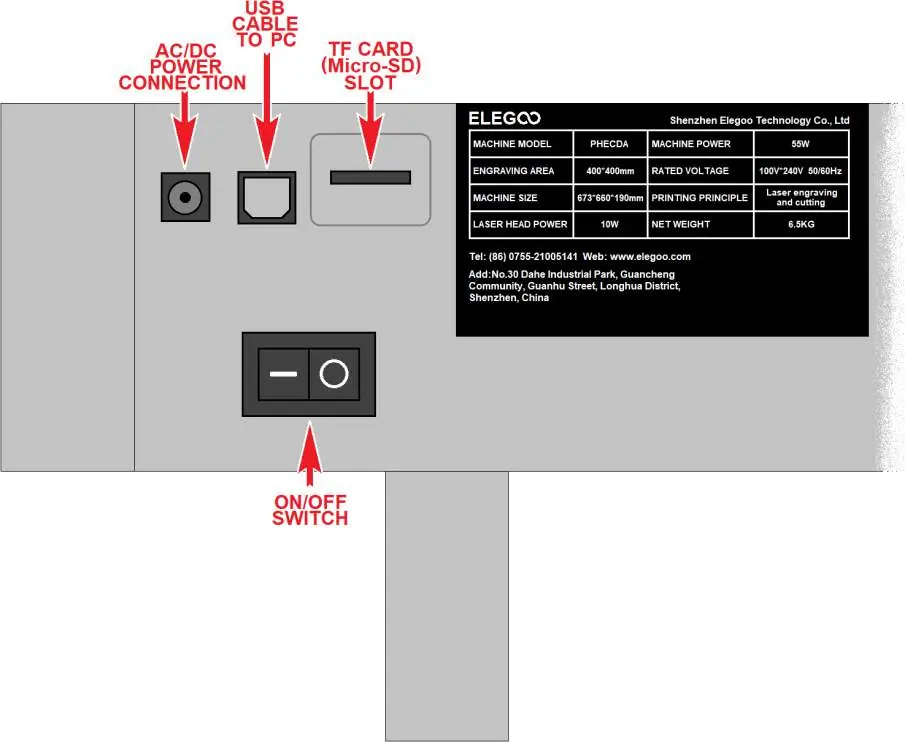
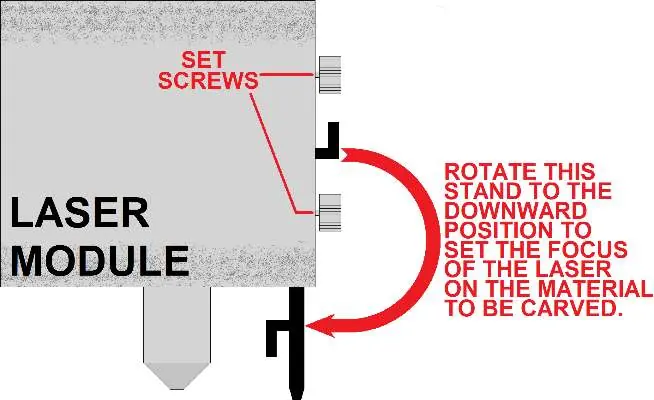
The machine features a touch screen interface for control. On the side of the machine, you will find the AC/DC power connection, USB port, TF card slot, and the main power switch. Always ensure the power is OFF before inserting or removing the TF card. To set the laser focus, remove the orange cover plate, loosen the set screws, rotate the black plastic kickstand to the downward position, lower the laser module until the kickstand rests on the workpiece, and then tighten the set screws.
Operating the laser
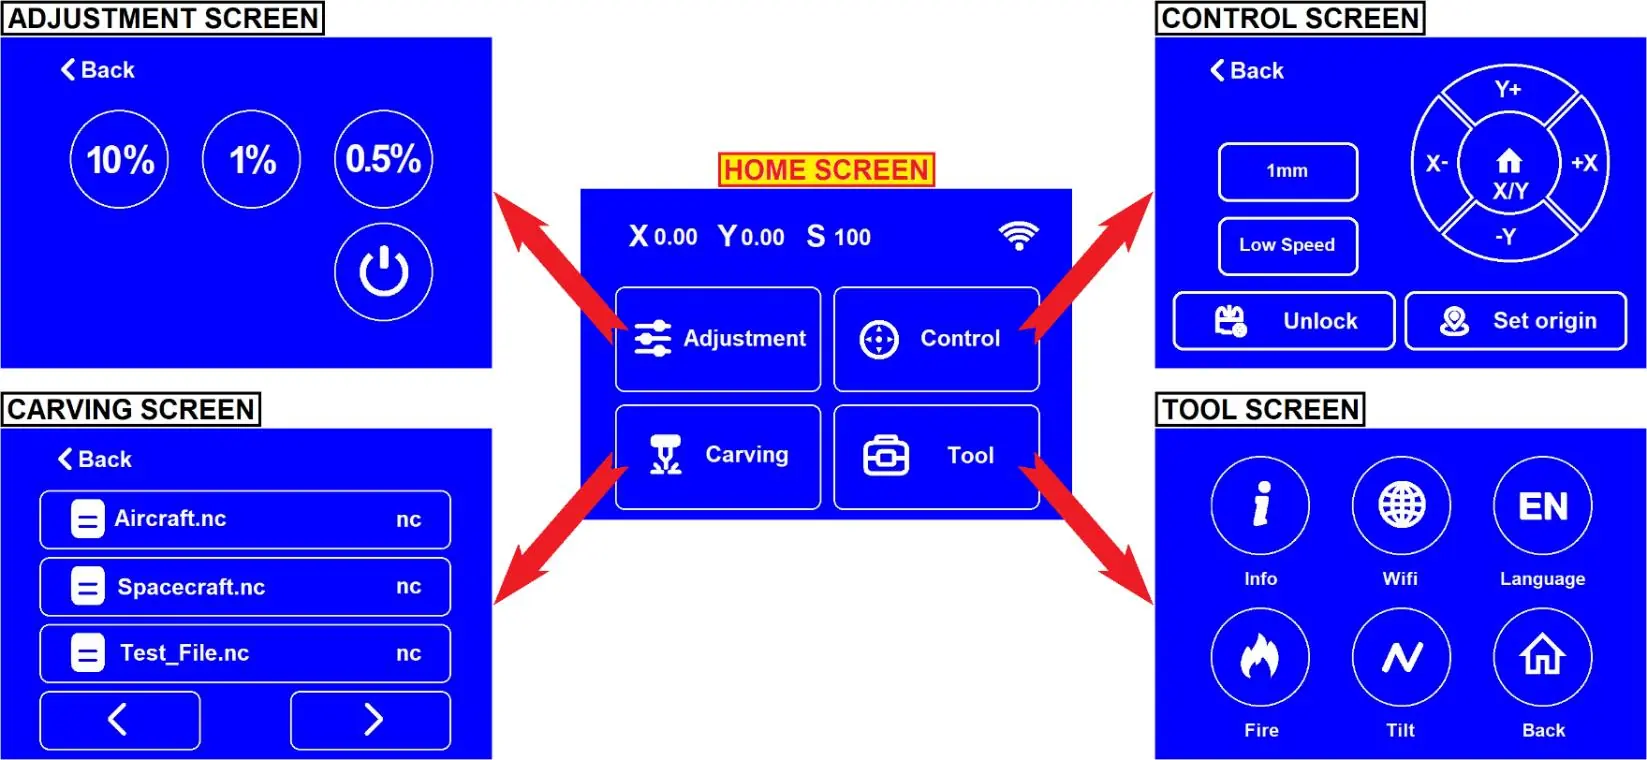
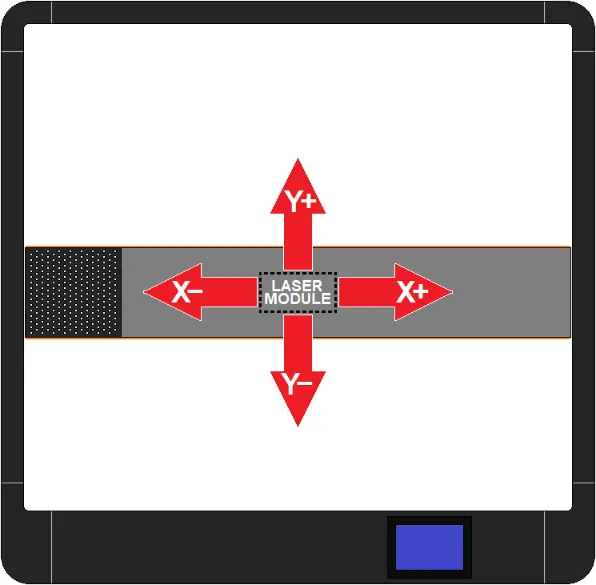
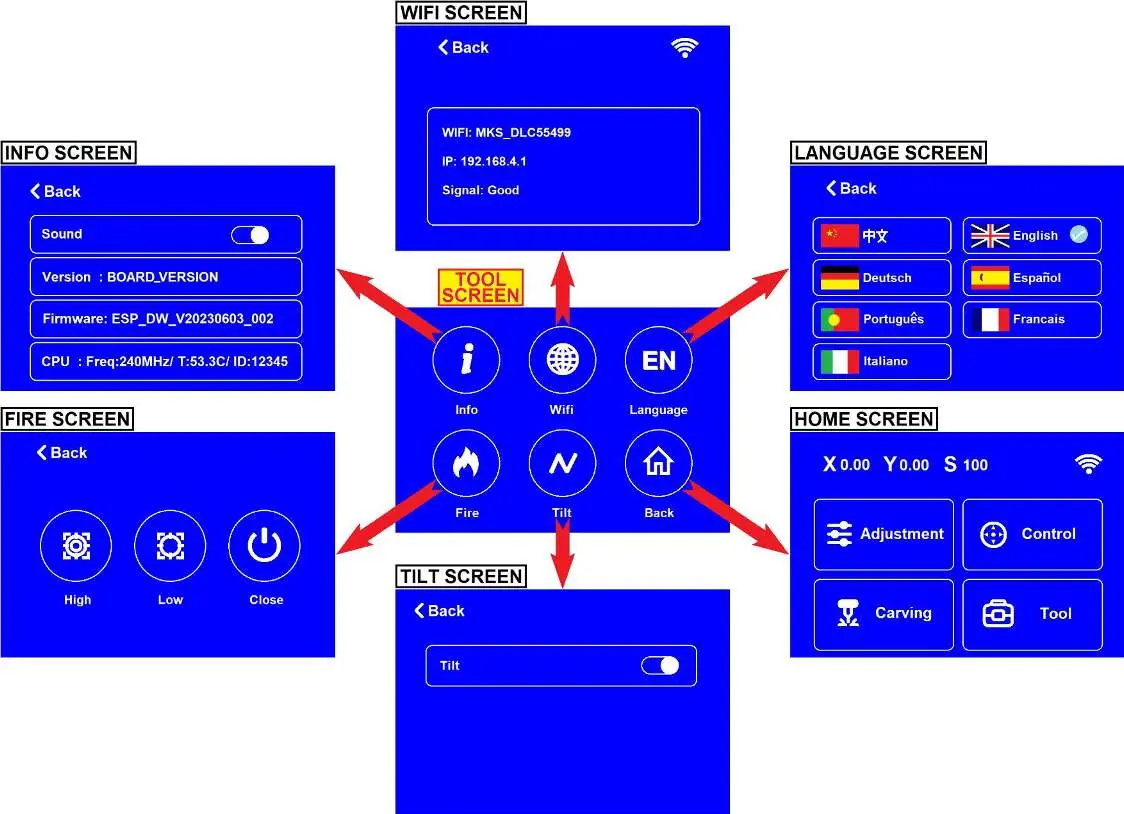
The Home screen provides access to four main functions: Adjustment, Control, Carving, and Tool. Use the Adjustment screen to project a low-power beam to locate the carving area. The Carving screen allows you to select .nc files from the TF card. You can choose between Plane Mode (for flat surfaces) and Rotation Mode (for cylindrical objects). Use the directional buttons to jog the laser module and set the Home position. The Mark the Perimeter feature is essential for verifying the carving area before starting the job.
Screen navigation
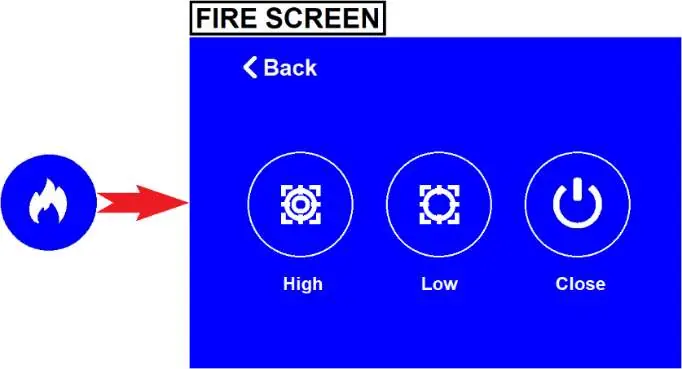
The interface is divided into specific screens for different tasks. The Control screen is used for moving the laser and setting the origin. The Tool screen provides access to system information, WiFi settings, language selection, fire detection sensitivity, and tilt detection settings. During carving, the screen displays progress, and you can pause to adjust power and speed settings in real-time.
Maintenance and safety
Regular maintenance is crucial for the longevity of the machine. Inspect and clean the laser module's cooling fans, the dust collection turbo fan, and the window mirror regularly. Debris buildup on the window mirror can cause it to overheat and crack. If the machine is used in direct sunlight, the flame detection sensor may trigger; you may need to adjust its sensitivity or turn it off, but always monitor the machine closely when doing so.
Laser settings reference
The manual provides detailed tables for suggested laser settings, including power percentage and speed (mm/min), for both the 10W and 20W versions of the Phecda. These settings vary based on the material type (e.g., wood, leather, metal) and the operation (engraving vs. cutting). Always refer to these tables as a baseline for your projects.
Practical help
Common problems
Machine does not recognize the TF card or files
Ensure files are in the root directory (not in folders), use FAT32 format, and ensure the machine power is OFF when inserting/removing the card.
Laser module collides with rails
Ensure the Home position is set correctly (ideally lower left corner) and always use the 'Mark the Perimeter' function before starting a carve.
Carved image is mirrored or backward
Check the 'Device Origin' setting in your software (e.g., LightBurn). It should be set to the bottom left.
Window mirror cracks
This is often caused by debris buildup. Clean the window mirror regularly and ensure the air assist is functioning.
Before use
- Wear laser goggles
- Ensure power switch is OFF before inserting TF card
- Place sample material beneath laser
- Adjust laser focus using the kickstand
- Verify file is in the root directory of the TF card
- Use 'Mark the Perimeter' to verify the carving area
Specs in practice
- 100% Power/Speed
- Relative setting based on the values defined in the .nc file.
- Mark the Perimeter
- Traces the carving area to prevent collisions and verify placement.
Images and diagrams
- Home screen buttons: Adjustment, Control, Carving, Tool
- Laser module height adjustment using the kickstand
- Directional buttons for moving the laser module
Model compatibility
- Compatible with LaserGRBL and LightBurn software
- Supports TF card, WiFi, and USB connection

Manual page author
David Miller
Documentation analyst
Organizes user manual content into clear summaries, with attention to model details, product context, and everyday usability.