Automotive / Car Audio
Assembly Instructions for 10CZYCSCT04-WH Shoe Cabinet
A complete assembly guide for the 10CZYCSCT04-WH shoe cabinet. Includes parts list, hardware identification, step-by-step installation instructions, and safety warnings.
Table of contents
Manual images
Click an image to enlargeQuick guide from the manual
This document provides instructions for assembling the 10CZYCSCT04-WH shoe cabinet. Before beginning, ensure you have a spacious, clean area to work, preferably on a carpet or the cardboard packaging to protect your floor. It is recommended to keep screws slightly loose during assembly and tighten them firmly only after the entire unit is constructed. Always use a team to lift the unit to avoid injury or damage.
Safety warnings
- Do not allow children to climb on the unit.
- Keep small parts and packaging materials away from children and pets to prevent choking hazards.
- Avoid using sharp objects or corrosive chemicals on the product.
- Always remove all objects from the unit before moving it.
- Use caution with power tools; they may strip or damage the furniture parts.
Parts and hardware
The manual includes a detailed parts list (pages 2-4) identifying panels 1 through 19 and hardware components labeled A through L. Verify all parts are present before starting assembly.
Assembly instructions
The assembly process is divided into 11 steps:
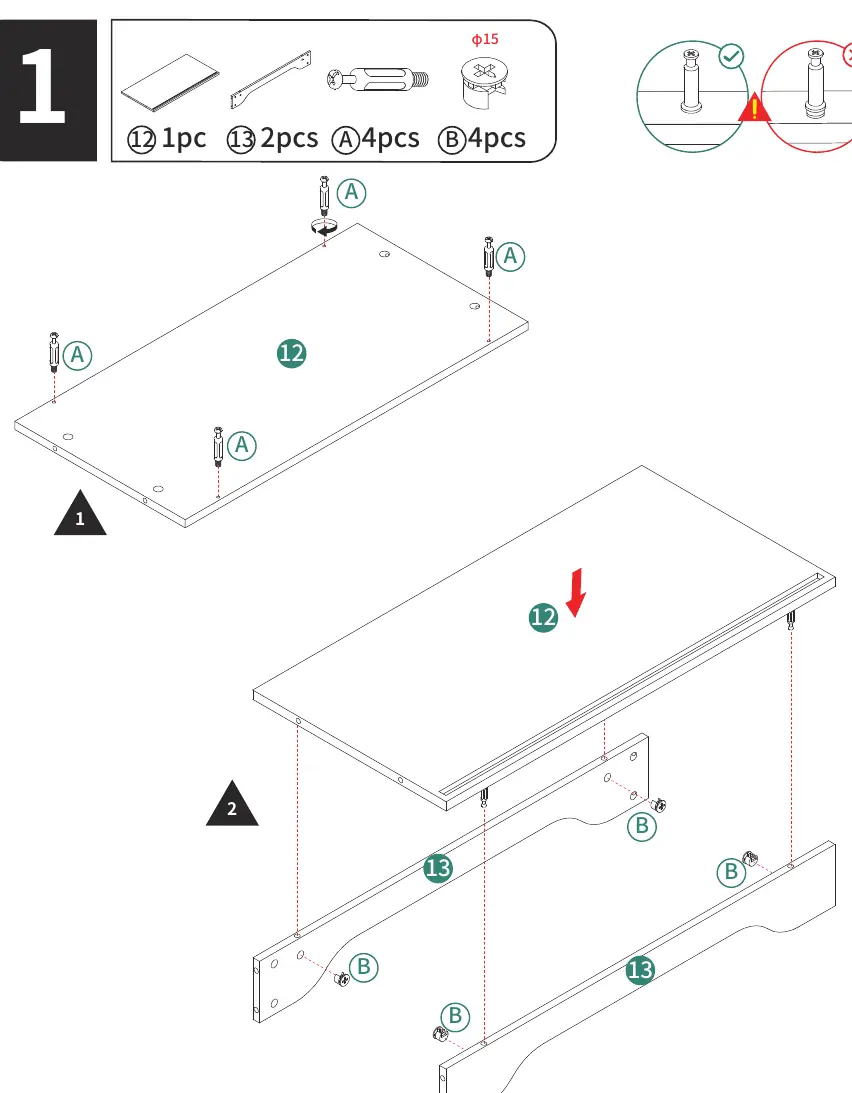
- Base Assembly: Attach hardware A and B to panel 12 and connect to panels 13.
- Main Frame Preparation: Prepare panels 6, 7, 8, and 9 with hardware A, E, and F.
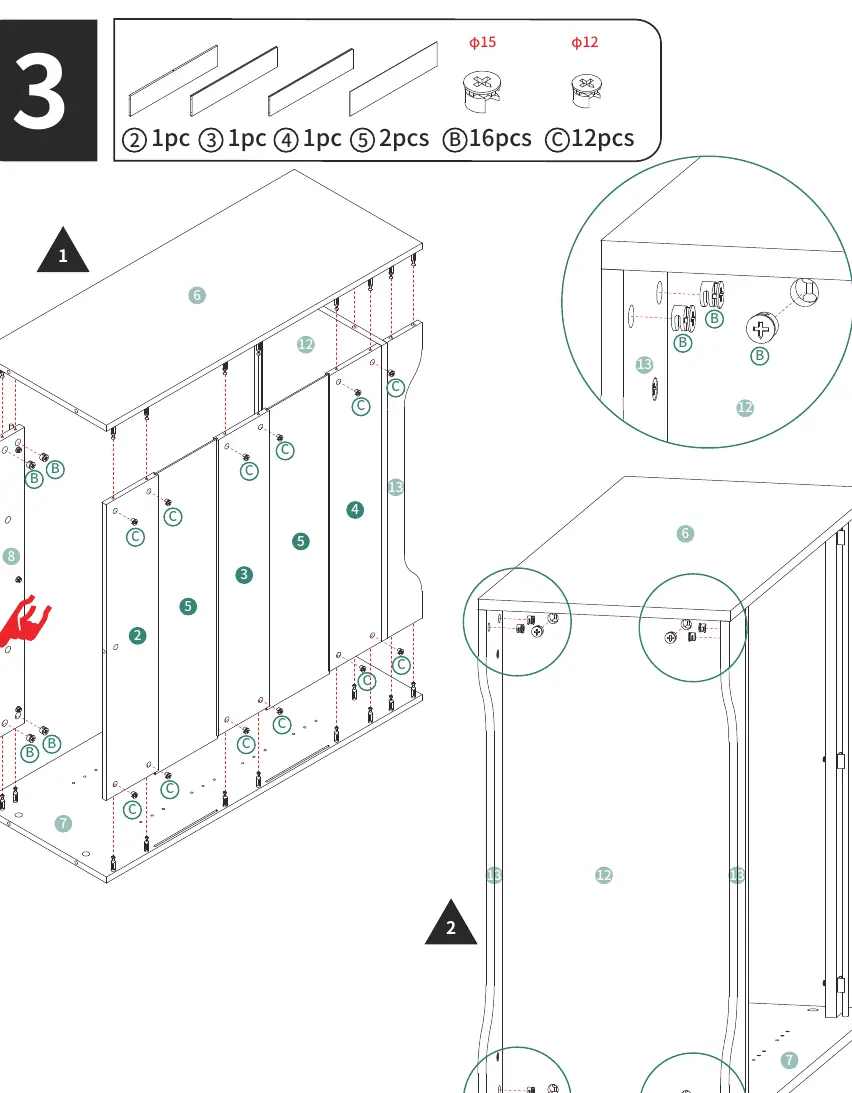
- Main Frame Construction: Connect panels 2, 3, 4, 5, 6, 7, 8, 12, and 13 using hardware B and C.
- Top Panel Installation: Attach panel 1 to the main frame using hardware A, B, and C.
- Side Cabinet Assembly: Prepare panels 15, 16, 17, 18, and 19 with hardware A and B, then assemble.
- Joining Sections: Connect the side cabinet section to the main frame using hardware B.
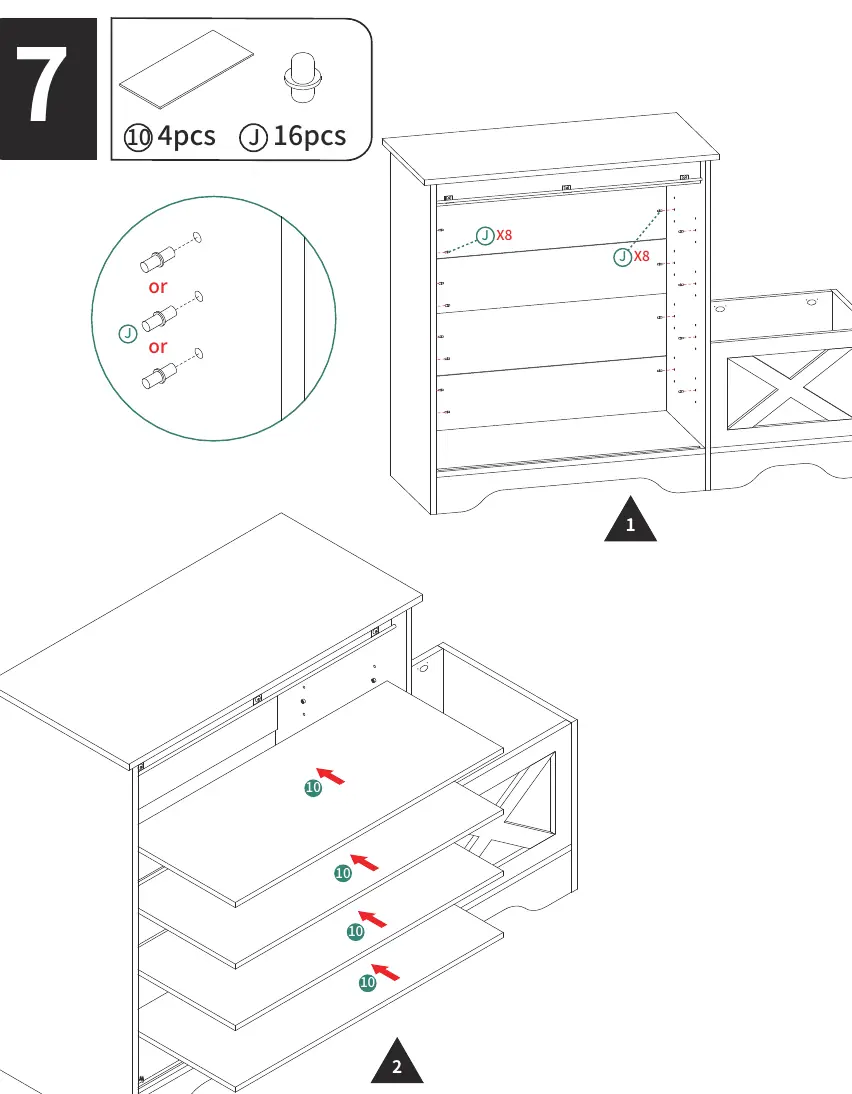
- Shelving: Install shelves (10) using hardware J.
- Sliding Door Assembly: Assemble the sliding door (11) using hardware D, E, F, and G.
- Door Hinge Installation: Attach the door (14) to the unit using hardware H and I.
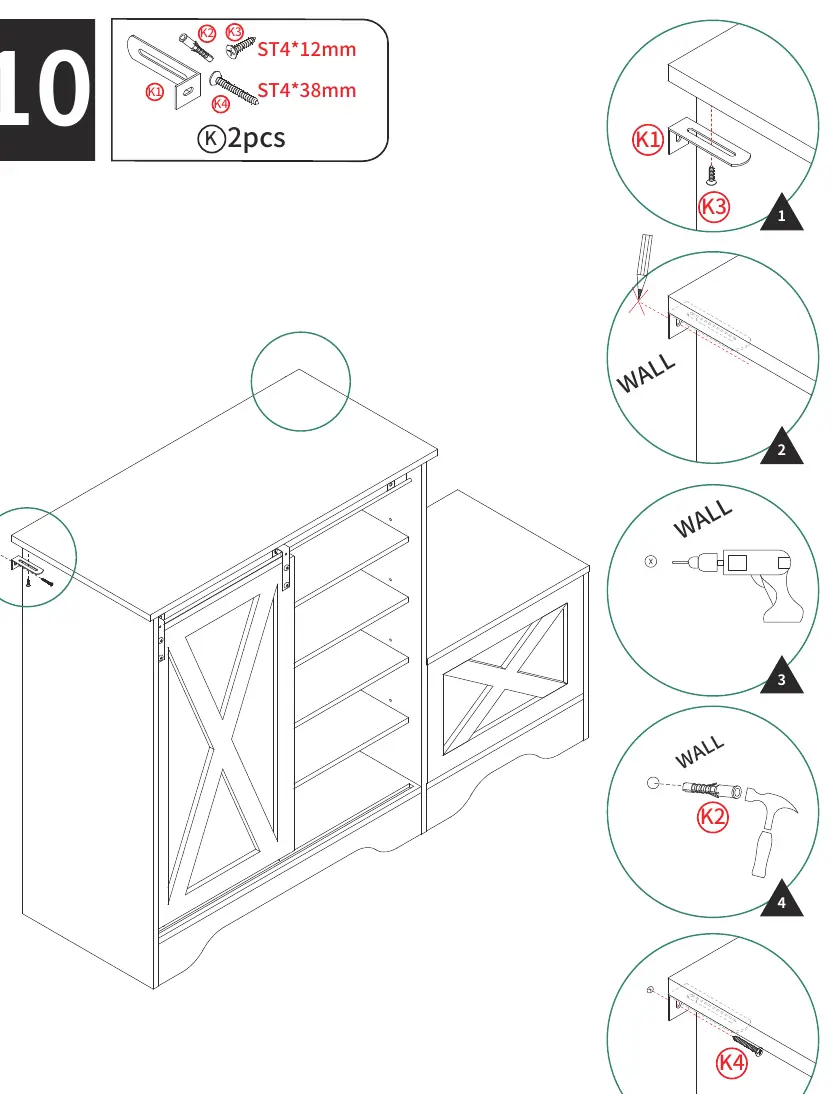
- Wall Mounting: Secure the unit to the wall using hardware K (K1, K2, K3, K4) for safety.
- Final Check: Ensure all screws are tightened and the unit is stable.
Maintenance
Regularly check that all screws remain tight. Clean with a soft, dry cloth. Avoid abrasive cleaners.
Practical help
Common problems
Difficulty during assembly
Ensure steps are followed in the exact sequence provided. Do not skip steps.
Damaged parts or stripped screws
Avoid using power tools at high torque; use manual tools to prevent stripping screws.
Unstable unit
Ensure all screws are firmly tightened after the initial assembly is complete.
Before use
- Verify all parts are included against the parts list.
- Prepare a spacious, clean area for assembly.
- Use a carpet or cardboard to protect the floor.
- Have a second person available for lifting the unit.
- Ensure you have a screwdriver for assembly.
Images and diagrams
- Parts list (pages 2-4) identifies all panels and hardware.
- Assembly steps (pages 6-17) show the sequence of connecting panels and hardware.
- Wall mounting instructions (step 10) show how to secure the unit to the wall.
Model compatibility
- Ensure the wall type is suitable for the provided wall mounting hardware.

Manual page author
Michael Turner
Technical manual editor
Reviews PDF manuals for structure, safety notes, and practical product details so readers can find the right information quickly.