Furniture / Storage Cabinets
Assembly and User Guide for Gracie Oaks 160CM Dining Table
Quick guide for the Gracie Oaks 160CM Dining Table. Includes assembly instructions, parts list, hardware identification, and how to operate the extendable table mechanism and adjust foot pads.
Table of contents
Manual images
Click an image to enlargeQuick Guide
This guide covers the assembly and operation of the Gracie Oaks 160CM Dining Table. Before beginning, verify all parts and hardware against the provided list. Ensure the table is placed on a level surface and adjust the foot pads if the table wobbles.
Parts and Hardware
Ensure the following items are present:
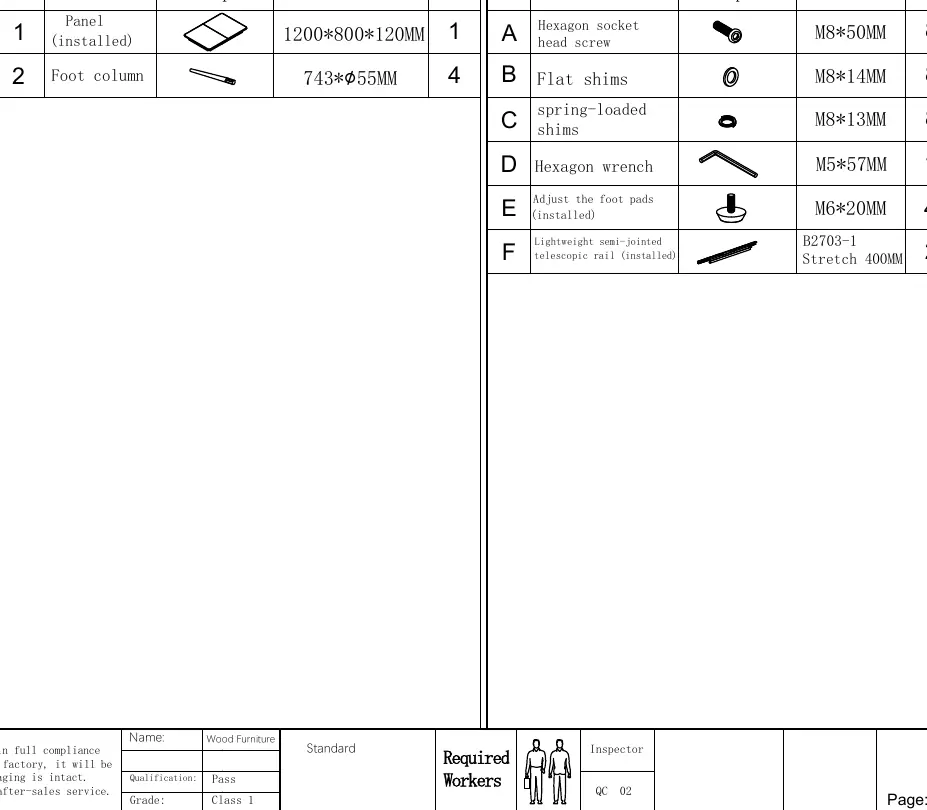
- Panel: 1 (pre-installed)
- Foot column: 4
- Hardware: Hexagon socket head screws (8), Flat shims (8), Spring-loaded shims (8), Hexagon wrench (1), Foot pads (pre-installed), Telescopic rail (pre-installed).
Caution: Items marked as (installed) in the parts table are already attached to the finished product and will not be found in the hardware bag.
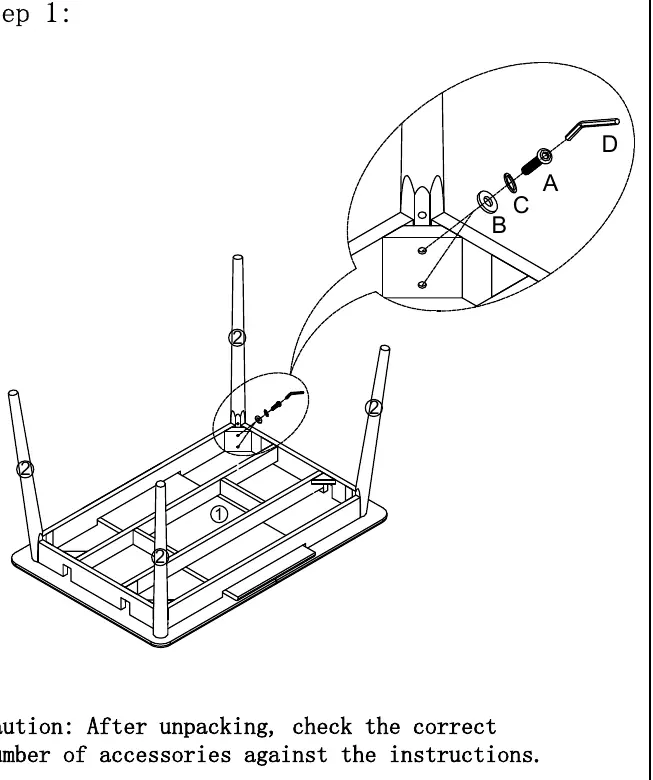
Assembly Instructions
Step 1: Place the table panel upside down on a soft surface to prevent scratching. Align the holes in the foot columns (leg #2) with the holes in the corners of the frame. Secure each leg using the provided hardware (A, B, C, D) and the included hexagon wrench.
Operating the Extendable Table
The table features a telescopic mechanism for extension.
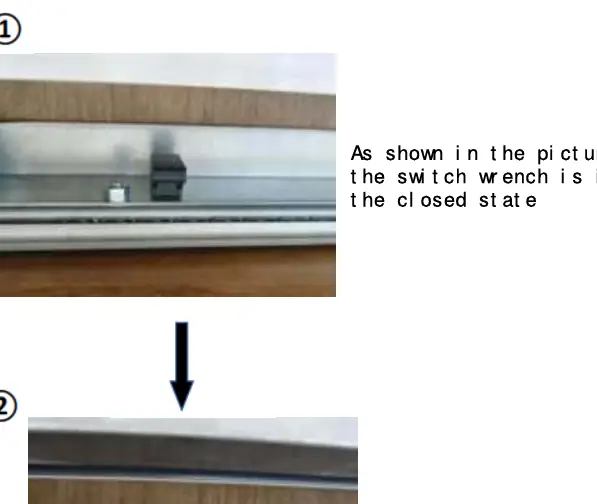
- To extend or retract: Locate the switch wrench on the slider. Ensure it is in the 'open' position to allow the panel to move.
- To lock: Once the desired position is reached, ensure the switch wrench is in the 'closed' position to secure the panel.
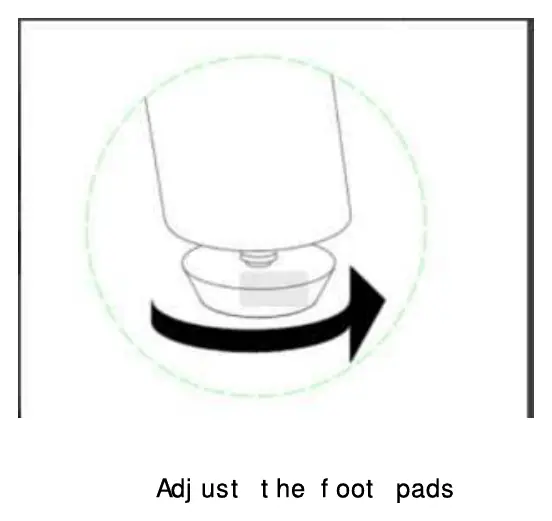
Maintenance and Adjustments
If the table legs are not stable, adjust the foot pads at the bottom of each leg to keep the table balanced.
Practical help
Common problems
Table is unstable or wobbles
Adjust the foot pads at the bottom of the legs to level the table.
Cannot extend or retract the table panel
Ensure the switch wrench on the slider is in the 'open' position.
Before use
- Unpack all items carefully
- Verify parts against the parts list
- Check hardware count (A-F) against the hardware list
- Ensure you have the included hexagon wrench
- Place the table on a flat, level surface
Images and diagrams
- Step 1 shows the leg attachment process using screws and shims.
- Step 2 illustrates the open and closed states of the table.
- Page 3 details the switch wrench operation for the telescopic rail.
- Page 3 shows how to adjust the foot pads for stability.
Model compatibility
- For indoor use as a dining table.

Manual page author
Emily Carter
User documentation editor
Prepares concise manual descriptions and highlights the most useful setup, operation, and maintenance information for readers.