Furniture / Tables & Desks
Assembly Instructions for 1 Drawer Bedside
A comprehensive assembly guide for the 1 Drawer Bedside unit. This manual includes a complete hardware list, tool requirements, step-by-step assembly instructions, and essential safety wall-mounting procedures.
Table of contents
Manual images
Click an image to enlargeQuick Assembly Guide
Before beginning assembly, ensure you have all the necessary hardware. The hardware is located inside a cardboard box; check for it before disposing of any packaging. Clear a clean, flat area on a carpet or soft surface to prevent scratching the furniture during assembly. The estimated assembly time is approximately 30 minutes.

Tools Required
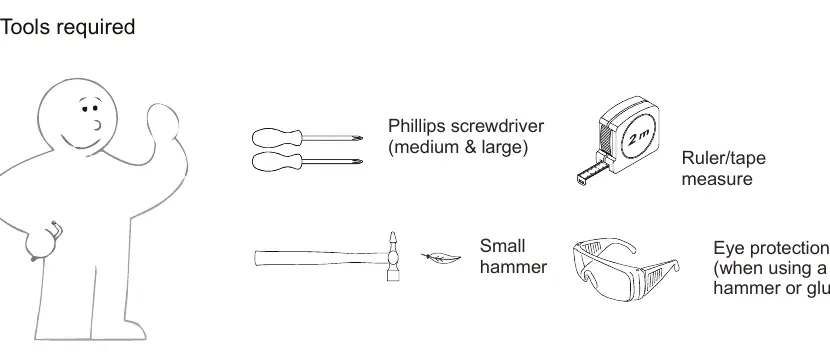
- Phillips screwdriver (medium & large)
- Small hammer
- Ruler or tape measure
- Eye protection (recommended when using a hammer or glue)
Hardware List
The unit includes various screws, dowels, cam locks, and rails. Use the ruler provided on page 4 of the manual to correctly identify the screws before starting. Ensure you have the correct quantities of parts A through M as listed in the manual.

Assembly Steps
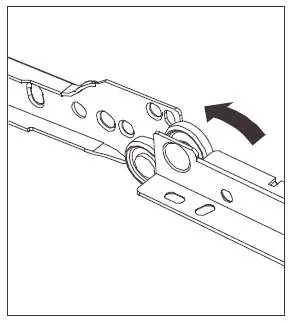
1. Rail Installation: Attach the drawer rails (G and H) to the side panels (02 and 03) using screws (E). Ensure the rails are oriented correctly as shown in the diagrams.
2. Frame Assembly: Assemble the top panel (01) and support (05) using dowels (A) and screws (D). Connect the side panels to the bottom and top sections using the cam lock system (K) and screws (B). Ensure all cam locks are tightened securely.
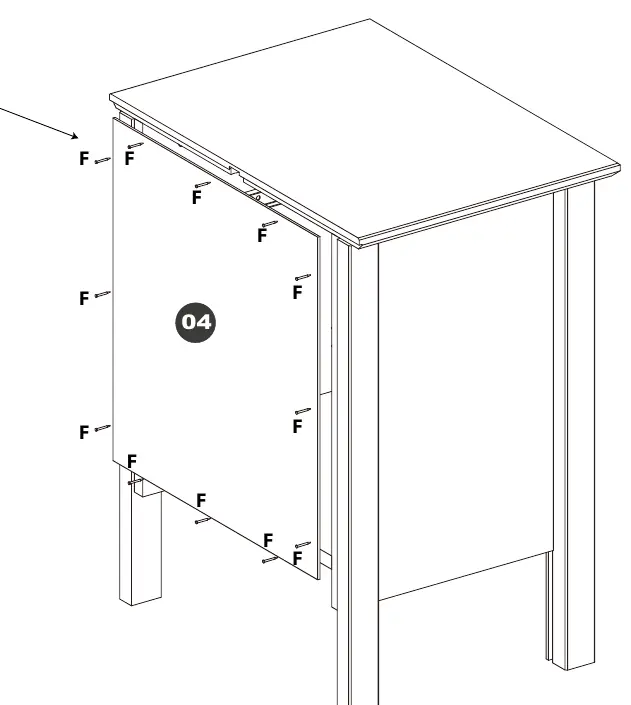
3. Back Panel: Attach the back panel (04) to the rear of the unit. Use all provided nails (F) and space them evenly to ensure the unit is strong and stable. Important: The cabinet must be 'square' before attaching the back panel.
4. Drawer Assembly: Assemble the drawer sides (09, 10), back (11), and bottom (12). Attach the drawer front (08) using screws (B) and dowels (A). Install the drawer rails (G/H) to the drawer sides using screws (C).
Wall Mounting and Safety
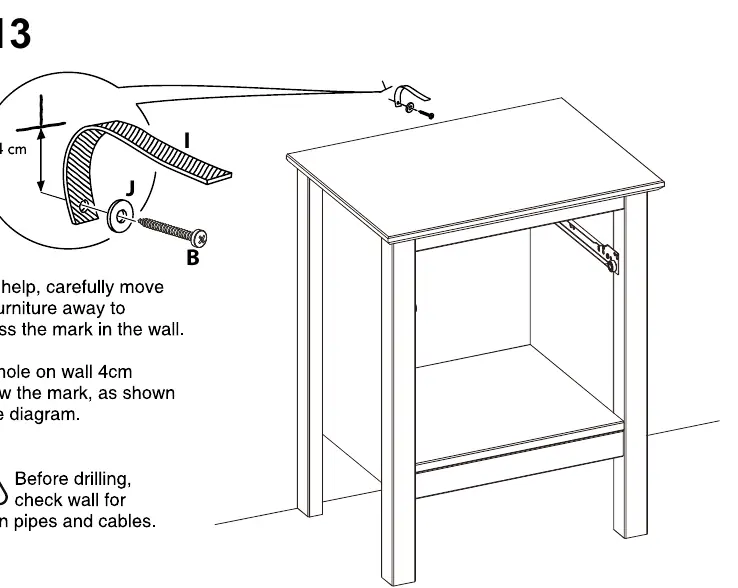
For safety, the unit must be secured to the wall. Position the furniture in its desired location and mark the wall. Move the unit aside, drill a hole 4cm below the mark, and install the wall strap (I) using the provided washer (J) and screw (B). Move the furniture back into position and secure the strap to the top panel.
Final Adjustments
Insert the assembled drawer into the unit. Ensure the drawer slides smoothly along the rails. If the drawer does not slide correctly, check that the rails are installed flush and that the cabinet frame is square.
Manufacturer information
The Home Depot
Practical help
Common problems
Drawer does not slide smoothly
Ensure the drawer rails are installed flush and that the cabinet frame is square.
Unit feels unstable
Ensure all back panel nails are used and evenly spaced to provide structural integrity.
Before use
- Check all hardware is present inside the cardboard box.
- Ensure you have a Phillips screwdriver, small hammer, and tape measure.
- Wear eye protection when using a hammer.
- Clear a space on a carpet or soft surface for assembly.
- Verify all screws and dowels match the sizes shown on the ruler guide.
Images and diagrams
- Hardware identification: Use the ruler on page 4 to identify screws by length.
- Cam lock installation: Ensure the arrow on the cam lock points towards the screw hole.
- Wall mounting: The strap must be secured to both the wall and the top panel of the unit.
Model compatibility
- Wall mounting is required for safety to prevent tipping.

Manual page author
Michael Turner
Technical manual editor
Reviews PDF manuals for structure, safety notes, and practical product details so readers can find the right information quickly.