HVAC / Sauna Heaters
Installation Guide for Harvia Solide Compact Outdoor Sauna
Comprehensive installation guide for the Harvia Solide Compact outdoor sauna. Includes foundation requirements, step-by-step assembly instructions for walls, floor, roof, and interior, along with parts lists and technical diagrams.
Table of contents
Manual images
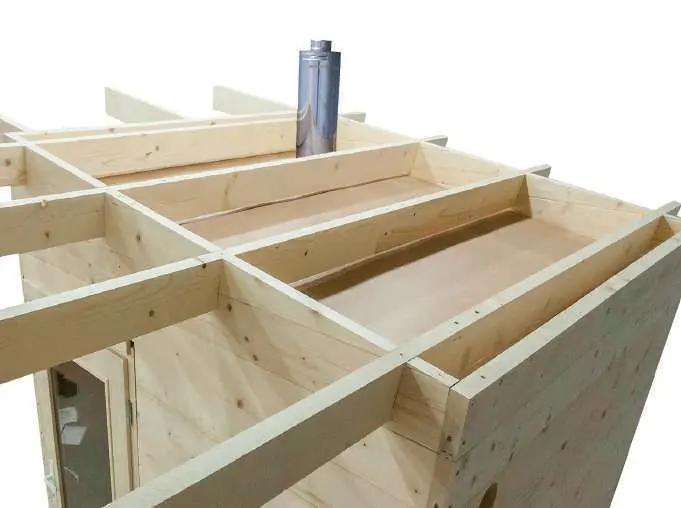
Click an image to enlargeQuick guide from the manual
The Harvia Solide Compact outdoor sauna requires two people for assembly. The wood is a natural product and may require some force to assemble. The wood is untreated, so it is recommended to paint the exterior with a wood-protective color to increase its lifespan. Roofing material is not included in the standard delivery.
Preparation and Tools
Before starting, place the parts around the building area for easy access and check the delivery content list. The following tools are required for assembly:
- Drill machine / Screwdriver
- Saws
- Hammer
- Tape measure
- Spirit level
- Knife
- Stepladders
Foundation Requirements
A solid concrete foundation is essential for durability and safety. It is recommended that the foundation be prepared by an expert. Ensure the foundation is perfectly horizontal. Use plastic or tar ribbons between the socket wood and the concrete to prevent moisture from entering the wood. The floor and terrace have 7mm wide gaps for drainage; ensure water can leak from under the floor and that the intermediate space remains clean.
Assembly Instructions
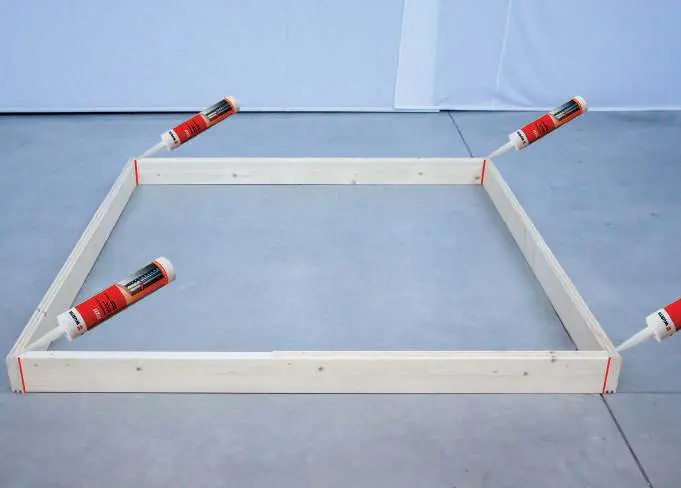
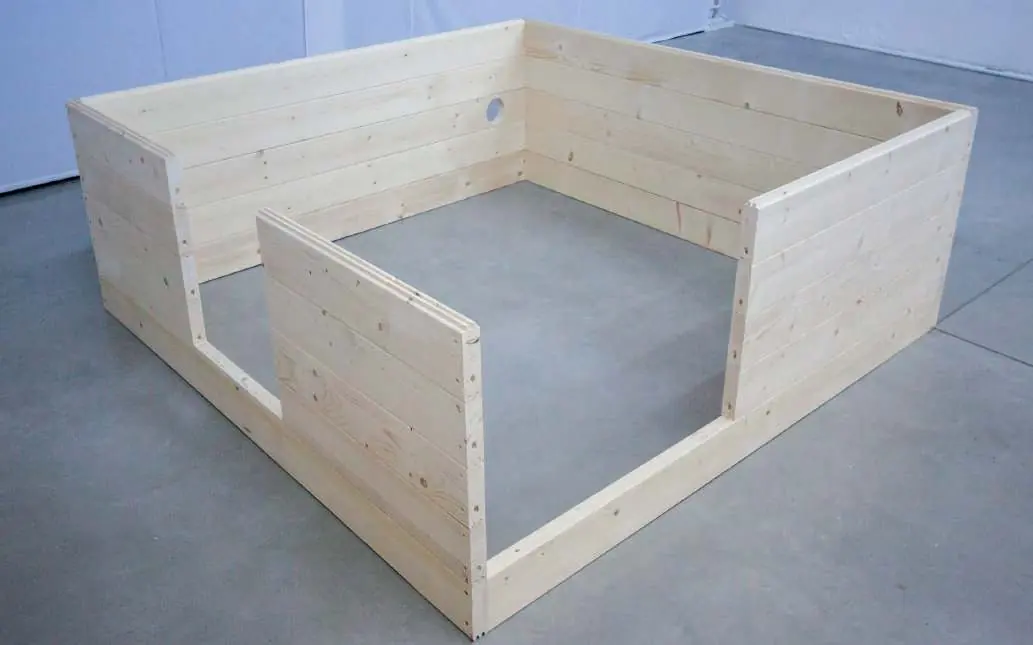
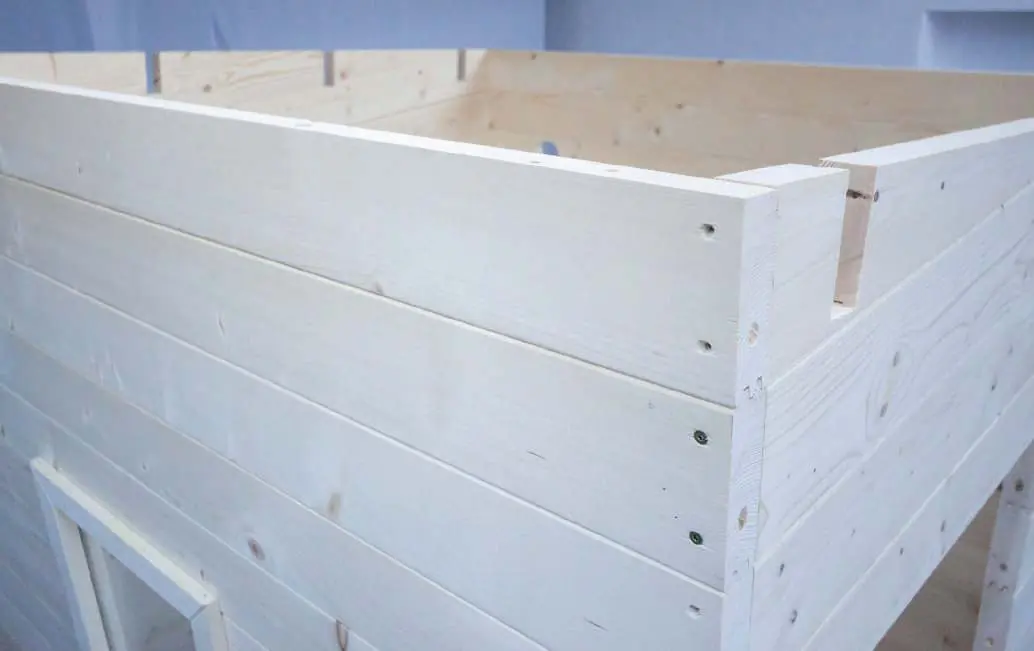
Base Frames and Walls: Lay the base frame on the foundation as shown in the floor plan. Glue the floor frames together at the corners and screw them using 5x80mm screws. Start wall assembly with the back wall, proceeding row-wise. Glue and screw the corners and hammer dowel nails into the drilled holes in every row.
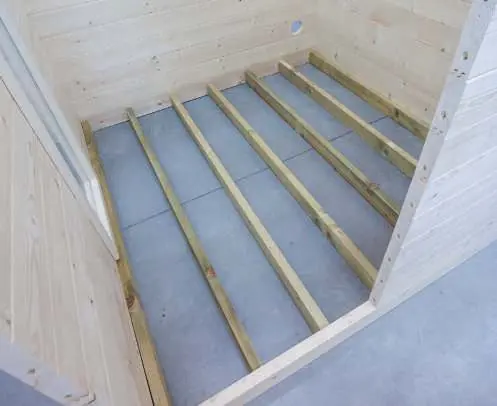

Floor: Place the waterproofed floorboards in the cabin and screw them into the base frame using the provided 7mm spacers.
Interior: Assemble the sauna stool, benches, backrest, and heater guard according to the specific steps provided in the manual.
Roof: Install the roof supporting ledges (210mm from the top edge) and insert the roof elements. Connect the rafters with screws and place them in the recesses. Attach the tongue and groove boards and wind slats as specified.
Terrace (Optional): Start by mounting the base frame with 5x80mm screws, then attach the terrace boards using 4x60mm screws.
Maintenance and Care
The wood of the outdoor sauna is untreated. To ensure longevity, paint the exterior with a suitable wood-protective color. Regularly check the foundation and drainage gaps to ensure water does not accumulate under the structure.
Manufacturer information
Harvia
Practical help
Common problems
Wood swelling or shrinking
Wood is a natural product; some force may be required during assembly.
Moisture entering wood
Use plastic or tar ribbons between socket wood and concrete foundation.
Water accumulation under floor
Ensure foundation allows water to leak from under the floor and that the intermediate space can be cleaned.
Before use
- Check delivery content against the parts list
- Prepare a solid, horizontal concrete foundation
- Have two people available for assembly
- Gather all required tools (drill, saw, hammer, etc.)
- Ensure roofing material is acquired (not included)
Specs in practice
- Foundation gap
- 7mm wide gaps in floors and terrace are designed for water drainage.
- Wood treatment
- The wood is untreated; painting the exterior is recommended for longevity.
Images and diagrams
- Floor plans show foundation layout and wall positioning.
- Assembly diagrams illustrate screw sizes and placement for each step.
Model compatibility
- Roofing material is not included in the standard delivery.
- Stove installation must follow the specific stove's installation manual.

Manual page author
David Miller
Documentation analyst
Organizes user manual content into clear summaries, with attention to model details, product context, and everyday usability.