Furniture / Tables Desks
IKEA MALM 120x41cm Dressing Table Assembly Instructions
A comprehensive assembly guide for the IKEA MALM 120x41cm dressing table, including safety warnings, hardware lists, and step-by-step installation procedures.
Table of contents
Manual images
Jump to the sectionQuick guide from the manual
This document provides assembly instructions for the IKEA MALM 120x41cm dressing table. The most critical aspect of this assembly is the mandatory wall-anchoring process to prevent furniture tip-over, which can cause serious or fatal injuries. Ensure you have the necessary tools and follow the wall-mounting steps precisely.
Safety and Warnings
- Tip-over hazard: Serious or fatal crushing injuries can occur from furniture tip-over.
- Wall anchoring: You must secure this furniture to the wall using the provided tip-over restraints.
- Usage precautions: Place the heaviest items in the lower drawer. Do not place TVs or other heavy objects on top of the product. Never allow children to climb or hang on drawers, doors, or shelves.
Assembly Preparation
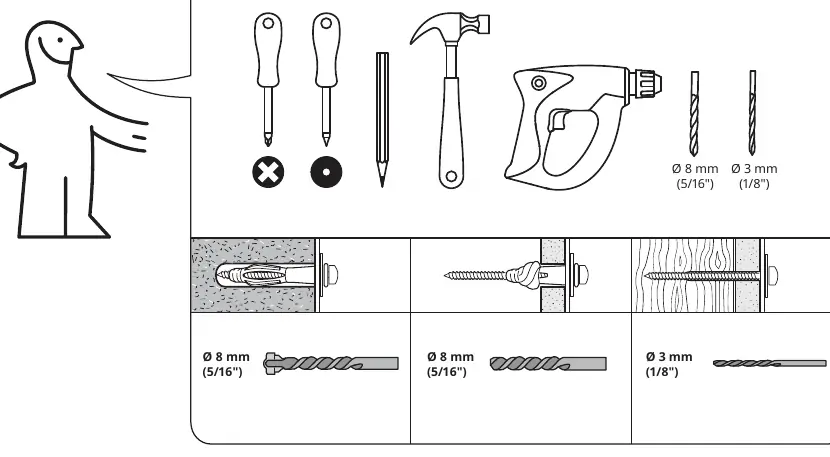
Before starting, ensure you have a clear, protected workspace (e.g., on a rug) to prevent damage to the furniture surfaces. You will need a screwdriver, a hammer, a pencil, a power drill, and drill bits (8mm for concrete/hollow walls, 3mm for solid wood).
Assembly Steps
- Prepare the main panel by inserting the provided screws using the included wrench.
- Attach the drawer runners to the side panels using the specified screws.
- Insert wooden dowels into the designated holes on the panels.
- Connect the side panels to the main structure using the provided locking mechanisms and tighten with the wrench.
- Attach the top surface and secure it using the provided brackets and screws.
- Perform the final wall-anchoring step by attaching the L-brackets to the wall, ensuring the furniture is stable and secure.
- Adjust the drawer alignment if necessary using the provided adjustment screws.
Wall Mounting Information
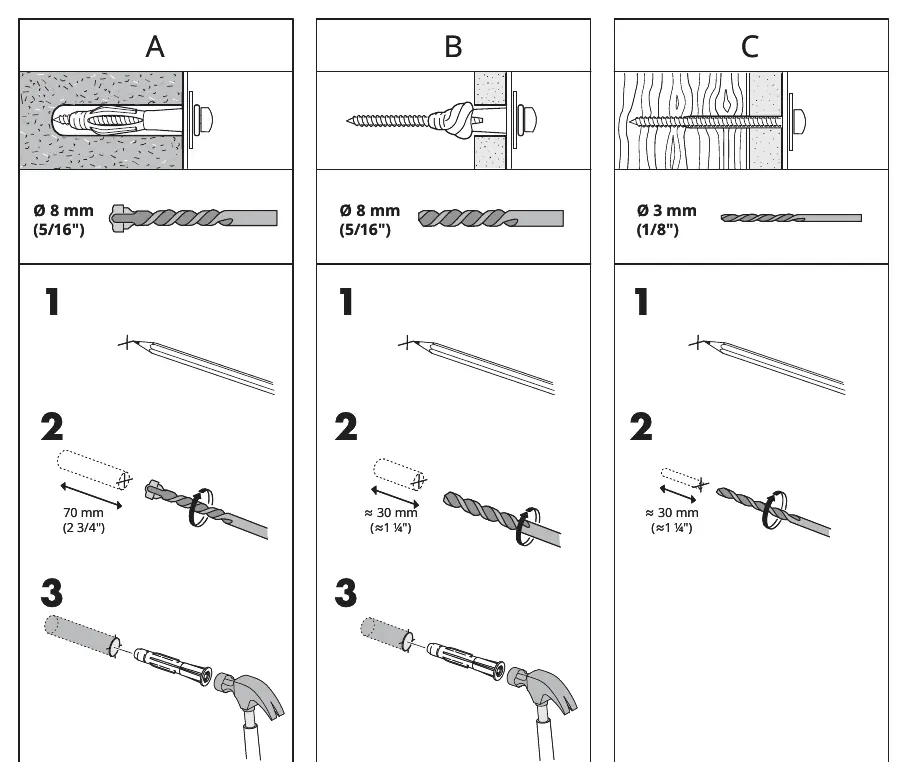
The supplied screws and plugs are suitable for most solid and hollow walls. For solid wood, use the screws without plugs. If you are uncertain about your wall type, seek professional advice.
Manufacturer information
IKEA
Practical help
Common problems
Furniture instability or tipping risk
Always use the provided wall-anchoring L-brackets to secure the unit to the wall.
Difficulty with wall mounting
Use the correct drill bit size (8mm for concrete/hollow, 3mm for wood) and ensure the wall type is compatible with the provided hardware.
Drawer misalignment
Use the adjustment screws located on the drawer runners to level the drawer.
Before use
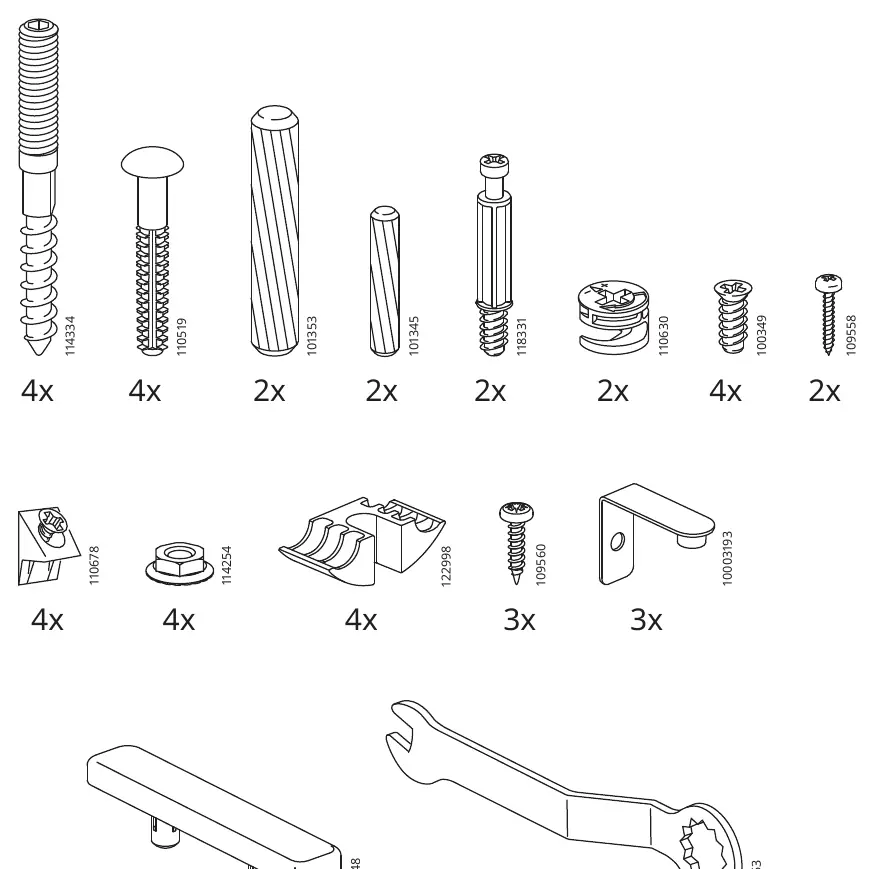
- Verify all parts and hardware listed in the manual are present.
- Prepare a soft surface (rug or carpet) for assembly to avoid scratches.
- Ensure you have a power drill, hammer, and screwdriver.
- Identify your wall type (solid, hollow, or wood) to select the correct mounting method.
- Check that the wall-anchoring kit is included.
Specs in practice
- 8mm drill bit
- Required for drilling into solid or hollow walls when using the provided wall plugs.
- 3mm drill bit
- Required for pilot holes when mounting directly into solid wood.
Images and diagrams
- The manual uses icons to indicate the need for a hammer, screwdriver, and drill.
- The 'X' symbol on diagrams indicates actions to avoid, such as assembling on hard surfaces without protection.
- The 'i' symbol indicates an adjustment step for drawer alignment.
Model compatibility
- Supplied hardware is for most solid and hollow walls.
- For solid wood walls, do not use the plastic wall plugs.

Manual page author
Emily Carter
User documentation editor
Prepares concise manual descriptions and highlights the most useful setup, operation, and maintenance information for readers.