Furniture / Home Furnishing
User Manual for Jaxsunny HGP0820 Garden Bed
Quick assembly guide for the Jaxsunny HGP0820 garden bed, including hardware lists, step-by-step installation instructions, and tips for using power tools safely during assembly.
Table of contents
Quick guide from the manual
This document provides assembly instructions for the Jaxsunny HGP0820 garden bed. Before beginning, ensure all parts are present and intact. The assembly process requires two people. If you encounter any issues, such as damaged parts or missing hardware, contact the manufacturer with your SKU number (HG61G0208) and tracking number.
Assembly requirements
- Two people are required for assembly.
- A power drill is recommended but not included.
- Check all package contents against the hardware list before starting.
Hardware list
- Parts 1, 2, 3: Main body panels.
- Part 4: Side panels (2 pieces).
- Part 5: Small side panels (4 pieces).
- Part 6: Floor panels (4 pieces).
- Part 7: Support rails (8 pieces).
- Hardware: SA3 (16 pcs), SC7 (24 pcs), SB1 (36 pcs), KB5 (5 pcs).
Assembly steps
- Step A-1 to A-4: Assemble the main body sections by attaching support rails (7) and panels (3, 2, 1, 4) using hardware KB5, SB1, and SA3.
- Step B-1 to B-7: Connect the assembled sections using SC7 screws. Ensure panels are aligned correctly. Note: When placing Part 4, ensure the wooden strip faces down and inward.
- Step B-8: Install the floor panels (6) into the base using SB1 screws.
Using a power drill
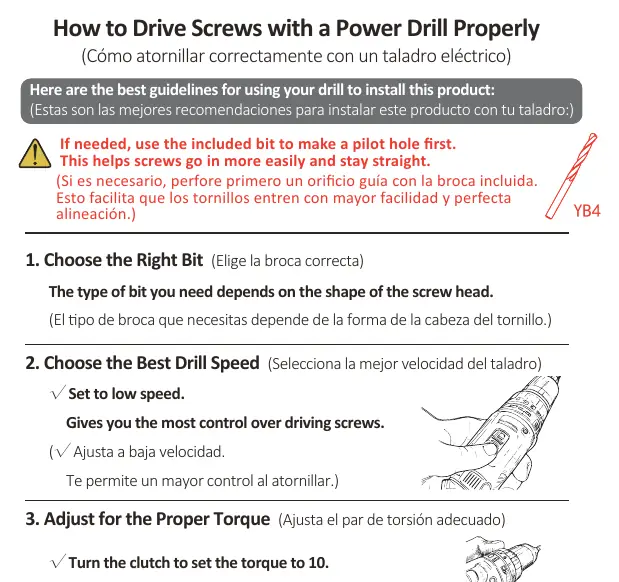
To avoid damaging the wood, follow these guidelines when using a power drill:
- Use the included bit to create pilot holes if necessary.
- Set the drill to low speed for better control.
- Adjust the clutch torque setting to 10.
- Hold the drill in a straight line with the screw and keep the bit perpendicular to the surface.
Practical help
Common problems
Outer box or product damaged upon arrival
Contact Jaxsunny customer service with your SKU and tracking number for factory-direct support.
Difficulty assembling the product
Ensure you have two people for the assembly process and follow the step-by-step instructions carefully.
Missing parts or hardware
Verify all items against the hardware list on page 2 of the manual and contact support if items are missing.
Before use
- Check that all parts are intact upon receiving the product.
- Browse the entire installation manual before beginning assembly.
- Ensure two people are available to assist with assembly.
- Confirm all hardware (SA3, SC7, SB1, KB5) is present.
- Have a power drill ready (not included) if preferred for faster assembly.
Specs in practice
- Torque setting 10
- The recommended clutch setting on a power drill to prevent over-tightening and damaging the wood.
Images and diagrams
- The manual uses numbered diagrams to identify parts (1-7) and hardware (SA3, SC7, SB1, KB5).
- Assembly steps are divided into 'A' (Preparation) and 'B' (Main Body) sequences.
- Arrows indicate the orientation and rotation (e.g., 90° or 180°) required for connecting panels.
Model compatibility
- The product is designed for assembly by two people.
- The included bit is intended for creating pilot holes to assist with screw installation.

Manual page author
Emily Carter
User documentation editor
Prepares concise manual descriptions and highlights the most useful setup, operation, and maintenance information for readers.