Electronics / Camera Monitors
User Guide for Lilliput 10X Live Streaming Camera
Comprehensive user guide for the Lilliput 10X Live Streaming Camera. Learn how to set up, configure menu settings, adjust focus, and connect via HDMI or USB-C for professional streaming.
Table of contents
Manual images
Click an image to enlargeQuick guide from the manual
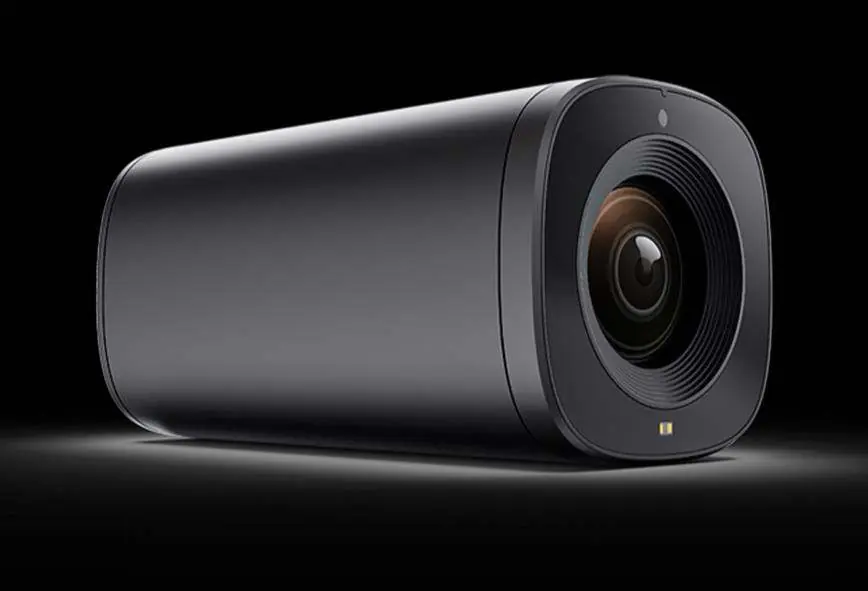
The Lilliput 10X Live Streaming Camera is designed for professional streaming, featuring a 5-megapixel CMOS sensor and 10x optical zoom. To get started, ensure the camera is placed on a stable surface or mounted securely. Connect the power supply (12V) and choose your output method: HDMI for monitors/switchers or USB-C for direct computer connection. Use the included remote control or the menu buttons on the back of the unit to navigate settings and adjust image quality.
Safety precautions
- Do not place the unit on unstable surfaces.
- Operate only on the specified supply voltage.
- Disconnect the power cord by the connector, not the cable.
- Keep the unit away from water, liquids, and metal objects.
- Do not operate in hazardous or explosive atmospheres.
- Internal servicing should only be performed by qualified personnel.
Device interfaces
The camera features several ports and controls:
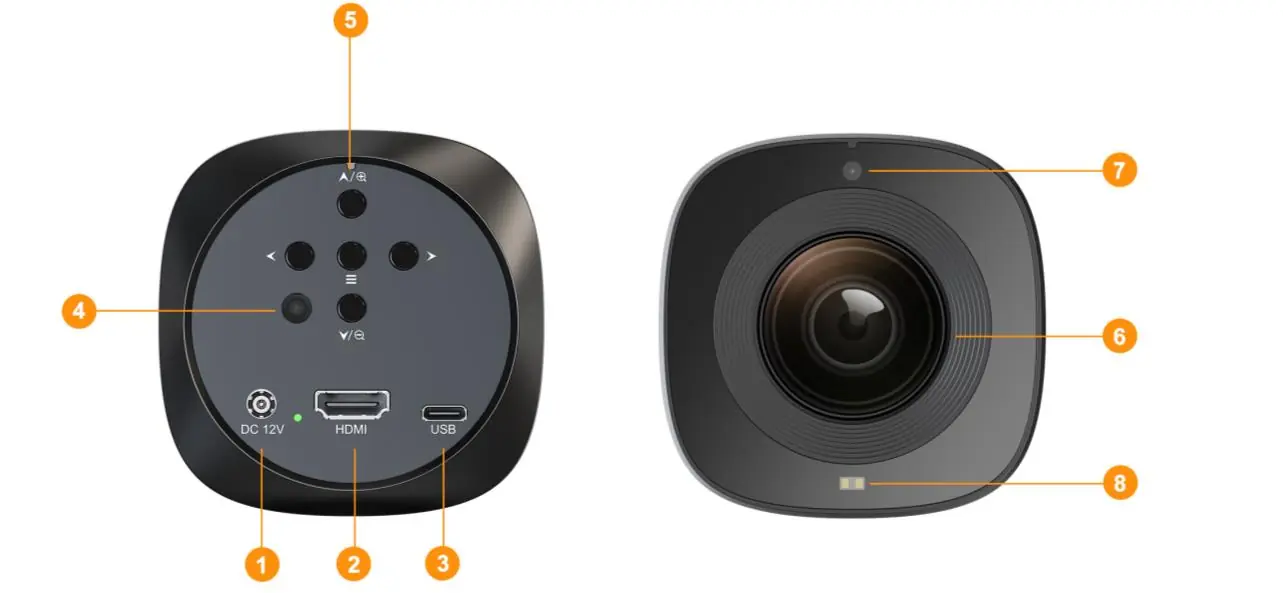
- DC 12V In: Power input.
- HDMI Out: Video output for monitors or switchers.
- USB Capture Out: USB-C connection for computer streaming.
- Rear IR Receiver: For remote control signals.
- Menu Combination Buttons: Manual control for menu navigation, zoom, and focus.
- ToF Module: Enables fast and accurate autofocus.
Remote control and menu buttons
The remote control allows for full configuration of the camera. Key functions include:
- Menu: Enter or exit the camera menu.
- Zoom +/-: Adjust zoom levels and navigate menu parameters.
- Manual Focus: Adjust focus manually.
- AE: Select exposure mode (AE, AE Lock, Custom).
- AF: Select focus mode (AF, AF Lock, Manual).
- AWB: Select white balance mode.
- Style: Choose preset image styles (Meeting, Beauty, Jewel, Fashion, Custom).
- FN: Set or recall preset positions.
Menu settings
Access the main menu to fine-tune your video output:
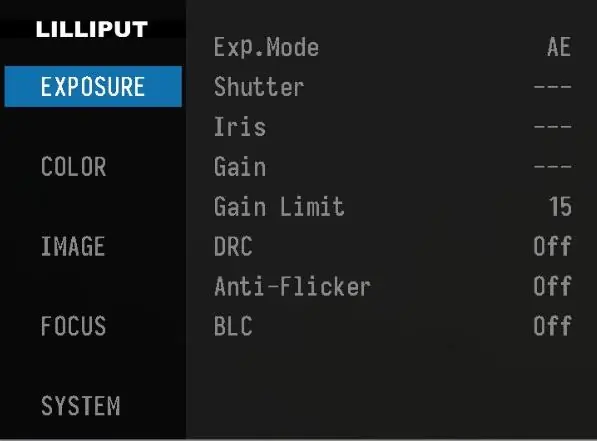
- Exposure: Adjust shutter speed, iris, gain, gain limit, DRC, anti-flicker, and BLC.
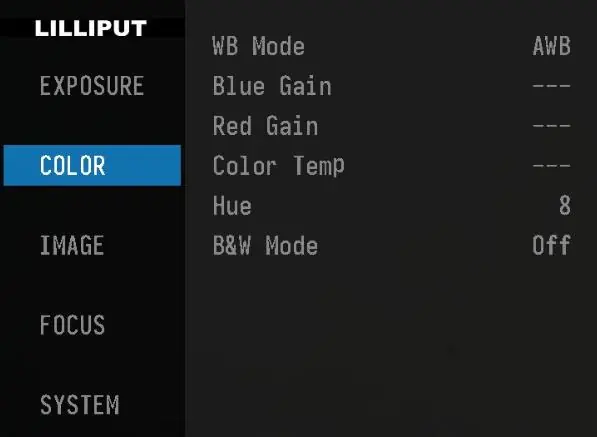
- Color: Fine-tune white balance, red/blue gain, color temperature, hue, and B&W mode.
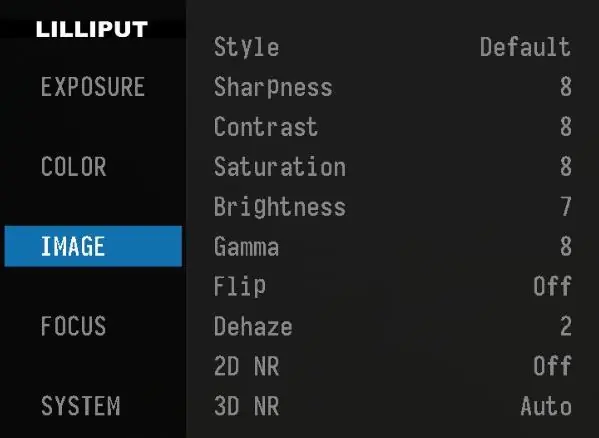
- Image: Select styles, adjust sharpness, contrast, saturation, brightness, gamma, and noise reduction (2D/3D NR).
- Focus: Configure focus mode, zoom speed, ToF focus activation, and magnification display.
- System: Manage language, video format, camera ID, OSD direction, and factory resets.
Video outputs and OBS setup
The camera supports HDMI and USB-C outputs. For USB-C streaming on a PC:
- Connect the camera to your computer via USB-C.
- Open OBS Studio.
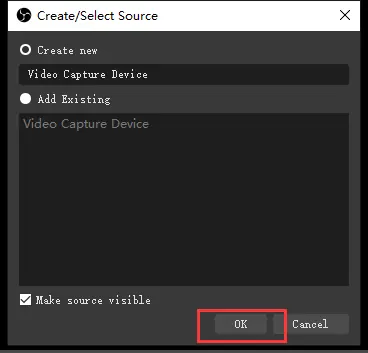
- Click the '+' icon and select 'Video Capture Device'.
- Rename the source and click OK.
- Right-click the new source, select 'Properties', and choose 'USB TOF CAMERA' as the device.
Practical help
Common problems
No video signal in OBS
Ensure the USB-C cable is securely connected and the camera is powered on. Check that the correct device ('USB TOF CAMERA') is selected in OBS properties.
Image is blurry or out of focus
Check if ToF focus is enabled in the menu. Ensure the subject is within the focus distance range (30cm to 150cm+).
Remote control not responding
Ensure the camera ID is configured correctly in the menu and matches the remote settings. Check for obstructions between the remote and the IR receiver.
Before use
- Verify power supply is 12V.
- Ensure a stable tripod or mounting surface is used.
- Connect HDMI or USB-C cable based on your setup.
- Install OBS or relevant streaming software on your PC.
- Check that the camera lens is clean.
Specs in practice
- 10X Optical Zoom
- Allows for high-quality magnification without digital image degradation.
- ToF Autofocus
- Time-of-Flight technology for fast, accurate focusing even in low light.
Images and diagrams
- The rear panel contains the DC power input, HDMI port, USB-C port, and menu navigation buttons.
- The front panel houses the lens, ToF module, and front IR receiver.
Model compatibility
- Compatible with Windows, Mac, and Android operating systems.
- Supports standard UVC (USB Video Class) for plug-and-play functionality.

Manual page author
Michael Turner
Technical manual editor
Reviews PDF manuals for structure, safety notes, and practical product details so readers can find the right information quickly.