Electronics / Monitors
User Manual for Lilliput 12G-SDI Broadcast Monitor
A comprehensive user guide for the Lilliput 12G-SDI broadcast monitor. This manual provides instructions on setup, menu navigation, 3D LUT loading, troubleshooting, and technical specifications.
Table of contents
Manual images
Click an image to enlargeQuick Guide from the Manual
This guide provides essential information for operating the Lilliput 12G-SDI broadcast monitor. Before use, ensure the device is connected correctly. Use the provided 15V/4A DC adapter and avoid blocking vent holes. For long-term storage or during thunderstorms, disconnect the power and remove any batteries.
Product Description
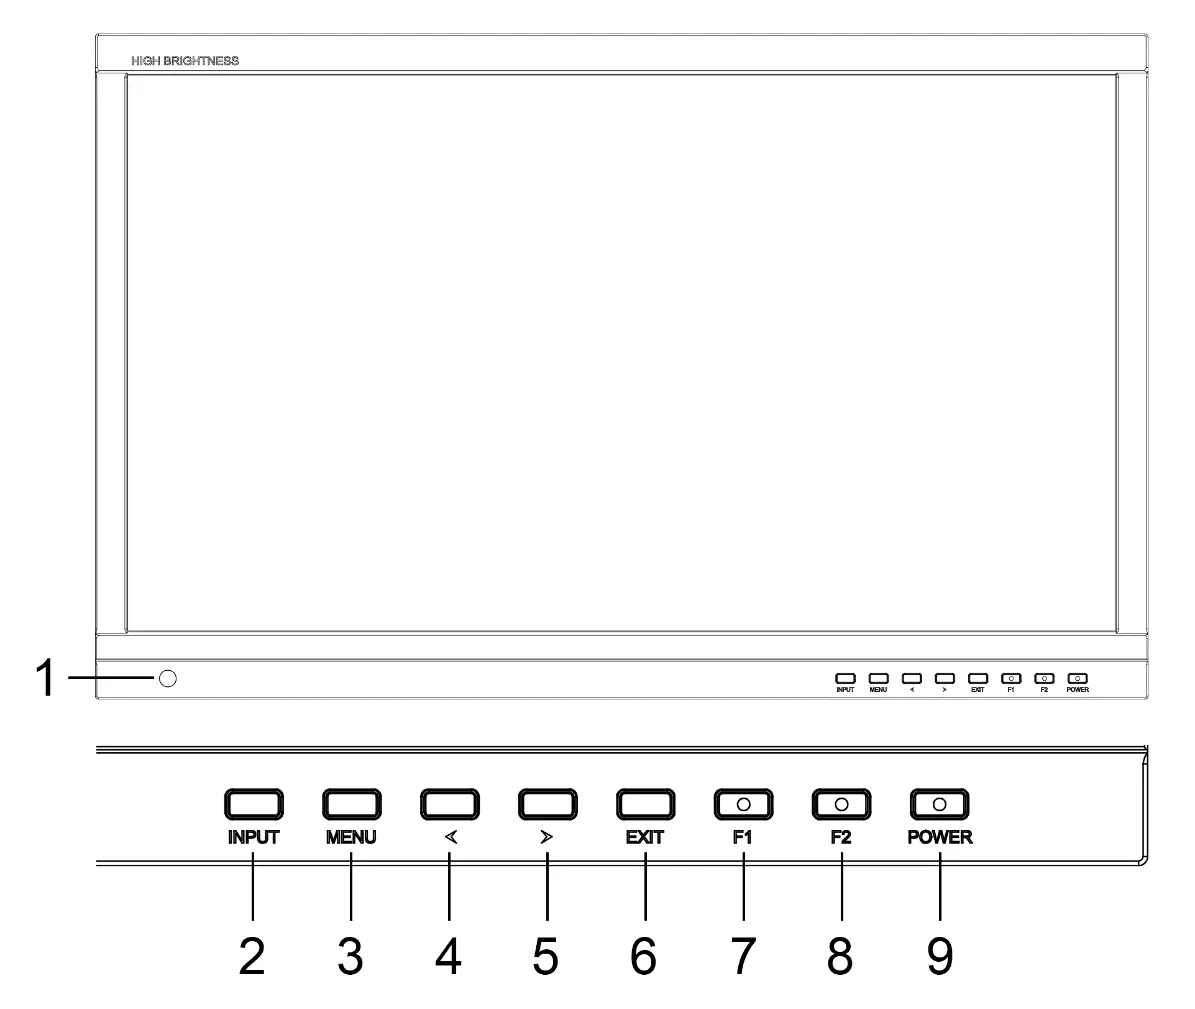
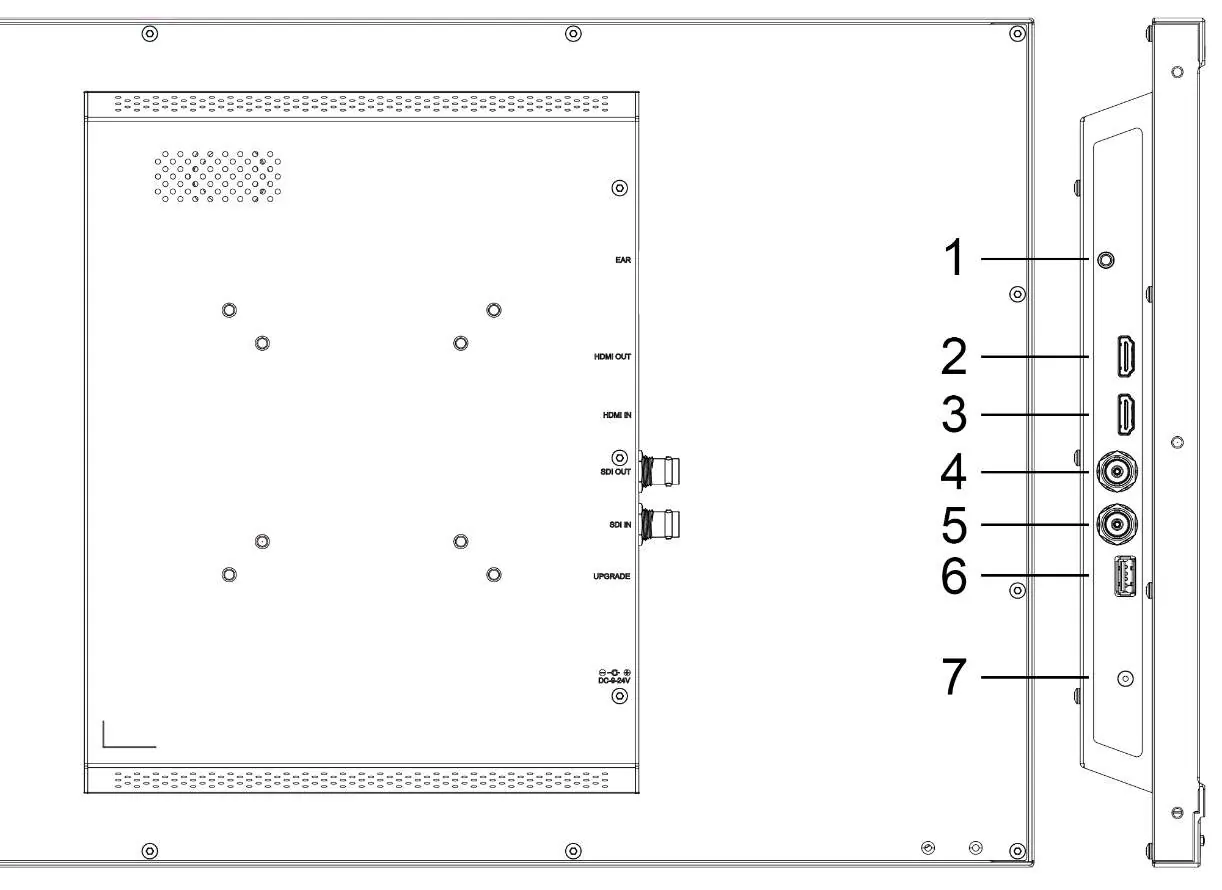
The monitor features a high-brightness 21.5-inch screen. The front panel includes a light sensor and control buttons: Input, Menu, Left, Right, Exit, F1, F2, and Power. The rear panel houses the interfaces: Earphone jack, HDMI 2.0 Input/Output, 3G-SDI Input/Output, USB port for upgrades/LUTs, and DC Power Input (9V-24V).
Installation
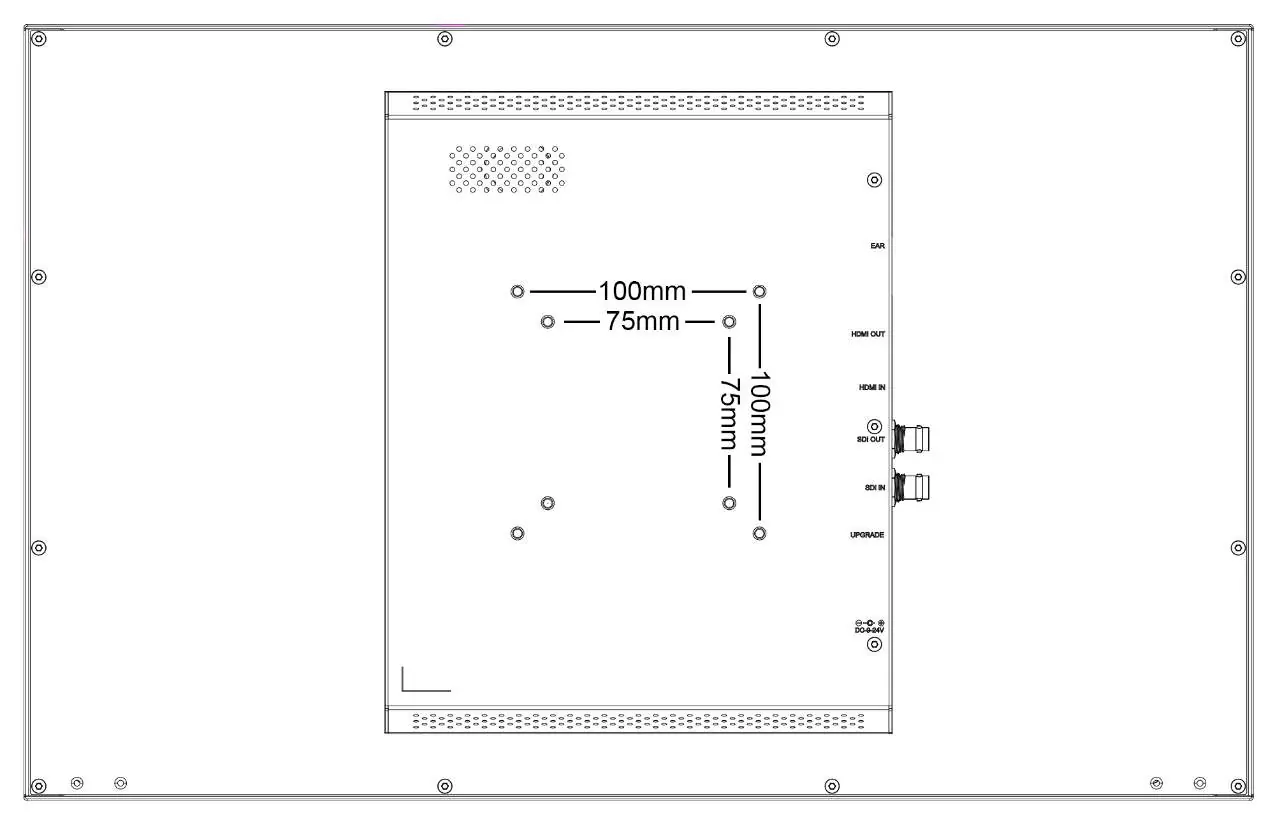
The monitor supports standard VESA mounting. The 75mm x 75mm pattern is used for external batteries (V-mount/Anton Bauer), while both 75mm x 75mm and 100mm x 100mm patterns are compatible with external hanging brackets.
Menu Operations
Access the OSD menu by pressing the Menu button. Navigate using the Left/Right buttons and confirm selections with the Menu or Exit buttons. Key settings include:
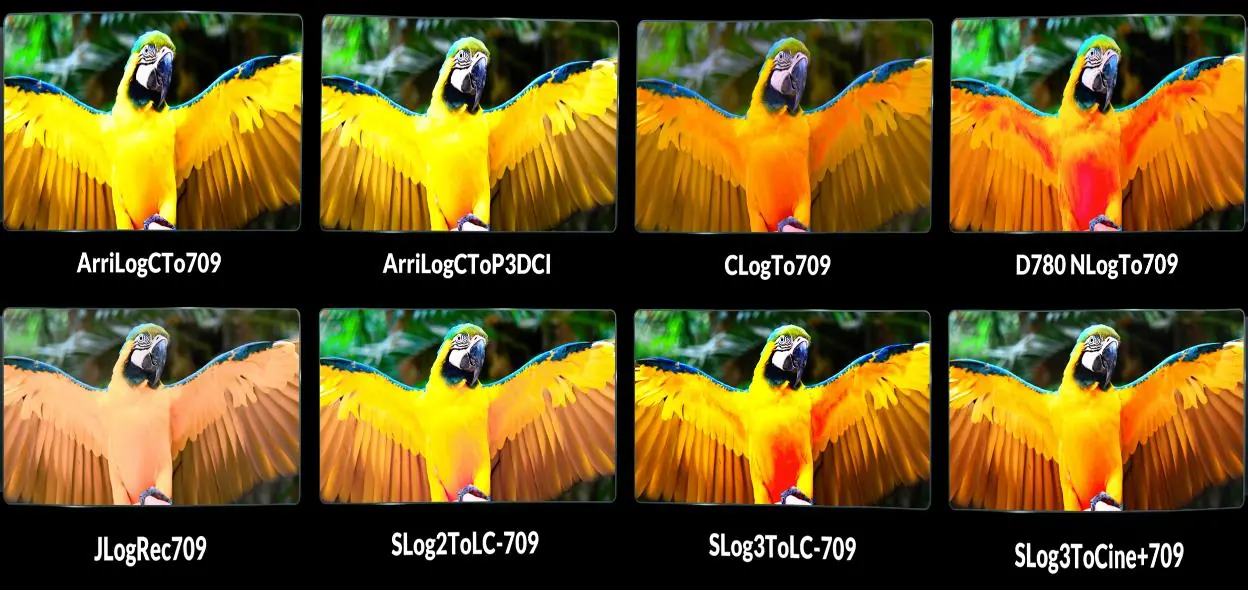
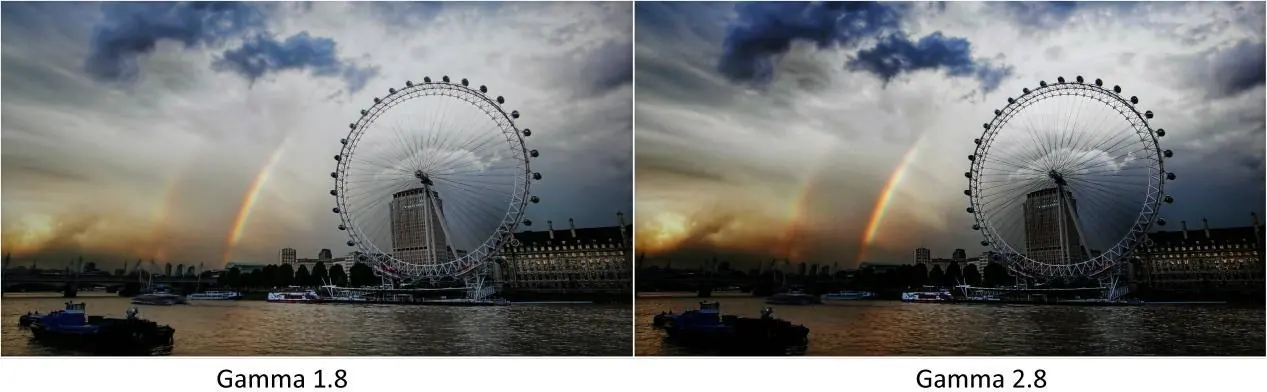
- Picture: Adjust Brightness, Contrast, Saturation, Tint, Sharpness, Backlight, RGB Range, HDMI EDID, Color Space, and Camera Log.
- Marker: Configure Center Marker, Aspect Marker, Safety Marker, and marker colors/thickness.
- Function: Adjust Scan mode, Aspect ratio, Anamorphic de-squeeze, Overscan, H/V Delay, Check Field, Zoom, and Freeze.
- Waveform: Enable Waveform (Y/YCbCr/RGB), Vector, Histogram, Peaking, False Color, and Exposure tools.
- Audio: Control Volume, Mute, Level Meter, and select Audio Channels.
- System: Set Language, Color Bar, OSD Timer, Color Calibration, and Reset settings.
3D LUT Loading
To load custom 3D LUTs or color calibration files:
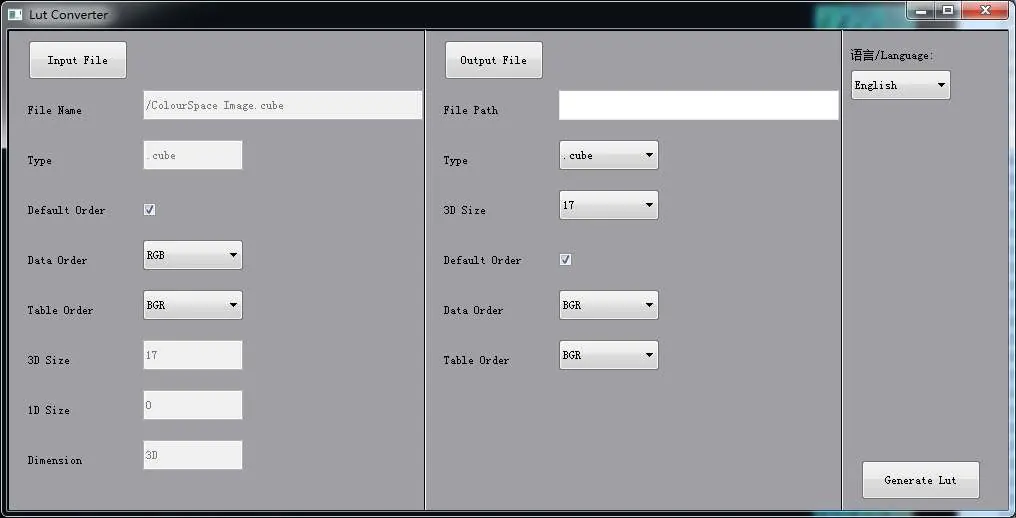
- Ensure the file is in .cube format (17x17x17 or 33x33x33 size, BGR data/table order).
- Copy the file to the root directory of a FAT32 formatted USB 2.0 flash disk (max 16G).
- Plug the USB into the monitor's USB port.
- The device will prompt for an update; confirm to proceed.
Troubleshooting
- Black-and-white display: Check if color saturation is set correctly.
- No picture: Verify SDI/HDMI cable connections and ensure the standard power adapter is used.
- Abnormal colors: Check for loose or broken cable pins.
- Size error: Navigate to MENU -> FUNCTION -> Overscan to adjust.
- System issues: Perform a reset via MENU -> SYSTEM -> Reset.
Practical help
Common problems
Only black-and-white display
Check if the color saturation is properly set.
Power on but no picture
Verify that SDI/HDMI cables are correctly connected and use the standard power adapter provided with the product.
Wrong or abnormal colors
Ensure cables are properly connected and check for broken or loose pins.
Picture size error
Go to MENU -> FUNCTION -> Overscan to zoom in/out automatically.
General system issues
Perform a factory reset by selecting MENU -> SYSTEM -> Reset -> On.
Before use
- Read the user guide and safety precautions.
- Ensure the device is connected correctly before setting functions.
- Use the standard 15V/4A DC adapter provided.
- Do not block any vent holes.
- Unplug the power and remove the battery if the device will not be used for a long time or during thunderstorms.
Specs in practice
- Viewing Angle
- 178°/178° (H/V) for consistent image quality from various angles.
Images and diagrams
- Front Panel: Contains the light sensor and buttons for Input, Menu, Navigation, Exit, F1/F2, and Power.
- Rear Panel: Features the Earphone jack, HDMI 2.0 In/Out, 3G-SDI In/Out, USB port, and DC Power input.
- VESA Mount: Supports 75x75mm and 100x100mm mounting patterns.
Model compatibility
- Supports standard 3G-SDI and HDMI 2.0 input/output.
- 3D LUT loading requires a USB 2.0 flash disk formatted in FAT32 (size <16G).
- User Log files must be in .cube format.

Manual page author
David Miller
Documentation analyst
Organizes user manual content into clear summaries, with attention to model details, product context, and everyday usability.