Furniture / Trade Show Displays
Lookourway 10ft SEG Backlit Trade Show Display Assembly Instructions
Assembly guide for the Lookourway 10ft SEG Backlit Trade Show display. Includes step-by-step frame assembly, power connection, graphic installation, and care instructions.
Table of contents
Manual images
Click an image to enlargeQuick guide from the manual
This guide provides instructions for assembling the Lookourway 10ft SEG Backlit Trade Show display. Before starting, ensure you have a clear workspace and all components listed below. The assembly involves constructing the frame, connecting the power supply, and installing the silicone edge graphic.
Parts List
- Profile Bar w/ LED Stripe (x6)
- Profile Bar w/ Cable (x2)
- Profile Bar without Cable (x2)
- Inner Strut (x7)
- Base Plate (x2)
- Bottom Connector (x2)
- Side Connector (x4)
- Corner Connector (x2)
- Middle Cross Connectors (x2)
- Connecting Cable (x4)
- Power Supply w/ Device Plugin (x2)
- Soft Travel Case
- Graphic
Assembly Instructions
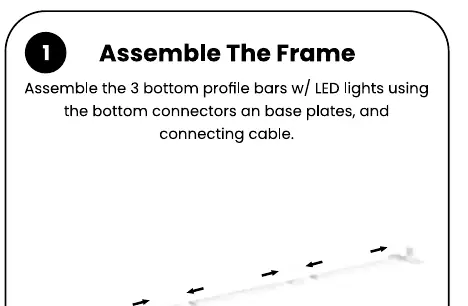
Step 1: Assemble the 3 bottom profile bars with LED lights using the bottom connectors and base plates. Connect the cables.

Step 2: Add a Profile Bar with Cable to each side of the display. Attach 2 Inner Struts to the lower half of the assembly.
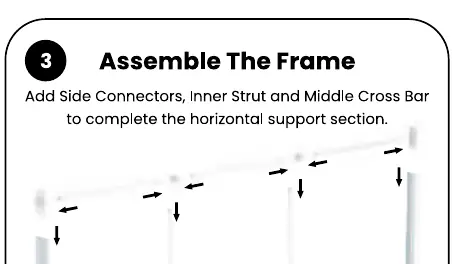
Step 3: Add Side Connectors, Inner Strut, and Middle Cross Bar to complete the horizontal support section.
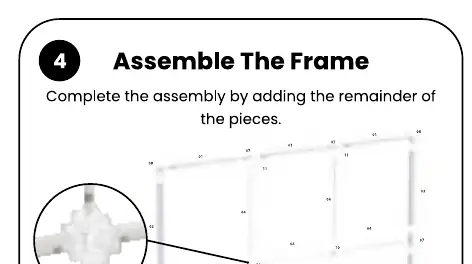
Step 4: Complete the frame assembly by adding the remaining pieces.
Power Connection
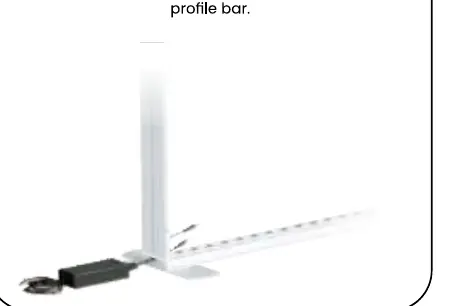
Step 5: Connect the power supply to the bottom of the profile bar.
Graphic Installation
Step 7: Install the graphic by firmly pushing the silicone edge into the channel on the front of the frame. Maintain tension on the graphic as you work down each side to ensure the fabric reaches the end.

Storage & Care
Store the unit in a cool, dry location. Clean the hardware with a damp cloth. Machine wash the graphics in cold water on a gentle cycle. Air dry only. Use a steamer to remove wrinkles. Never dry-clean the graphics.
Manufacturer information
LookOurWay, LLC
Practical help
Common problems
Wrinkles in the graphic
Use a steamer to remove wrinkles. Do not dry-clean.
Graphic does not fit or is loose
Ensure you maintain tension on the graphic while pushing the silicone edge into the channel, working down each side evenly.
Dirty hardware
Clean the hardware using only a damp cloth.
Before use
- Verify all 13 parts are present according to the parts list.
- Ensure you have a clear, flat area for assembly.
- Check that the power supply is available for the backlit feature.
- Ensure the graphic is clean and free of wrinkles before installation.
Images and diagrams
- Steps 1-4 illustrate the sequential assembly of the frame structure using connectors and struts.
- Step 5 shows the connection point for the power supply at the base of the profile bar.
- Step 7 demonstrates the technique for inserting the silicone edge of the graphic into the frame channel.
Model compatibility
- Graphics must be machine washed in cold water on a gentle cycle.
- Graphics must be air dried only.

Manual page author
David Miller
Documentation analyst
Organizes user manual content into clear summaries, with attention to model details, product context, and everyday usability.