Furniture / Trade Show Displays
LookOurWay 10X20ft Trade Show Booth Display
Assembly guide for the LookOurWay 10X20ft Trade Show Booth Display (H and K models). Includes step-by-step instructions for frame assembly, fabric banner installation, shelving, TV mount, and LED lighting setup.
Table of contents
Manual images
Click an image to enlargeQuick Guide from the Manual
This manual provides assembly instructions for the LookOurWay 10X20ft Trade Show Booth Display, covering both H and K variants. The assembly process involves connecting the frame, sliding on the fabric banners, installing the header, feet, shelves, and optional accessories like TV mounts and LED lights.
Frame Assembly
The frame is constructed using poles connected by push buttons. Ensure all poles are connected according to the labels provided on the components.
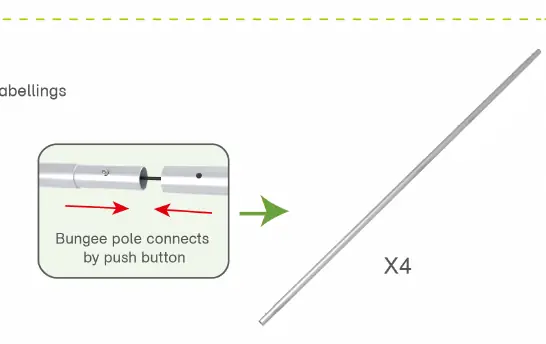
- Step 01: Connect the poles by aligning the push buttons until they click into place.
- Step 02: Connect the long poles using the corner pieces, ensuring they are aligned according to the labels.
Banner Installation
Once the frame is assembled, the fabric banner can be applied.
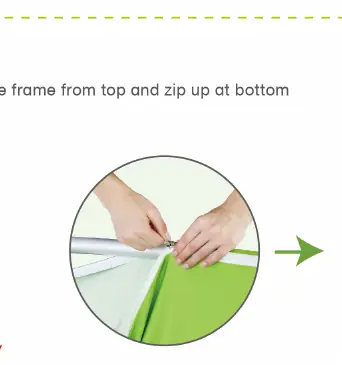
- Step 03: Slide the fabric banner over the frame from the top. Zip the banner closed at the bottom to secure it. Repeat this process for the remaining back walls.
Booth Set Assembly
This section covers the assembly of the complete booth structure.
- Step 01: Use the C-clip and Allen Key to fasten the header onto the backwall.
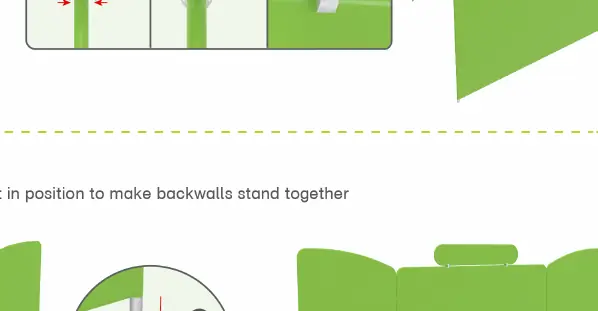
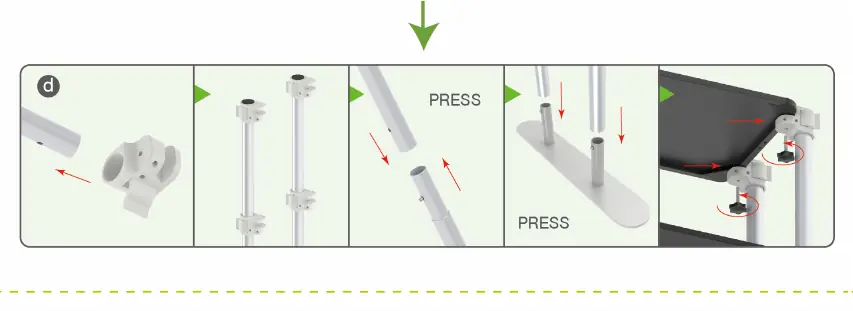
- Step 02: Install the "double-head" feet at the base of the backwalls to ensure they stand together securely.
- Step 03: Install the shelves by attaching the shelf brackets to the frame and securing them in position.
- Step 04: Place the C-clip into the gap between the backwalls and fasten using the provided screws.
Accessories Installation
Optional components can be added to the booth structure.
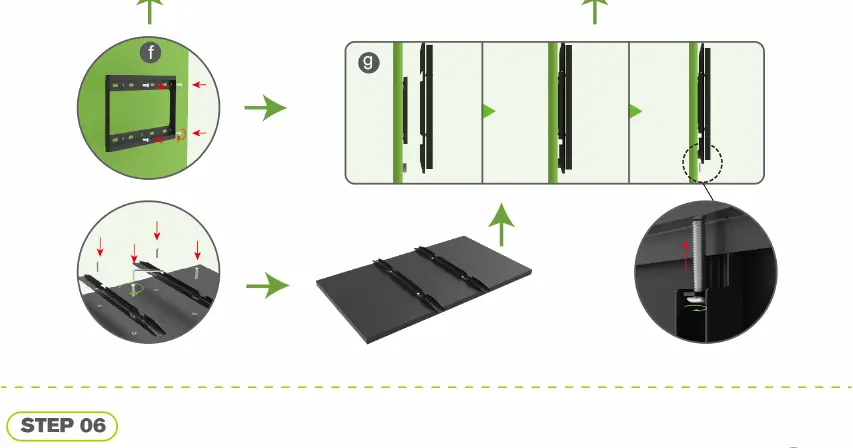
- Step 05 (TV Mount): Attach the TV mount bracket to the frame, then secure the TV mount assembly in position.
- Step 06 (LED Light): Attach the LED light clips to the top of the frame and mount the LED lights.
Manufacturer information
LookOurWay, LLC
Practical help
Common problems
Poles not connecting
Ensure the push button is fully depressed and aligned with the hole in the connecting pole.
Banner not fitting
Ensure the banner is pulled all the way down from the top before attempting to zip it at the bottom.
Before use
- Verify all poles are present and labeled correctly.
- Check that all fabric banners are clean and free of tears.
- Ensure all C-clips, screws, and Allen keys are included in the hardware kit.
- Confirm the floor area is level for the booth setup.
Images and diagrams
- Push button mechanism: Press the button to release or lock the pole connection.
- C-clip fastening: Used to join backwall sections together for stability.
- Zip closure: Used at the bottom of the fabric banner to secure it to the frame.
Model compatibility
- The assembly instructions provided are applicable to both 10X20ft-Booth-H and 10X20ft-Booth-K models.

Manual page author
Emily Carter
User documentation editor
Prepares concise manual descriptions and highlights the most useful setup, operation, and maintenance information for readers.