Garden / Garden Structures
Assembly Instructions for Mercia 8x6 Shiplap Shed 01DTSHRAX0806SDNW-V1
Comprehensive assembly guide for the Mercia 8x6 Shiplap Shed (01DTSHRAX0806SDNW-V1). Includes step-by-step installation, parts list, timber maintenance, and warranty information.
Table of contents
Manual images
Click an image to enlargeQuick Guide
Important: This building should be erected by at least two adults. Before starting, ensure you have a clear, dry area and all necessary tools. Always pre-drill all screw holes to prevent the timber from splitting. It is essential to apply a wood preservative and waterproof treatment immediately after assembly and annually thereafter to maintain the anti-rot guarantee.
Preparation and Location
Choose a location with a minimum of 60cm clearance around the perimeter to allow for maintenance and air flow. Avoid placing the building under large trees to prevent damage from falling branches or debris.
Base Requirements: The base must be level and firm to prevent distortion. Recommended types include:
- Concrete: 75mm laid on top of 75mm hard-core.
- Slabs: Laid on 50mm of sharp sand.
The floor should be at least 25mm above the surrounding ground level to avoid flooding.
Assembly Instructions
The building can be configured as an Apex or Reverse Apex. Ensure all transportation blocks are removed from the bottom of each panel before assembly.
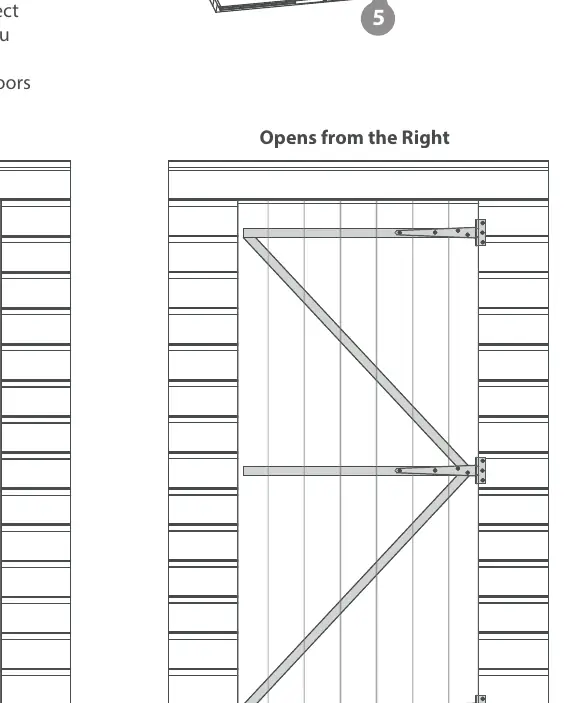

Step 1: Door Assembly
Fix the T-hinges to the door and door panel. Ensure the door is positioned correctly based on whether you want it to open from the left or right.
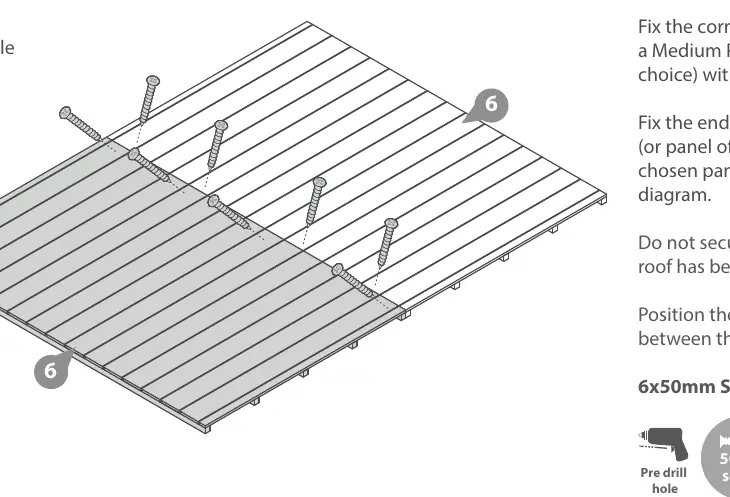
Step 2: Floor and Wall Installation
Place floor panels on the prepared base and secure them together using 50mm screws. Assemble the wall panels (Large Plain, Medium Plain, Small Plain) by fixing them at the corners with 50mm screws. Do not secure the building to the floor until the roof is fitted.
Step 3: Gable and Ridge Bar
Place the gable tops centrally over the panels. Install the ridge bar between the gable tops using L-brackets and 20mm screws.
Step 4: Roof and Felt
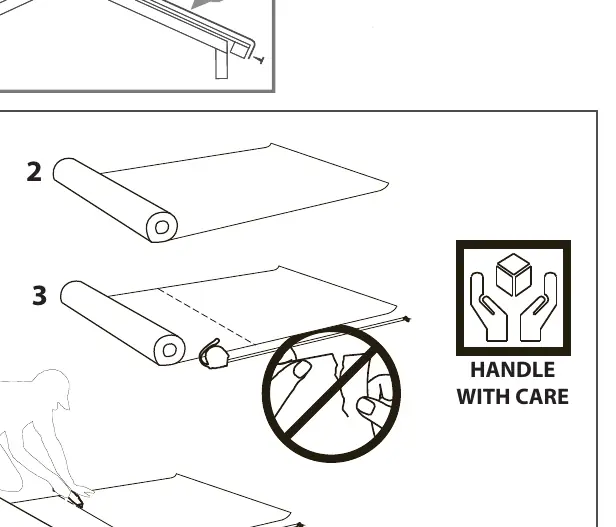
Fix the roof panels to the ridge bar and gable tops using 60mm screws. Ensure the roof panels are flush with the outer cladding. Once the roof is fixed, secure the building to the floor framing. Apply the roofing felt, cutting it to size with a 50mm overhang, and secure with felt tacks spaced 100mm apart.
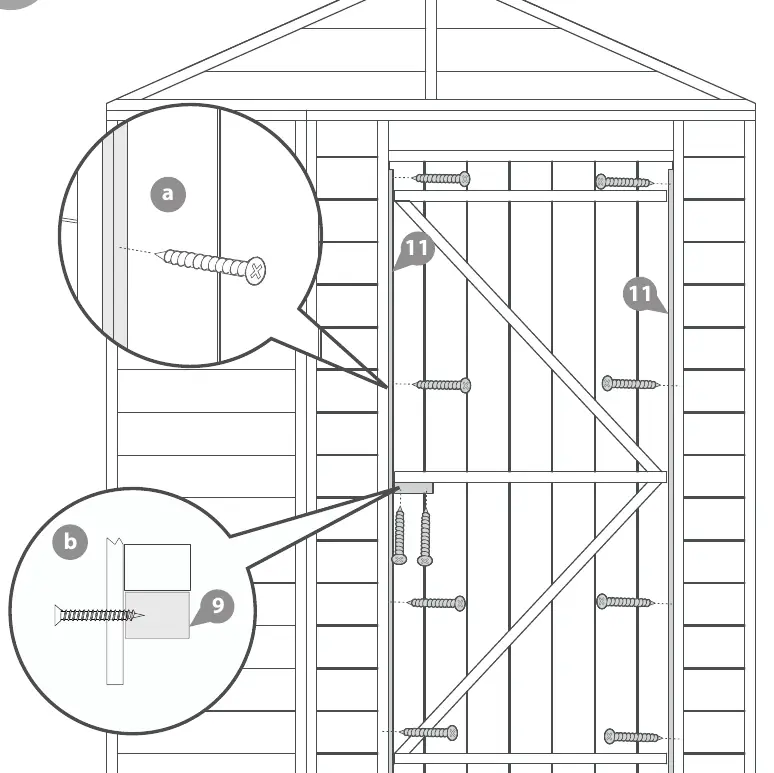
Step 5: Finishing Touches
Attach cover trims over joins and corners. Install fascias and finials to the roof. Finally, attach door blocks, the padbolt, and turn buttons to the door panel.
Maintenance and Care
Timber is a natural material and may expand or contract with weather conditions. During dry spells, spray the building with water to help manage moisture. If splinters occur, use gloves when handling. Annual treatment with a preservative and waterproof coating is mandatory to prevent rot and decay.
Warranty Information
Mercia Garden Products offers a 10-year anti-rot guarantee on dip-treated products and 15 years on pressure-treated products. The warranty is void if the building is modified, not maintained according to instructions, or if the timber is cut/drilled without subsequent treatment.
Practical help
Common problems
Timber swelling or warping
This is a natural process. Spray with water during extended dry spells and shelter during heavy rain or snow.
Splinters on timber surfaces
Wear gloves when handling rough sawn timber.
Water ingress
Ensure the building is treated annually with a waterproof treatment and that the roof felt is correctly installed.
Before use
- Check the pack and ensure all parts are listed.
- Gather tools: Phillips screwdriver, Stanley knife, wood saw, step ladder, hammer, and drill with 2mm bit.
- Ensure a level, firm base is prepared.
- Verify 60cm clearance around the building perimeter.
- Ensure two adults are available for assembly.
Specs in practice
- Overall Dimensions
- 1905mm (Width) x 2432mm (Depth) x 2222mm (Height)
- Base Dimensions
- 2350mm (Width) x 1753mm (Depth)
Images and diagrams
- Step 1: Shows T-hinge placement on the door panel.
- Step 2: Illustrates floor panel connection using 50mm screws.
- Step 9: Details roof panel alignment with the ridge bar and gable tops.
- Step 12: Demonstrates felt cutting and tacking sequence.
- Step 15: Shows installation of door beading strips and door blocks.
Model compatibility
- Requires annual preservative and waterproof treatment to maintain anti-rot guarantee.
- Not suitable for placement under large trees.
- Floor must be at least 25mm above ground level.

Manual page author
Emily Carter
User documentation editor
Prepares concise manual descriptions and highlights the most useful setup, operation, and maintenance information for readers.