Furniture / Home Furnishing
Assembly Guide for Hokku Designs 10x6FT Chicken Coop
Comprehensive assembly instructions for the Hokku Designs 10x6FT chicken coop, including a full parts list, step-by-step construction diagrams, and installation tips.
Table of contents
Manual images
Jump to the sectionProduct Overview
The Hokku Designs 10x6FT chicken coop is a spacious, outdoor enclosure designed to provide a secure environment for poultry. The structure features a durable metal frame, wire mesh walls, and a protective canopy. This guide provides all necessary steps to assemble the unit from the provided components.
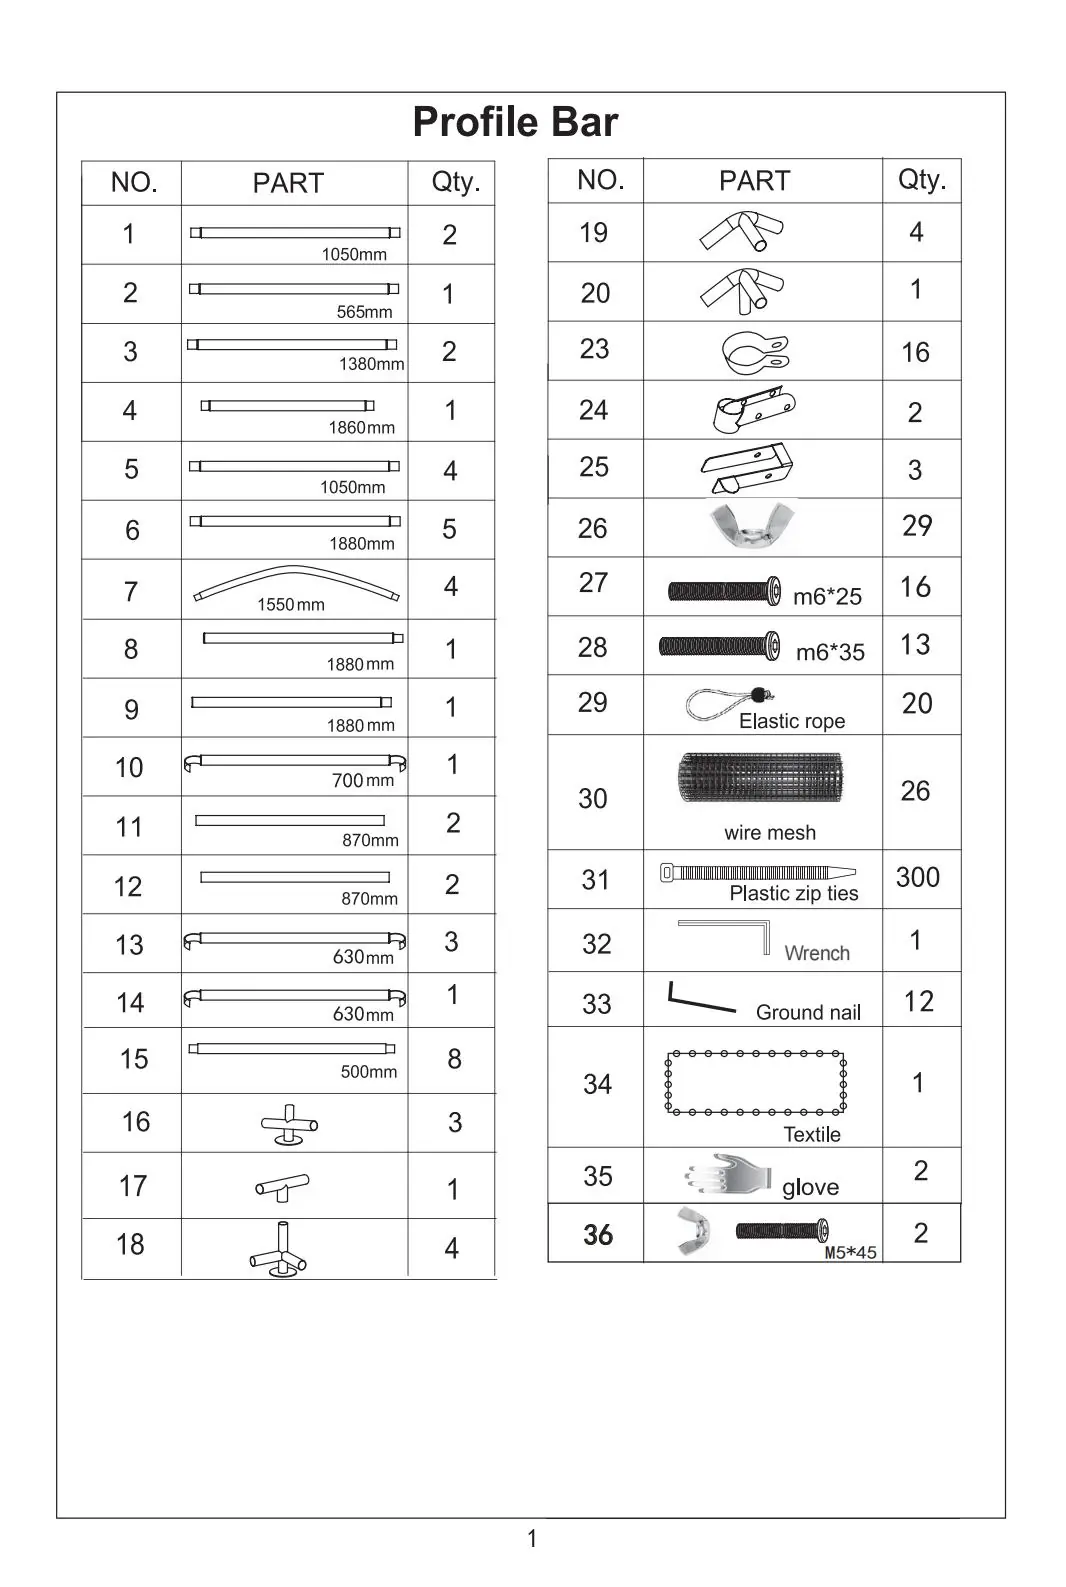
Parts and Components
Before beginning assembly, verify that all parts are present according to the provided parts list. Key components include various lengths of profile bars (numbered 1-15), connectors (16-20, 23-25), screws, nuts, wire mesh, elastic ropes, and a protective textile cover. A wrench and gloves are included to assist with the assembly process.
Assembly Instructions
The assembly process is divided into 11 logical steps:
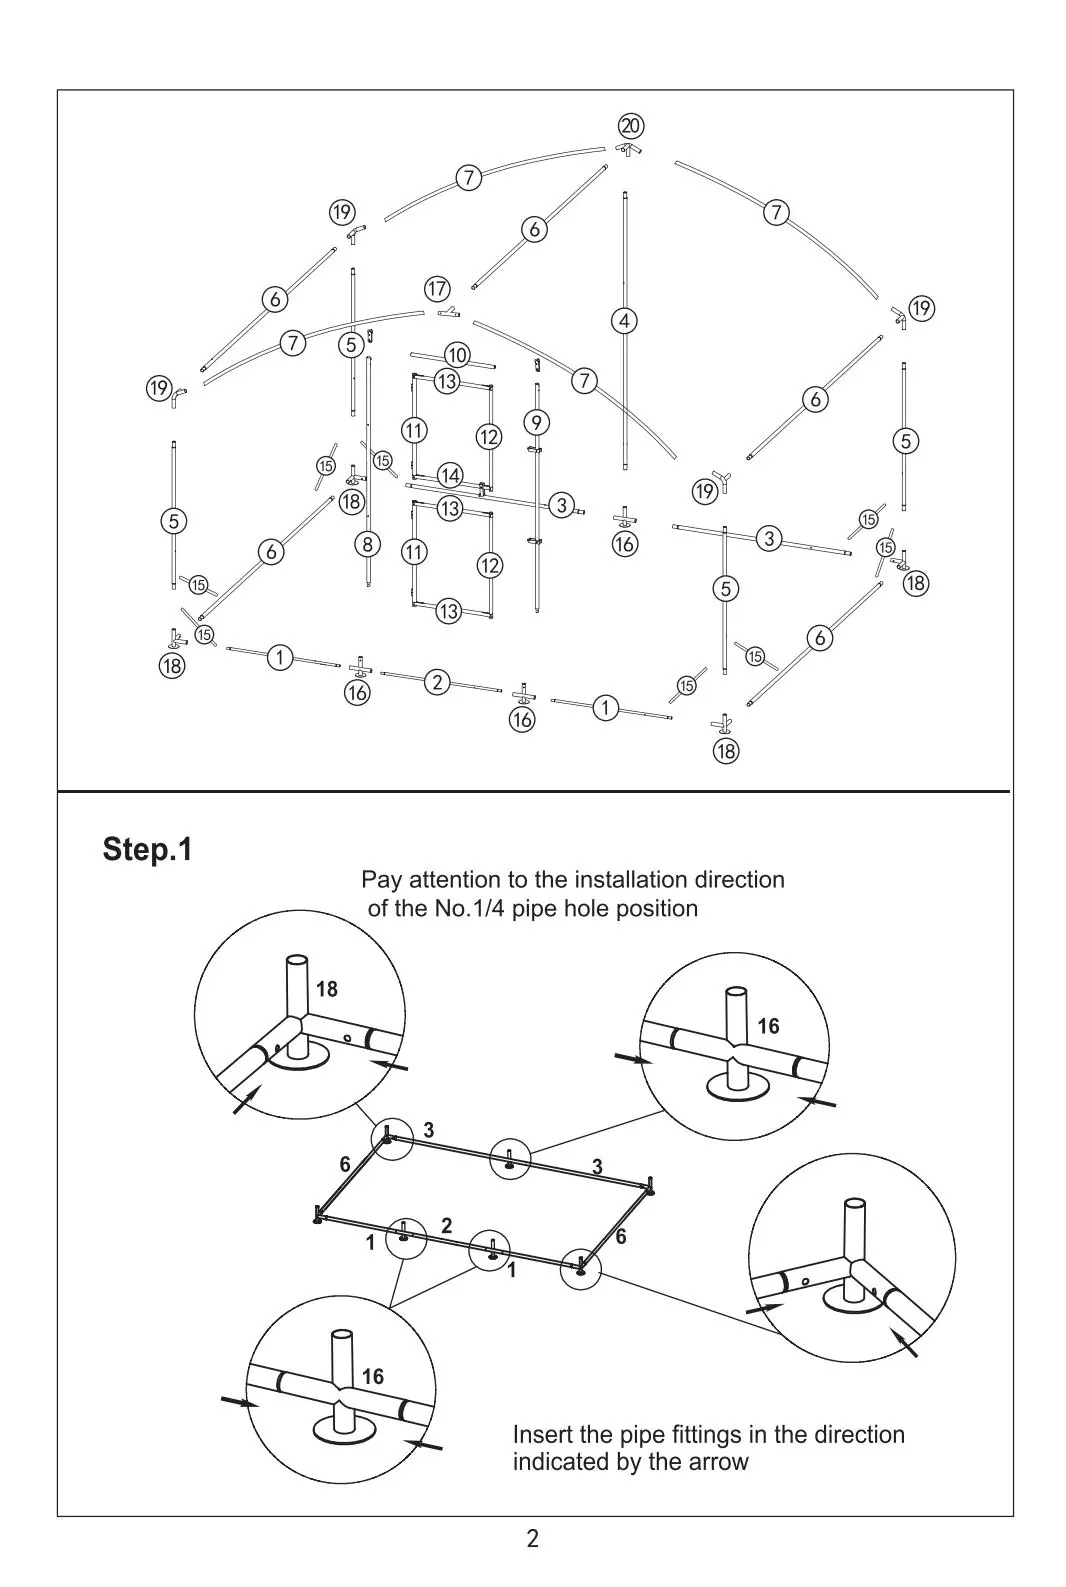


- Frame Base: Start by assembling the base frame using the specified profile bars and connectors. Pay close attention to the orientation of the pipe holes.
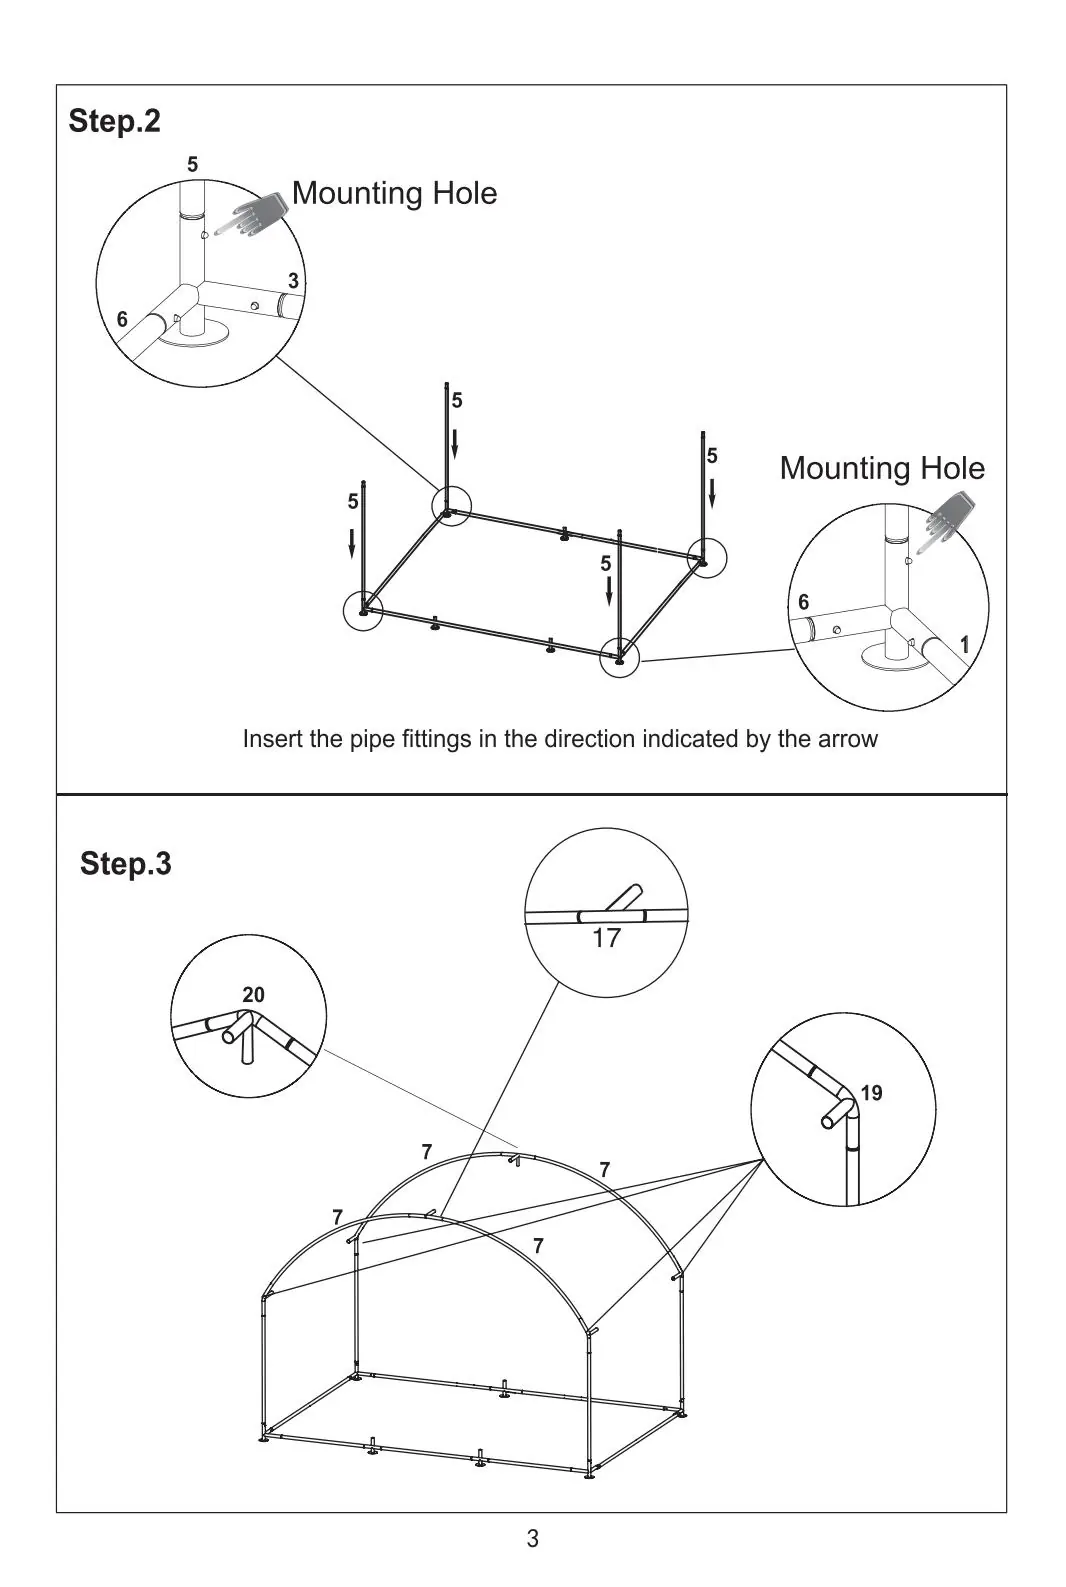
- Vertical Supports: Install the vertical support pipes into the base frame.
- Arch Construction: Assemble the arched roof structure using the curved profile bars and appropriate connectors.
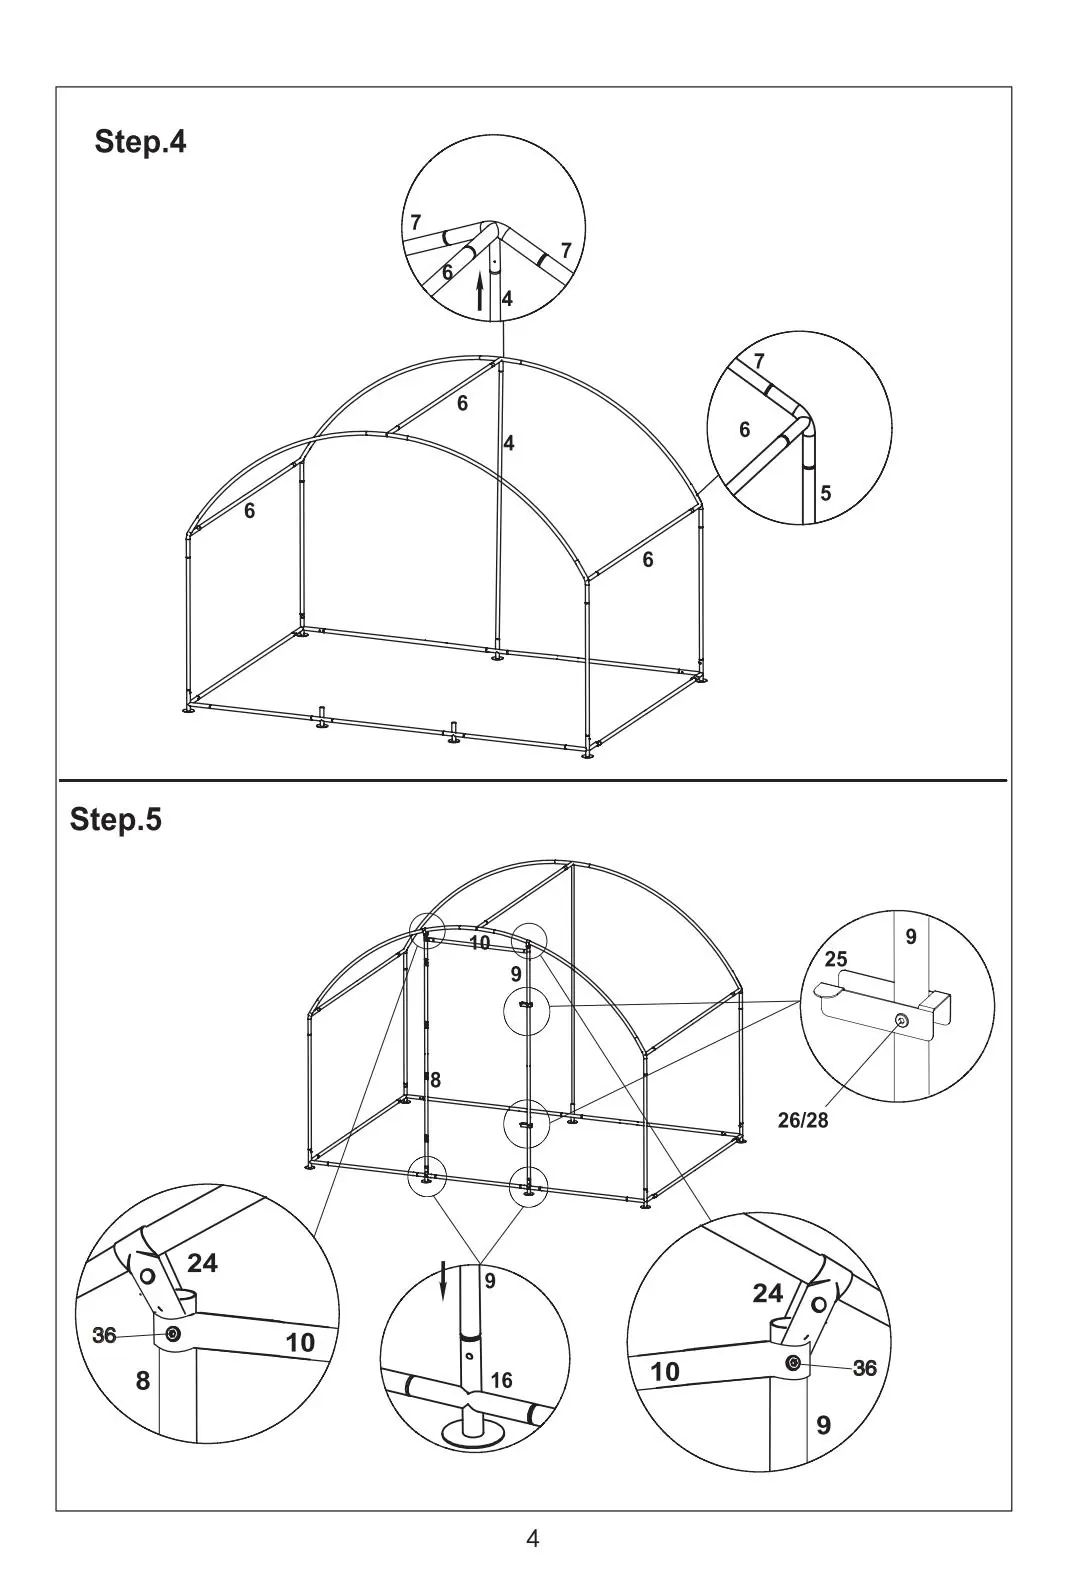
- Roof and Door Frame: Complete the upper frame structure and install the door frame components.
- Wire Mesh Installation: Attach the wire mesh to the frame. Note that the mesh may need to be cut to size based on the actual dimensions of the coop.
- Canopy and Final Fixation: Secure the protective textile cover using the provided elastic ropes. Finally, anchor the coop to the ground using the included ground nails to ensure stability.
Customer Support
If you encounter any issues during assembly or have questions, please contact the customer service team. You can reach them via email at [email protected] or by phone at 3022415039 / 6605538327. Support is available 24 hours via the after-sales mailbox.
Practical help
Common problems
Difficulty fitting pipes
Ensure you are following the installation direction indicated by the arrows in the diagrams, specifically for pipe hole positions.
Wire mesh does not fit perfectly
The wire mesh is provided in a standard length; please cut it according to the actual size of your assembled chicken coop.
Before use
- Verify all parts against the 'Profile Bar' list (36 items total).
- Ensure you have the included wrench and gloves ready.
- Check that the ground surface is level before starting assembly.
- Confirm the orientation of pipe holes before inserting connectors.
Images and diagrams
- Step 1-2: Focus on base frame orientation and pipe hole alignment.
- Step 5: Details the door frame and connector assembly.
- Step 10: Illustrates the wire mesh application.
- Step 11: Shows the canopy attachment and final ground anchoring.

Manual page author
Emily Carter
User documentation editor
Prepares concise manual descriptions and highlights the most useful setup, operation, and maintenance information for readers.