Furniture / Home Furnishing
User Manual for Salus Saunas Ally, Compose, and Festive Steam Saunas
Quick guide for assembling and operating Salus Saunas Ally, Compose, and Festive steam saunas. Includes installation steps, control panel instructions, and safety guidelines.
Table of contents
Manual images
Click an image to enlargeQuick Start Guide
This manual covers the assembly and operation of Salus Saunas Ally, Compose, and Festive steam sauna models. Before beginning, ensure you have a dry, level location. The stove requires a dedicated 240VAC/1PHASE (30/40AMP) circuit, and the sauna control system requires a 120VAC 15AMP circuit. Installation must be performed by 2-3 adults depending on the model. All electrical work must be completed by a certified electrician.
Assembly Instructions
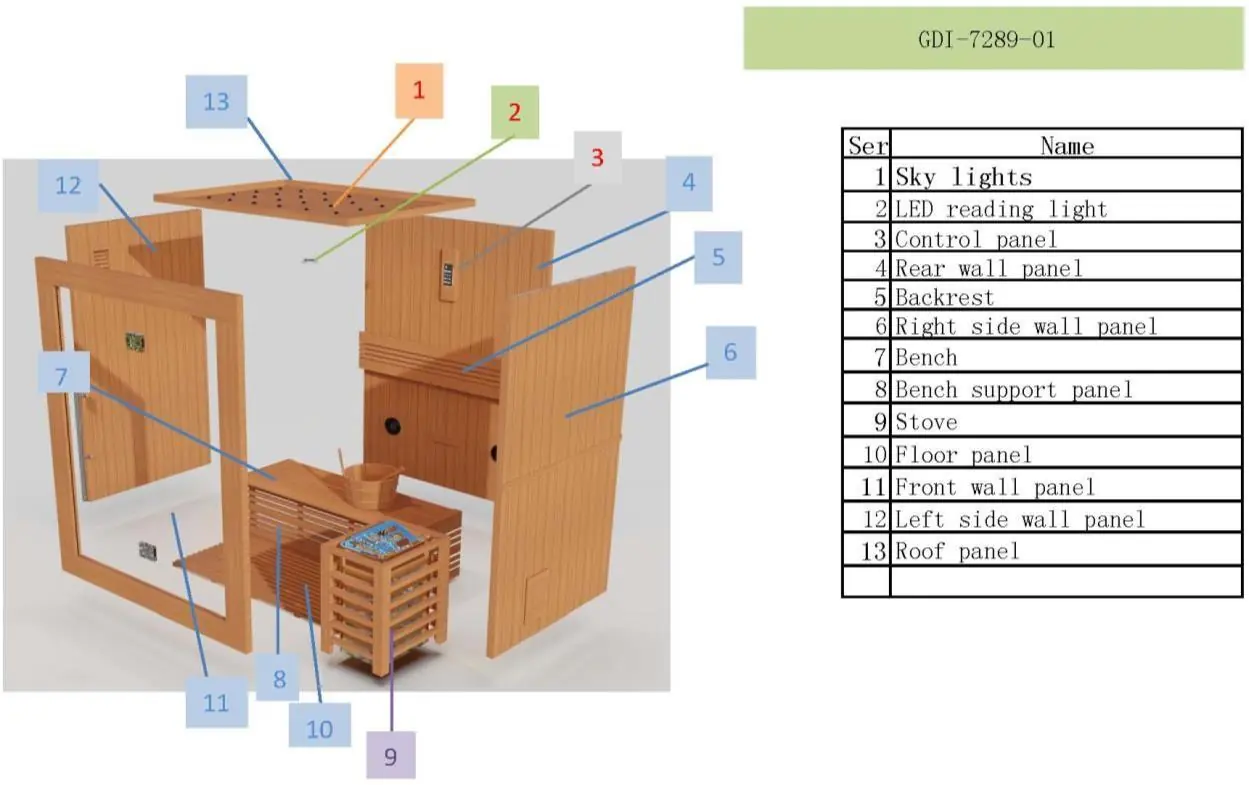
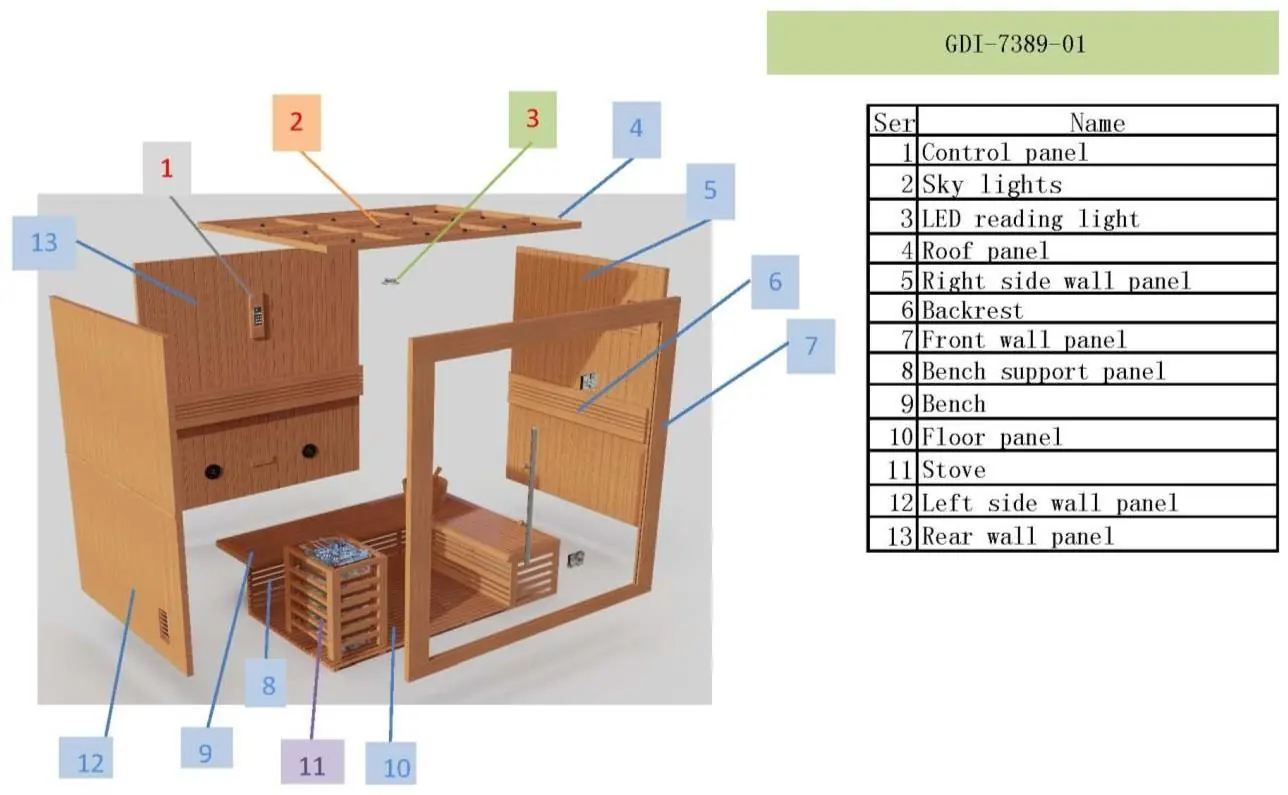
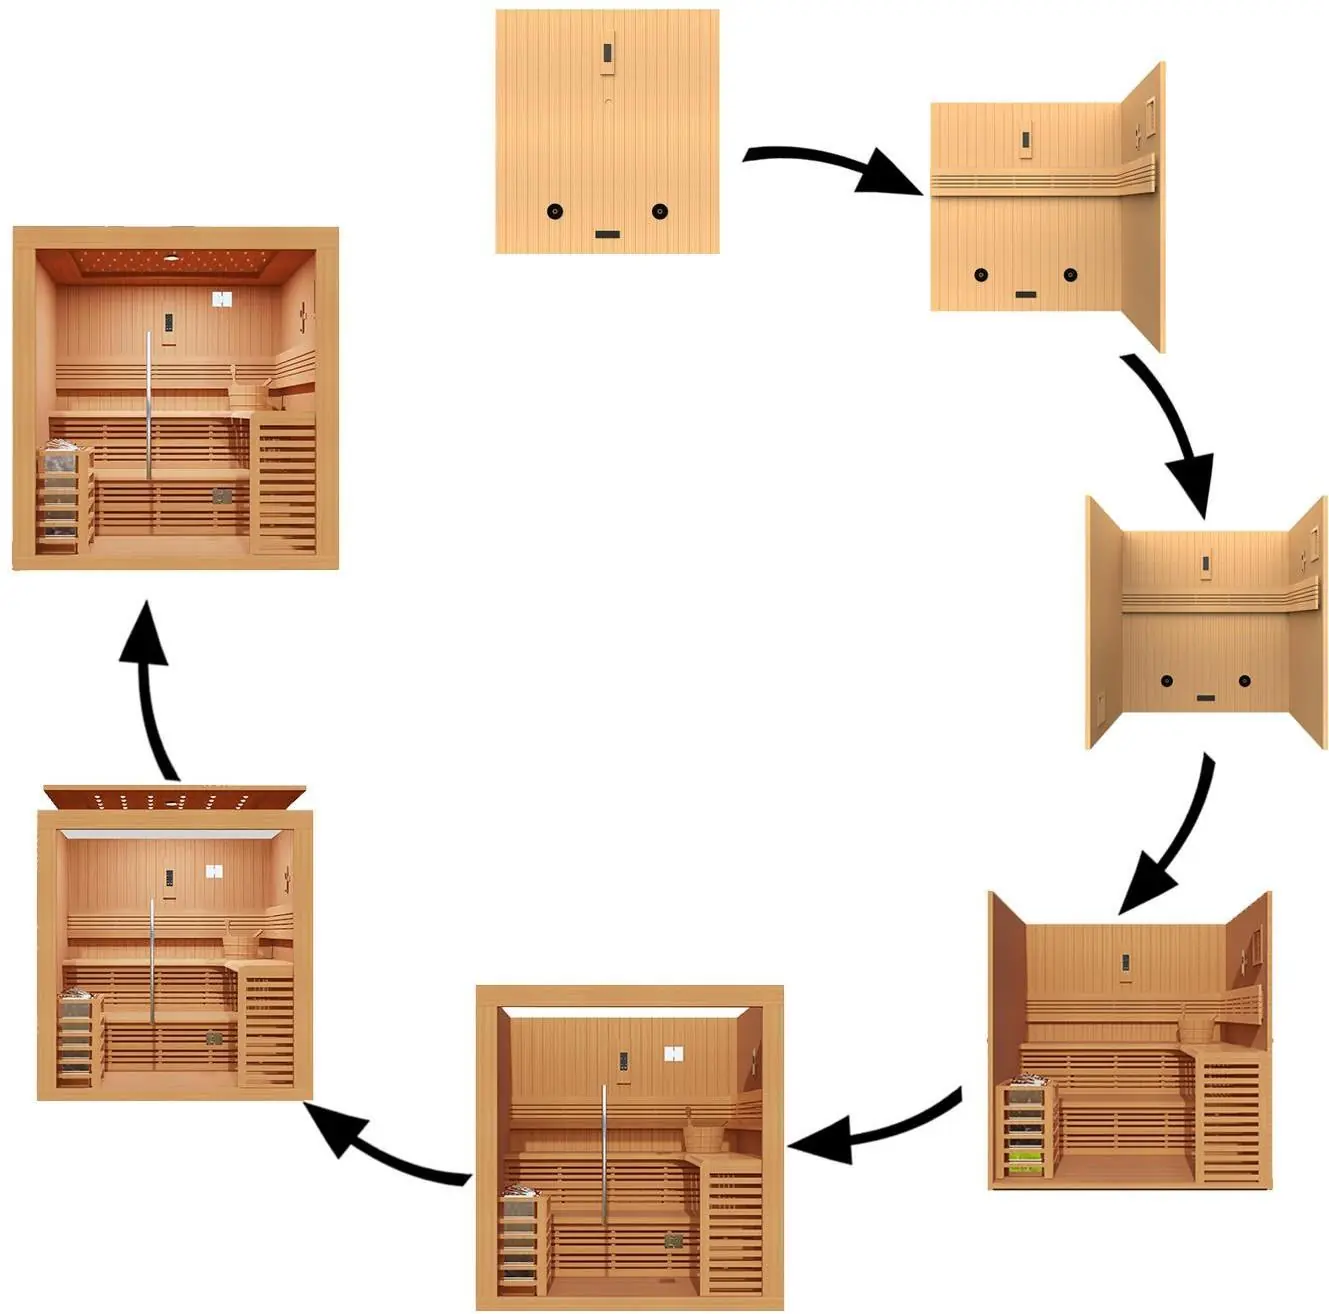
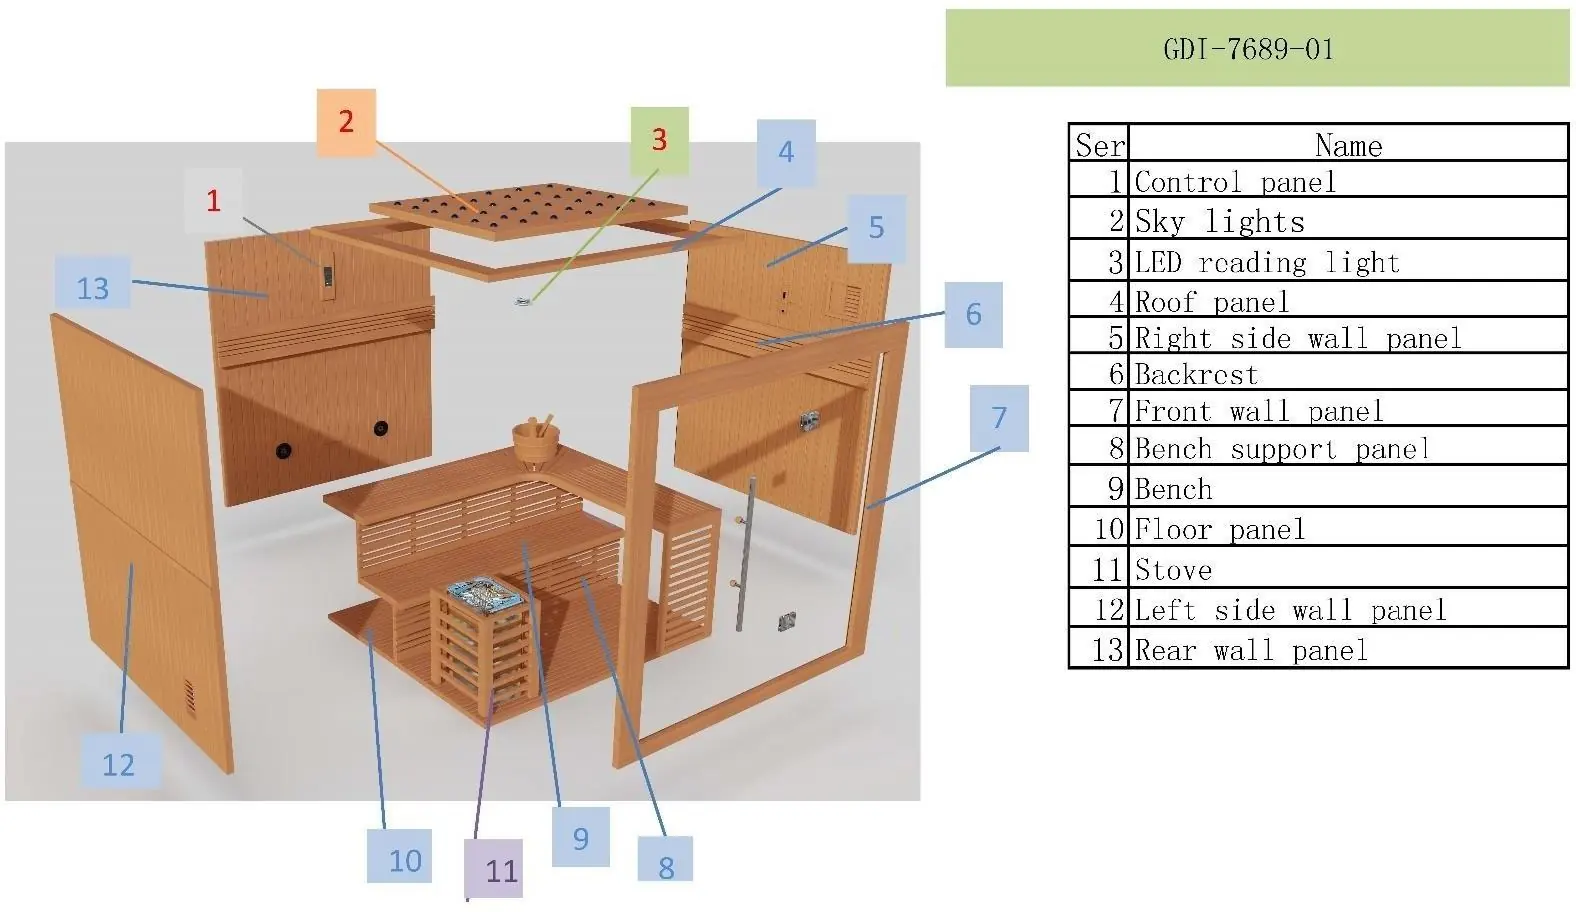
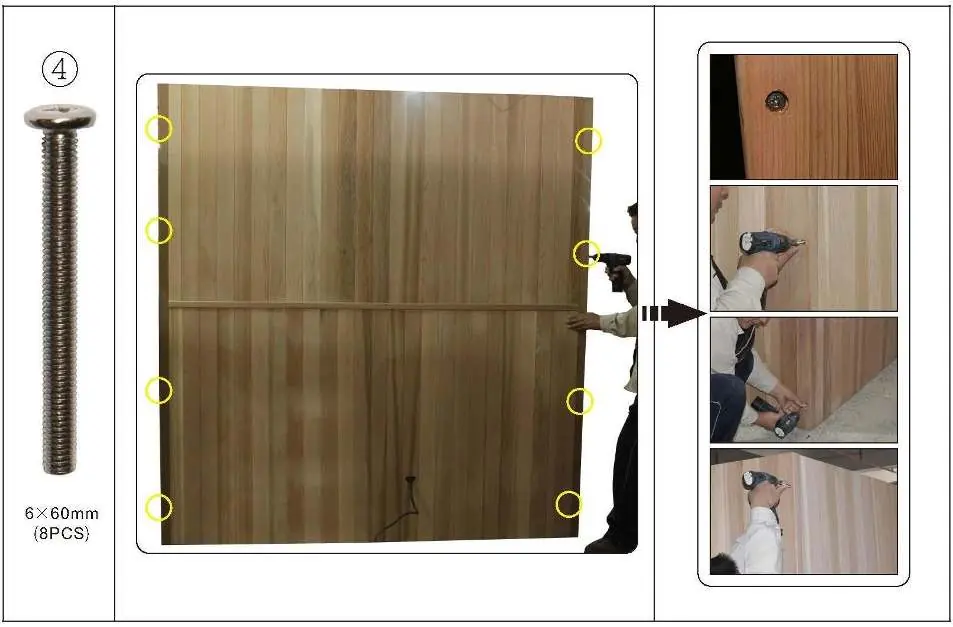
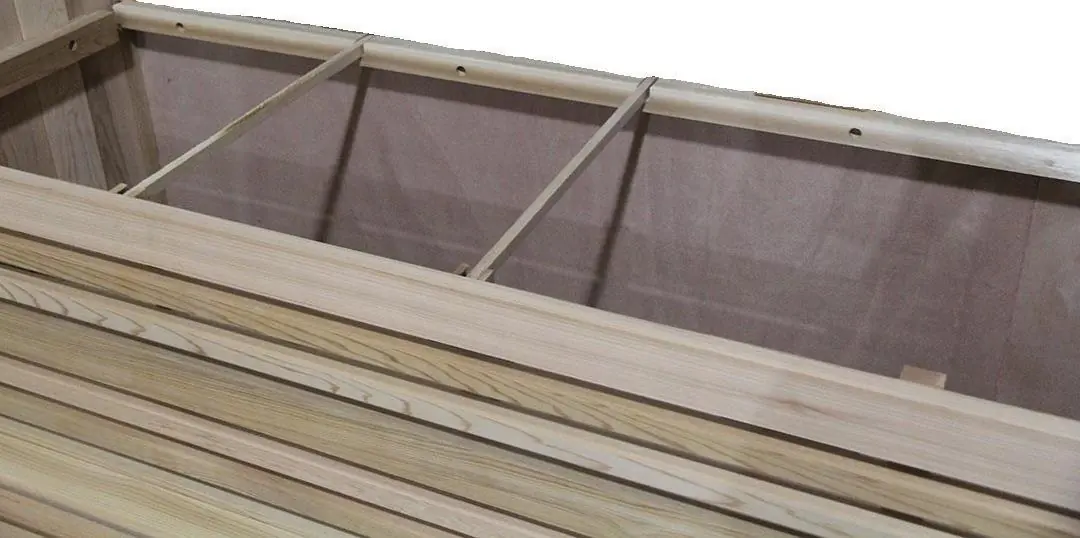
The sauna is assembled by connecting wood panels and installing internal components. Follow this general order: Rear Wall Panel, Right Side Wall Panel, Left Side Wall Panel, Floor Panel, Front Wall Panel, Bench Support Panels, Benches, Backrests, Roof Panel, and finally the Stove. Use a battery-operated screwdriver, rubber mallet, claw hammer, leveler, and ladder. Ensure all parts are inspected for damage before assembly.
Control Panel Operation
The control panel manages the sauna's lights, FM radio, and Bluetooth audio. Press the Power button to turn the system on or off. The system automatically turns off after 45 minutes. To connect Bluetooth, search for the device named 'JOYONWAY' and use the password '2288'. Use the 'Media' button to toggle between FM radio and Bluetooth modes.
Safety and Maintenance
Do not install the sauna near water, bathtubs, or showers. Use only a soft cloth and water for cleaning; do not use liquid or aerosol cleaners. Always consult a physician before use if you are pregnant, have heart disease, or other medical conditions. If you feel dizzy or uncomfortable, exit the sauna immediately. Do not touch the glass door hinges or lamps during use as they become very hot.
Practical help
Common problems
Sauna not heating
Ensure the stove is properly connected to a dedicated 240VAC circuit and installed by a certified electrician.
Bluetooth not connecting
Search for device 'JOYONWAY' and use password '2288'. Ensure the device is in pairing mode.
Control panel unresponsive
Check power supply. Wait 30 seconds between turning the system 'On' and 'Off' to prolong the life of the unit.
Before use
- Verify electrical circuit requirements (240V for stove, 120V for sauna)
- Ensure the installation location is dry, level, and away from water sources
- Confirm 2-3 adults are available for assembly
- Gather required tools: screwdriver, rubber mallet, claw hammer, leveler, ladder
- Inspect all parts for damage before starting assembly
Specs in practice
- 240VAC/1PHASE
- Electrical requirement for the sauna stove.
- 120VAC 15AMP
- Electrical requirement for the sauna control system.
- 87.5MHz – 108.0MHz
- FM radio frequency range.
Images and diagrams
- Assembly diagrams illustrate the sequence of wall panels, bench supports, and roof installation.
- Wiring diagrams show connections for lights and the control panel.
Model compatibility
- Stove must be installed by a certified electrician per manufacturer's manual.
- Not for outdoor use without a waterproof roof or cover.
- Models GDI-7289-01, GDI-7389-01, and GDI-7689-01 have specific screw requirements.

Manual page author
Emily Carter
User documentation editor
Prepares concise manual descriptions and highlights the most useful setup, operation, and maintenance information for readers.