Smart Home / Smart Doorbells
Solight 1L73 Wireless Doorbell User Manual
Quick guide for the Solight 1L73 wireless doorbell. Learn how to pair transmitters, install the receiver and button, adjust volume and melodies, and replace batteries.
Quick answers from the manual
Quick answer
- The Solight 1L73 is a wireless doorbell system with a 200m range. The receiver supports 3x AAA batteries or USB-C power, while the transmitter uses a CR2032 battery. It features 64 melodies and 4 volume levels. p. 1
Key actions
- Pairing the button with the bell p. 2
- Replacing the transmitter battery p. 2
First start
- Insert batteries or connect USB power to the receiver, then pair the transmitter by holding the pairing button for 5 seconds. p. 1, 2
Problems and fixes
Receiver does not ring
Check distance and signal interference (metal objects, concrete walls).
p. 2Maintenance and reset
- To delete paired transmitters, hold the pairing button, remove batteries, and reinsert them after 10 seconds. p. 2
Technical specifications
| Parameter | Value | Meaning | Pages |
|---|---|---|---|
| Transmission range | 200m | In open space | p. 1 |
| Transmission frequency | 433.92 MHz | Radio frequency | p. 1 |
Where to find it in the PDF
- Receiver and Transmitter description p. 1
- Pairing and Maintenance p. 2
Table of contents
Manual images
Click an image to enlargeQuick guide from the manual
The Solight 1L73 is a wireless doorbell system with a range of up to 200m in open space. The receiver can be powered by 3x AAA batteries or via a USB-C cable. The transmitter is waterproof and battery-operated (CR2032). The system supports pairing multiple transmitters and receivers.
Receiver setup
The receiver can be powered in two ways:
- Battery operation: Open the battery cover and insert 3x AAA alkaline 1.5V batteries, observing the correct polarity.
- USB powered operation: Connect a USB adapter to the mains and plug the USB-C cable into the receiver. Important: If batteries are installed, remove them before using USB power to prevent damage.
The receiver can be placed on a surface or hung using the mounting holes. Do not cover the speaker.
Transmitter installation
Before mounting, test the wireless connection in the desired location. The transmitter is waterproof and suitable for outdoor use, but avoid areas with excessive heat or water exposure.
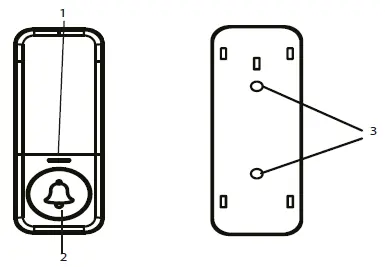
- Attach the installation pad to the base using double-sided adhesive tape or screws with dowels.
- Fit the transmitter with the tabs on the back into the holes of the installation pad and push to the side to secure it.
- Warning: Do not place the transmitter directly on metal objects or materials containing metal (e.g., steel posts, metal-framed doors), as this may interfere with the signal.
Pairing and deleting transmitters
Pairing:
- Insert batteries into the receiver or connect it to USB power.
- Long press the pairing button on the receiver for approximately 5 seconds.
- Release the button when the indicator light turns on.
- The receiver enters pairing mode for 25 seconds. Press the button on the transmitter.
- The doorbell will sound when successfully paired.
Deleting paired transmitters:
- Hold the pairing button on the receiver until the blue indicator turns on.
- Remove the batteries while holding the button.
- Reinsert the batteries after 10 seconds. The doorbell will ring, confirming the pairing is removed.
Settings
Use the control buttons on the receiver to adjust settings:
- Ringtone: Use the forward/backward buttons to select from 64 melodies.
- Volume: Press the volume button repeatedly to cycle through 4 levels (25-100 dB) or silent mode (blinking only).
Troubleshooting
If the receiver does not ring after pressing the transmitter button, check the following:
- Ensure the distance between the transmitter and receiver is not too great.
- Check for signal interference sources between the devices, such as radio/wireless networks, large metal objects, or reinforced concrete walls.
Transmitter battery replacement

- Use a flathead screwdriver to open the transmitter cover.
- Push gently between the side handles and lift the cover off.
- Remove the gasket.
- Tilt the battery plate and slide it out.
- Insert a new CR2032 battery, ensuring correct polarity.
- Close the button by reversing the procedure.
Practical help
Common problems
Receiver does not ring
Check the distance between units and ensure there are no strong signal interference sources like metal objects or reinforced concrete walls.
Before use
- Test wireless connection range before permanent mounting.
- Remove batteries from the receiver if using USB power.
- Do not mount the transmitter on metal surfaces.
- Ensure correct polarity when inserting batteries.
Specs in practice
- Transmission frequency
- 433.92 MHz
- Protection class
- IP56 (Transmitter is waterproof)
- Ringtone volume
- 4 levels (25-100 dB) + silent mode
Images and diagrams
- Receiver controls: LED indicator, Volume/Pairing button, Ringtone selection button, USB-C input, Speaker.
- Transmitter: LED indicator, Ring button, Mounting pad holes.
Model compatibility
- Maximum 8 transmitters can be paired to one receiver.
- One transmitter can be paired with up to 20 receivers.

Manual page author
Michael Turner
Technical manual editor
Reviews PDF manuals for structure, safety notes, and practical product details so readers can find the right information quickly.