Furniture / Tables & Desks
The Home Depot Workbench User Manual
A comprehensive assembly and usage guide for The Home Depot workbench models GZT610*610T, GZT610*610TH, GZT910*610J, and GZT760*455J. Includes safety precautions, parts list, and step-by-step installation instructions.
Quick answers from the manual
Quick answer
- This manual provides assembly instructions for The Home Depot workbench models GZT610*610T, GZT610*610TH, GZT910*610J, and GZT760*455J. It covers safety precautions, parts identification, and step-by-step assembly procedures. p. 1, 2, 3, 4
Key actions
- Assemble the workbench on a clean, well-lit surface. p. 2
- Tighten M6 screws with a torque of at least 25 N.m. p. 5, 6
First start
- After assembly, turn the workbench over and adjust the height of the four support feet or wheels to ensure stability. p. 7
Problems and fixes
Workbench is unstable
Adjust the height of the four support feet or wheels.
p. 7Technical specifications
| Parameter | Value | Meaning | Pages |
|---|---|---|---|
| Maximum load-bearing | 350-430 lbs (depending on model) | Weight limit for top board/clapboard. | p. 3 |
Where to find it in the PDF
- Safety Instructions p. 2
- Product Parameters p. 3
- Packing List p. 4
- Assembly Steps p. 5, 6, 7
Table of contents
Manual images
Click an image to enlargeQuick guide from the manual
This manual provides assembly and safety instructions for The Home Depot workbench models GZT610*610T, GZT610*610TH, GZT910*610J, and GZT760*455J. Before beginning assembly, ensure you have a clean, well-lit workspace and all parts listed in the packing list. Always adhere to the weight limits specified for your specific model to ensure safety and product longevity.
Safety Instructions
- Indoor use only: Using this product outdoors may lead to product failure and personal injury.
- Weight limits: Do not exceed the rated weight capacity indicated for your model.
- Assembly: Assemble only according to these instructions. Keep bystanders away during assembly.
- Installation: Use the provided mounting screws and do not overtighten them. Ensure the supporting surface can safely hold the combined weight of the workbench and any equipment.
- Small parts: Contains small items that pose a choking hazard; keep away from children.
Packing List
Ensure all items are present before starting assembly:
- Panel
- Shelves
- Table legs (whole or separated, depending on model)
- Support feet (3-inch universal wheels, 2 with brakes)
- M6 Allen socket screws
- Φ6 gaskets
- Hex key
Assembly Steps
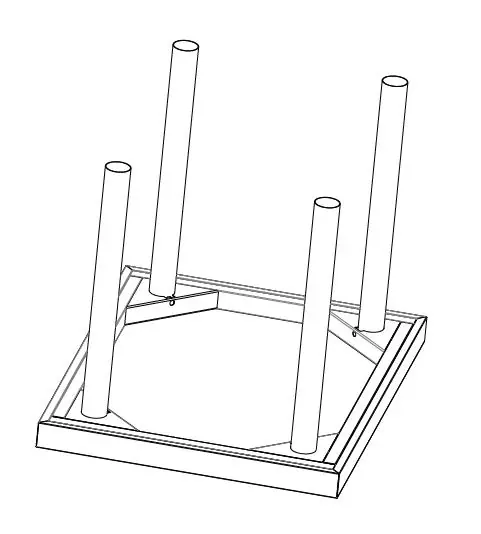
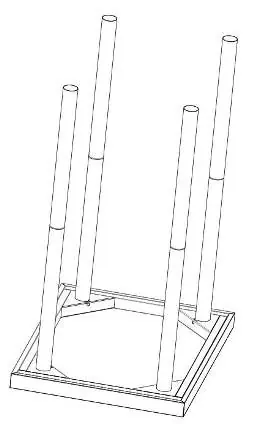
- Panel Assembly: Place the panel with the mounting hole facing upwards. Install the round pipe into the hole and fix it using M6 socket screws and Φ6 gaskets. Ensure a torque greater than or equal to 25 N.m.
- Pipe Preparation: For some models, distinguish between upper and lower support pipes and cover them as required. This step can be omitted for products with whole legs.
- Shelf Installation: Install the shelves at the desired height. Fix the mounting holes using M6 socket screws and Φ6 gaskets, ensuring a torque of at least 25 N.m.
- Feet/Wheels Installation: Install the support feet or wheels. Note that these are often pre-installed.
- Final Adjustment: Turn the workbench over and adjust the height of the four support feet or wheels to ensure the table is stable and close to the ground. If the workbench does not need to be moved, engage the brakes on the wheels.
Manufacturer information
The Home Depot
Practical help
Common problems
Workbench is unstable
Adjust the height of the four support feet or wheels to ensure they are all in contact with the ground.
Table moves when not intended
Engage the brakes on the wheels to lock the workbench in place.
Before use
- Ensure the assembly area is clean and well-lit.
- Verify all parts are present according to the packing list.
- Do not assemble if tired or under the influence of substances.
- Ensure the supporting surface can handle the combined weight of the workbench and equipment.
- Check that all screws are tightened to at least 25 N.m.
Specs in practice
- Maximum load-bearing
- The weight limit for the top board and clapboard. Exceeding this can cause instability or product failure.
Images and diagrams
- Diagrams illustrate the sequence of attaching pipes to the panel and shelves to the pipes.
- The support feet/wheels are shown as pre-installed components.
Model compatibility
- Some models feature separated legs, while others have whole legs.
- Product is intended for indoor use only.

Manual page author
Emily Carter
User documentation editor
Prepares concise manual descriptions and highlights the most useful setup, operation, and maintenance information for readers.