HVAC / Ventilation Systems
Vasco Electric Preheater Installation Guide
Installation and maintenance guide for Vasco electric preheaters (11VE44260, 11VE44270, 11VE44280). Includes wiring instructions, safety precautions, and technical specifications.
Table of contents
Manual images
Click an image to enlargeQuick guide from the manual
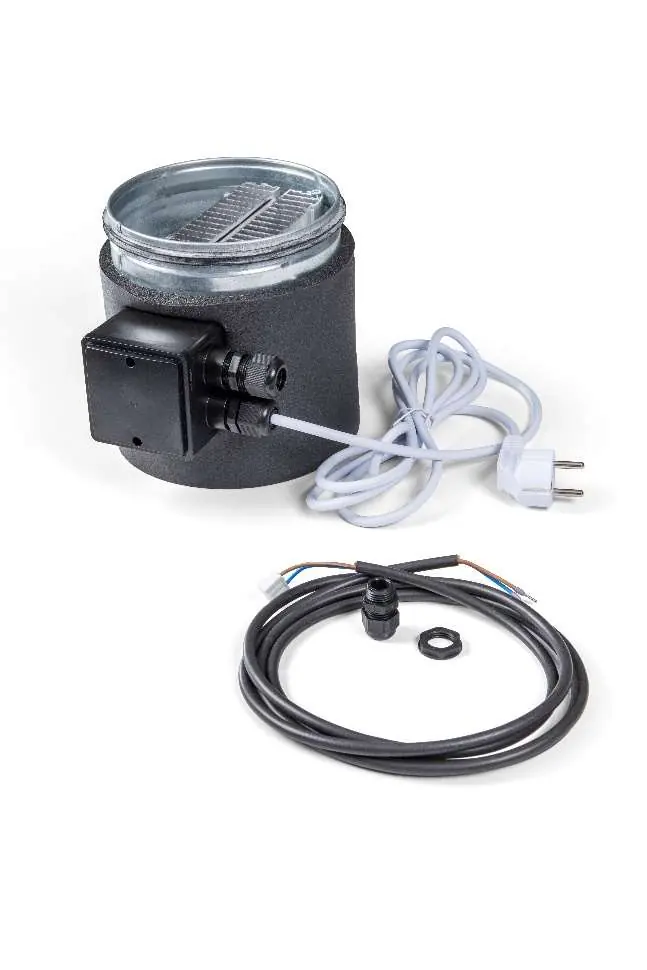
The Vasco electric preheater is a self-regulating heating element designed for integration into Vasco ventilation systems. It is a preventive device without an on/off switch; it operates automatically based on the ventilation unit's software. Ensure the device is always plugged into a live socket.
Safety instructions
Electrical safety: Installation must be performed by a professional installer. Electronic components may be under voltage. Do not touch the device during operation to avoid burns and fire risks. In case of a defect, contact a professional installer.
Maintenance safety: Before inspection or cleaning, switch off the ventilation unit and unplug the preheater. The device contains heated parts; wait approximately 10 minutes after unplugging for the element to cool down before handling.
Installation
Conditions: The room must be frost-free. The preheater must be installed within 2 meters of the ventilation unit's circuit board to allow for the power cable connection. Ensure the supplied air is free of rough contaminants; use an air filter if necessary.


Positioning: Install the preheater on the duct bringing fresh air from outside into the ventilation unit. It can be mounted horizontally or vertically.
Wiring steps:
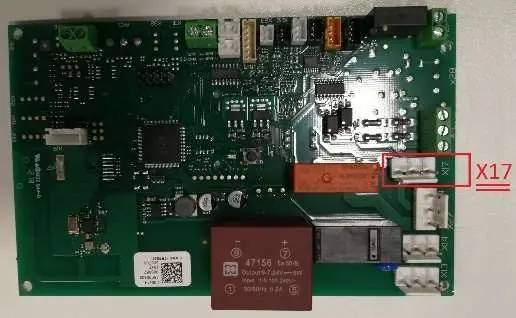
- Connect the black power cable to the ventilation unit's circuit board at connection X17. Use the black swivel as a transit for the cable through the metal casing.
- Open the preheater's cable box.
- Use the provided black swivel for the cable transit.
- Connect the brown phase wire to the +A1 connector of the switching relay and the blue neutral wire to the -A2 connector.
- Close the cable box and plug the power cord into the socket.
Maintenance
Vasco recommends cleaning the preheater every 4 years. Use pressurized air and/or a small brush to clean the metal elements inside. Do not use chemical or liquid cleaners. Failure to perform maintenance may result in suboptimal performance.
Technical data
The preheaters consist of an insulated PTC heat register in a metal and plastic housing. Models include:
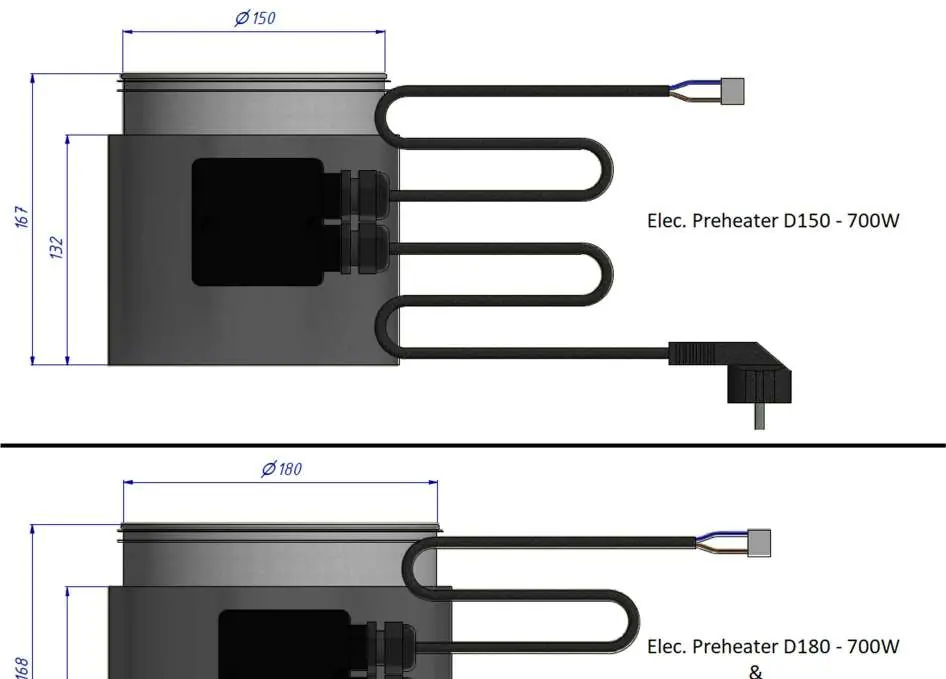
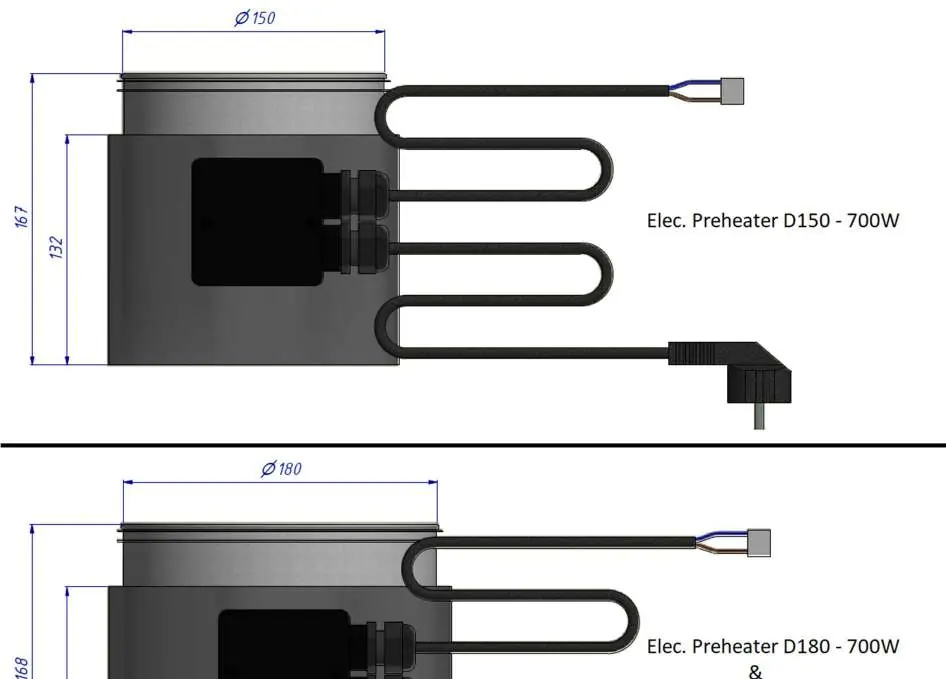
- 11VE44260 (D150): 600W nominal power, 700W max power.
- 11VE44270 (D180): 600W nominal power, 700W max power.
- 11VE44280 (D180): 1200W nominal power, 1400W max power.
Practical help
Common problems
Device not heating
Ensure the ventilation unit is powered on and the preheater is correctly connected to the X17 port on the circuit board.
Risk of burns during maintenance
Always wait at least 10 minutes after unplugging the device before opening the cable box or cleaning.
Before use
- Ensure the installation room is frost-free.
- Verify the preheater is within 2m of the ventilation unit's circuit board.
- Confirm a 230V, 50Hz socket is available.
- Check that the air duct is clean and free of rough contaminants.
- Ensure the ventilation unit is compatible (e.g., D275EP, D300E, D500E).
Specs in practice
- Nominal power (Pnom)
- The standard power consumption of the heating element.
- Differential pressure
- The pressure drop across the unit at specific airflow rates (e.g., 275m³/h for D150).
Images and diagrams
- Wiring diagram: Shows the connection of the black power cable to the ventilation unit's X17 port and the internal relay wiring.
Model compatibility
- Compatible with specific Vasco ventilation units including D275EP, D300E, D400EP, D500E, and various T_X/DX series models.

Manual page author
Michael Turner
Technical manual editor
Reviews PDF manuals for structure, safety notes, and practical product details so readers can find the right information quickly.