General / Other Manuals
Vasco EasyFlow Beton Air Distribution System Technical Manual
Technical guide for the Vasco EasyFlow Beton air distribution system, covering product specifications, installation procedures, accessories, and maintenance guidelines.
Table of contents
Manual images
Jump to the sectionQuick guide from the manual
The Vasco EasyFlow Beton system is designed for air distribution in concrete layers, suspended ceilings, and insulation layers. This manual provides technical specifications, installation guidelines, and maintenance information for the system components, including air ducts, distribution boxes, and air valves.
Product specifications
The system features antistatic components made of PE and PP. Key components include:
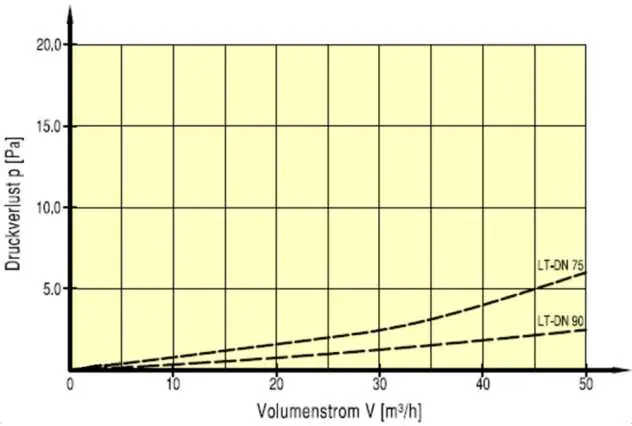
- Air ducts: Available in 75mm and 90mm diameters, supplied in 50m rolls.
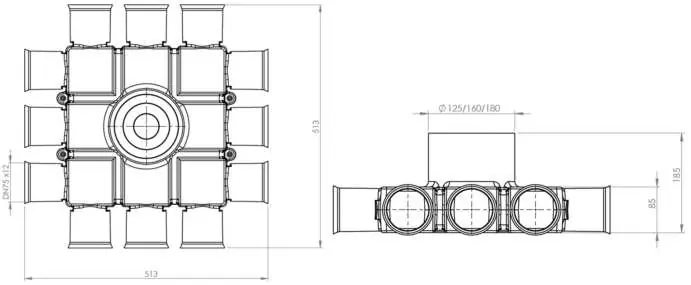
- Distribution boxes: Available in various configurations (5 to 15 connections) for surface or flush mounting.
- Air valves: A range of design valves in aluminium with KTL coating, including the Smiley regulation valve for precise airflow control.
Installation
Installation should follow a custom layout plan provided by Vasco Technical Sales Support. Key installation steps include:

- Layout planning: Request a free layout plan via the Vasco website or email.
- Duct preparation: Cut air ducts to the required length and ensure seals are used at all connections.
- Clamping: Use the provided clamps, ensuring the convex side faces outward.
- Main connection: Connect the main duct to the distribution box using appropriate adapters (galvanized or insulated, depending on the duct type).
- Valve installation: Install the Smiley regulation valve into the valve connection piece and secure it if necessary.
Maintenance
Vasco recommends a visual inspection of air ducts every 7-8 years. Professional maintenance services for the ventilation unit and system are available in Belgium, covering heat exchanger cleaning, fan maintenance, and filter replacement.
Practical help
Common problems
Damaged Smiley valve
Replace both the Smiley 2.0 and the design valve due to differences in the bayonet connection.
Main duct connection issues
For galvanized ducts, use a galvanized sleeve and reducer, sealing the transition airtight. For insulated ducts, use the specific connection sleeve provided.
Before use
- Ensure you have the custom layout plan for your project.
- Verify the required diameter (75mm or 90mm) for your air ducts.
- Check that all necessary seals and clamps are available.
- Confirm the type of main duct (galvanized or insulated) to select the correct adapter.
Specs in practice
- Air duct diameter
- Available in 75mm and 90mm, determining the airflow capacity.
- Smiley regulation valve
- A unique valve for precise airflow regulation at the room level.
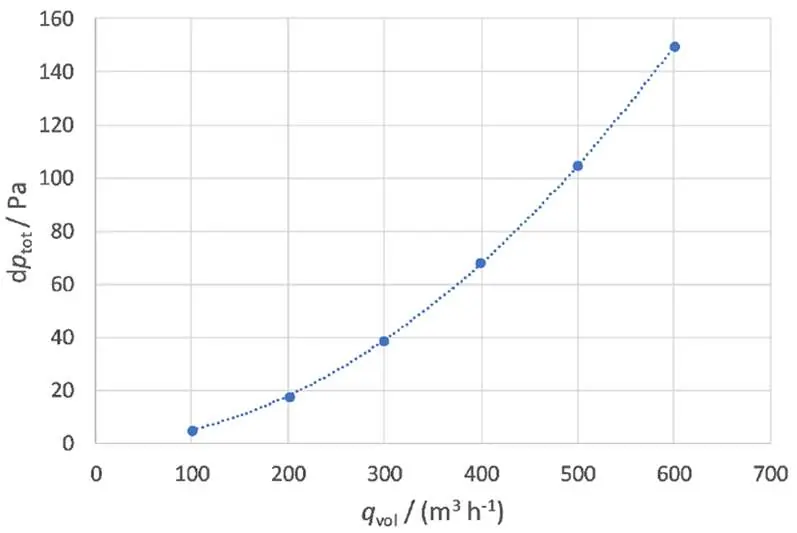
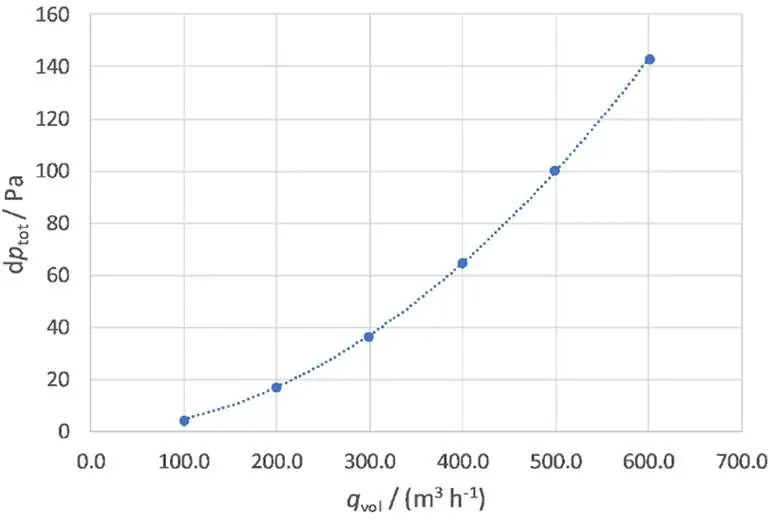
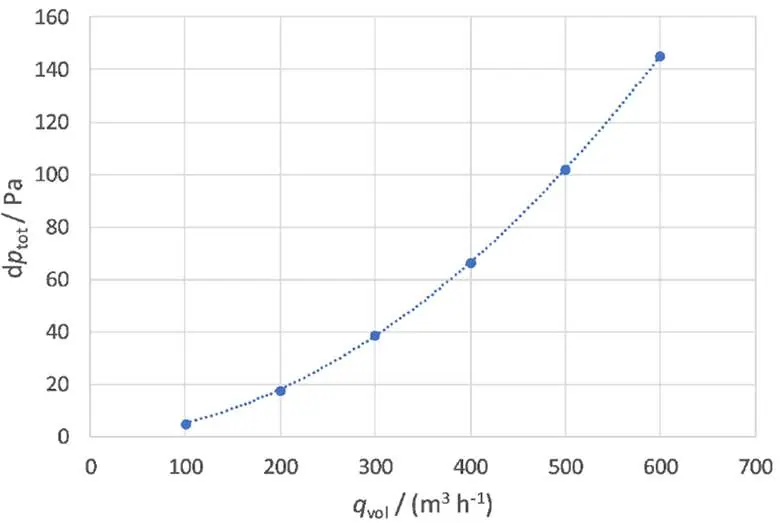
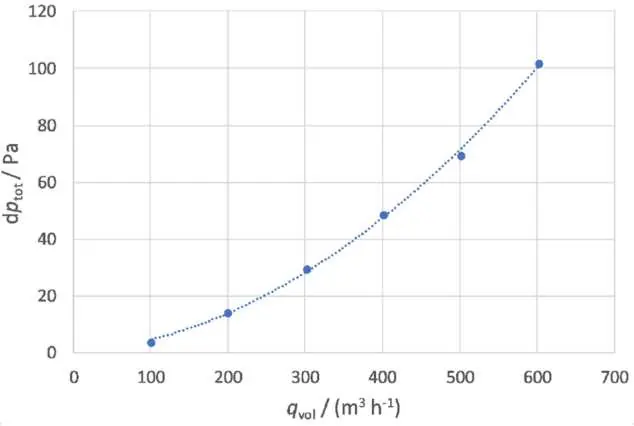
Images and diagrams
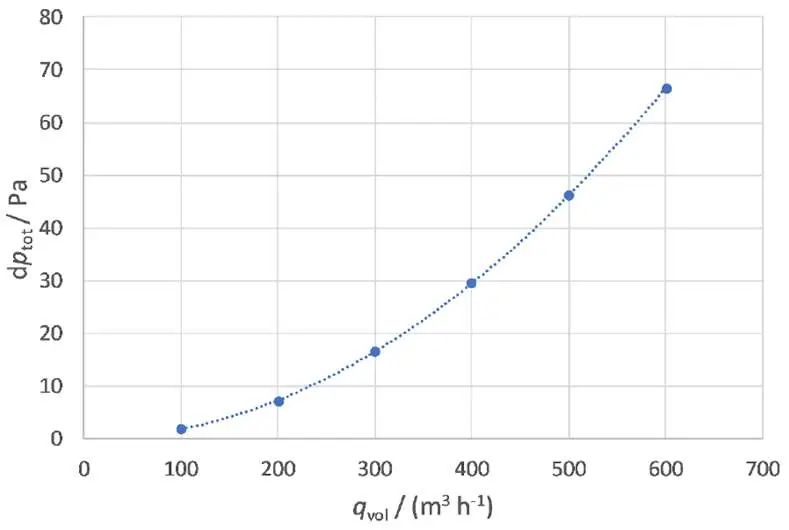
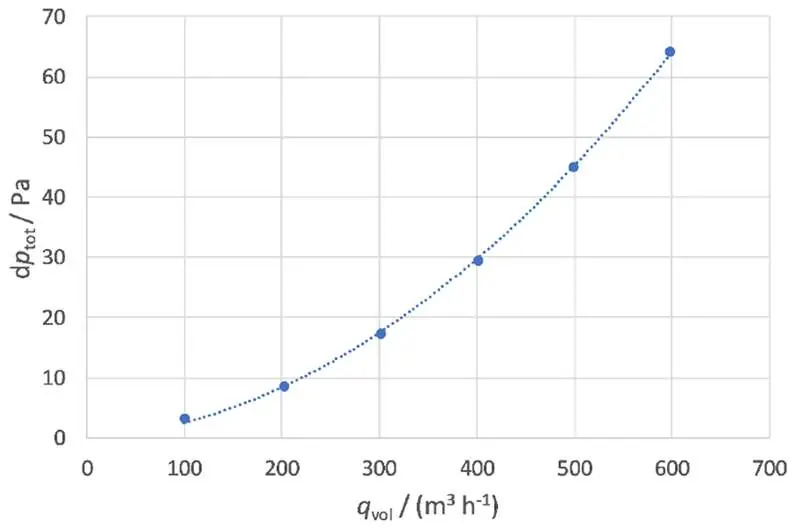
- Pressure loss charts are provided for all distribution boxes and valve connections to assist in system design.
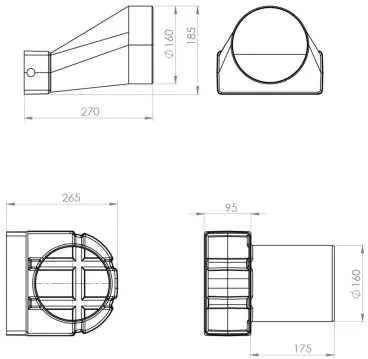
- Dimensional drawings are included for all components to ensure proper fitment during installation.
Model compatibility
- Smiley 2.0 is not directly compatible with older design valves due to a different bayonet connection.

Manual page author
Emily Carter
User documentation editor
Prepares concise manual descriptions and highlights the most useful setup, operation, and maintenance information for readers.