General / Other Manuals
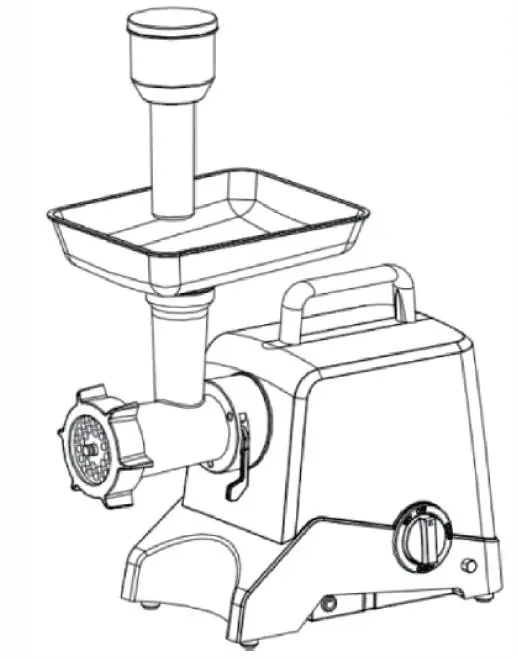
VEVOR 1A-PG612G Electric Meat Grinder Instruction Manual
Quick guide for the VEVOR 1A-PG612G electric meat grinder, covering assembly, operation for grinding and stuffing, cleaning, and maintenance tips.
Table of contents
Manual images
Jump to the sectionQuick guide from the manual
This document provides essential instructions for the safe and efficient operation of the VEVOR 1A-PG612G electric meat grinder. Key procedures include proper assembly of the grinding head, correct operation for grinding meat and stuffing sausages, and critical cleaning steps to maintain the appliance.
Safety Warnings
- Do not submerge the motor housing in water or other liquids.
- Always use the provided meat stomper; never feed food by hand.
- Do not grind bones, nuts, or other hard items.
- Unplug the appliance when not in use, before changing parts, or cleaning.
- Never operate the grinder unattended.
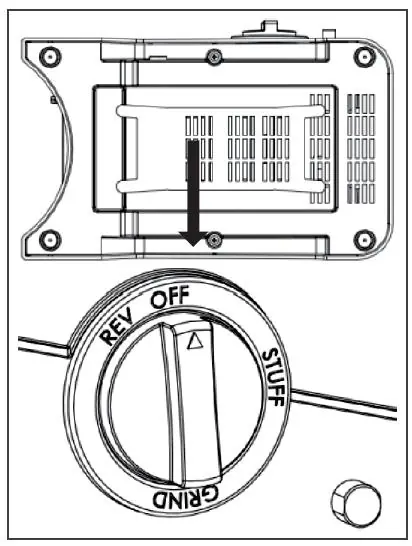
- Ensure the switch is in the OFF position before pressing the reverse button to avoid damage.
Assembly Instructions
Grinding Setup:

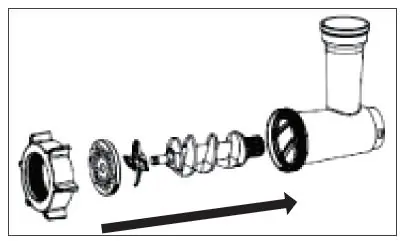
- Insert the worm gear/auger into the grinder head, geared end first.
- Place the grinder knife onto the auger stud with cutting edges facing outward.
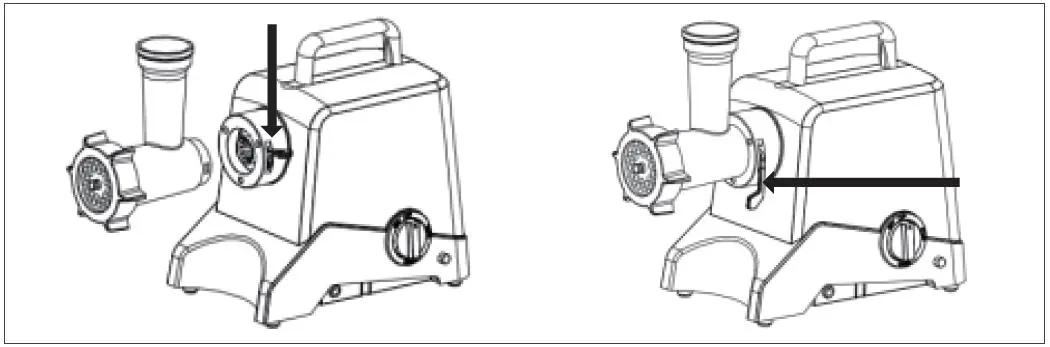
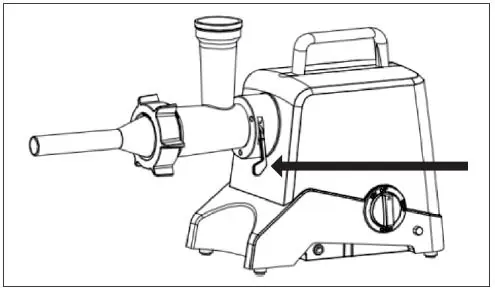
- Attach the grinder head to the motor housing and secure it by pressing down the locking handle.
- Screw the retaining ring onto the grinder head until hand-tight.
- Place the meat tray on the upright part of the grinder head.
Stuffing Setup:
- Insert the worm gear/auger into the grinder head.
- Place the stuffing plate, stuffing tube, and retaining ring onto the head in order.
- Attach the head to the motor housing and lock it securely.
Operation
Grinding: Cut meat into 4" x 3/4" strips, removing all bones, gristle, and sinew. Place meat in the tray, turn the switch to GRIND, and use the meat stomper to gently push meat into the head. Do not force the meat.
Stuffing: Slide the casing onto the stuffing tube. Mix ground meat with seasonings, place in the tray, and turn the switch to STUFF. Gently push the meat into the head using the stomper.
Care and Maintenance
If the grinder becomes locked, turn it off and press the reverse button. If the obstruction persists, unplug the unit, disassemble the head, and remove the blockage. Ensure the overload protector is active; if the button pops up, press it back down.
Cleaning:
- Switch off and unplug the appliance.
- Remove the meat stomper and tray.
- Release the grinder head from the main body.
- Unscrew the retaining ring and remove all parts. Hand wash in warm soapy water; parts are not dishwasher safe.
- Rinse with hot water and dry immediately.
- Lubricate the knife and grinding plates with silicon spray.
Manufacturer information
VEVOR
Practical help
Common problems
Grinder is locked
Turn off the unit and press the reverse button. If it remains locked, unplug the unit, disassemble the grinder head, and remove the obstruction.
Overload protector button pops up
Press the button back down to keep the protector active.
Meat is forced back into the motor
Ensure the grinder is never operated without the grinder knife and one of the grinding plates installed.
Before use
- Read all instructions carefully.
- Hand-wash all grinder parts in warm soapy water.
- Ensure the machine is suitable for your local voltage (120V/60Hz or 230V/50Hz).
- Verify the grinder knife and plate are correctly installed.
- Remove all bones, gristle, and sinew from meat before grinding.
Specs in practice
- Continuous working time
- ≤15min
Images and diagrams
- The locking handle on the motor housing must be pressed down to secure the grinder head.
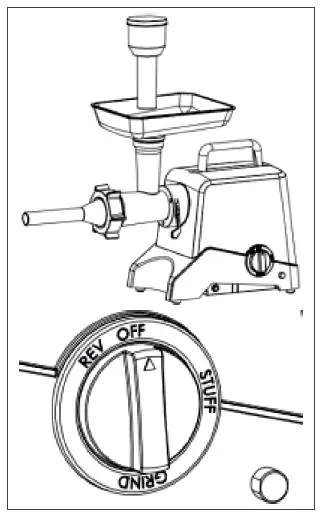
- The grinder switch has three positions: GRIND, OFF, and STUFF.
- The reverse button is used to clear obstructions in the grinder head.
Model compatibility
- Grinder parts are not dishwasher safe.
- Use only attachments sold by the manufacturer.

Manual page author
Michael Turner
Technical manual editor
Reviews PDF manuals for structure, safety notes, and practical product details so readers can find the right information quickly.