Furniture / Storage Cabinets
Vinsetto 2-Compartment Metal Locker Assembly Instructions
Assembly guide for the Vinsetto 2-Compartment Metal Locker (Model 913-008). Includes a complete parts list, step-by-step installation instructions, and customer support contact information.
Quick answers from the manual
Quick answer
- This document is an installation manual for the Vinsetto 2-Compartment Metal Locker (Model 913-008). It provides a 6-step assembly process and a parts list. p. 1, 2, 3, 4
Key actions
- Assemble the main frame p. 2
- Attach the doors p. 4
- Secure to wall p. 5
Where to find it in the PDF
- Parts List p. 2
- Assembly Steps p. 2, 3, 4, 5
Table of contents
Manual images
Click an image to enlargeQuick guide from the manual
The Vinsetto 2-Compartment Metal Locker (Model 913-008) requires assembly. The process is estimated to take approximately 0.5 hours and is recommended to be performed by two people. Ensure you have a clear workspace and a mallet or hammer available for assembly.
Parts List
Before beginning, verify that all components are present:
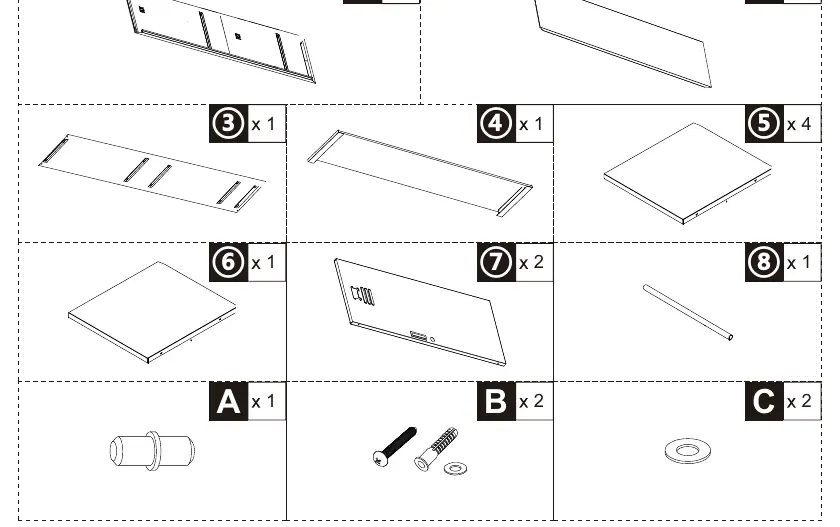
- 1: Side panel (x1)
- 2: Back panel (x1)
- 3: Side/Back panel component (x1)
- 4: Top panel (x1)
- 5: Shelves (x4)
- 6: Middle divider (x1)
- 7: Doors (x2)
- 8: Hanging rod (x1)
- Hardware: A (x1), B (x2), C (x2)
Assembly Steps
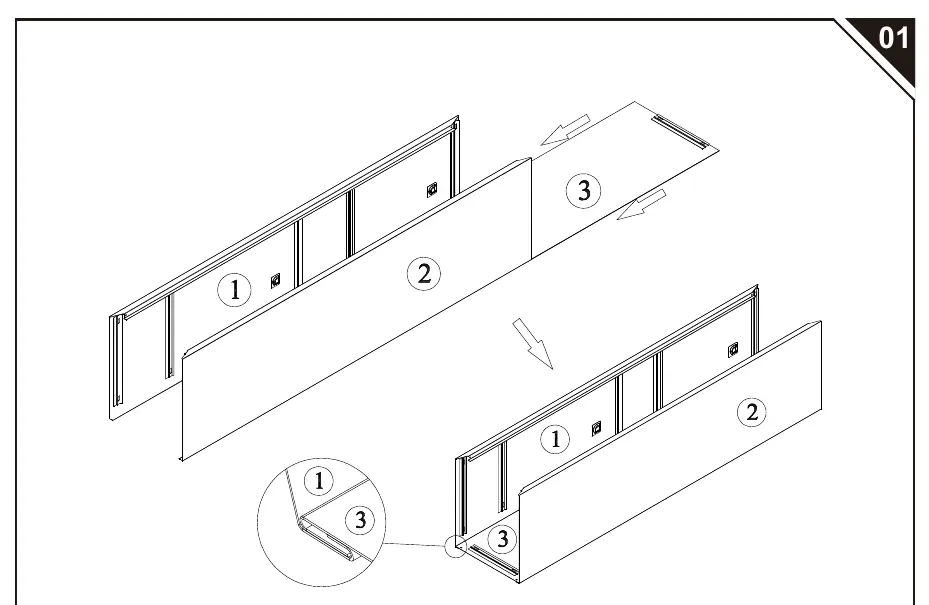
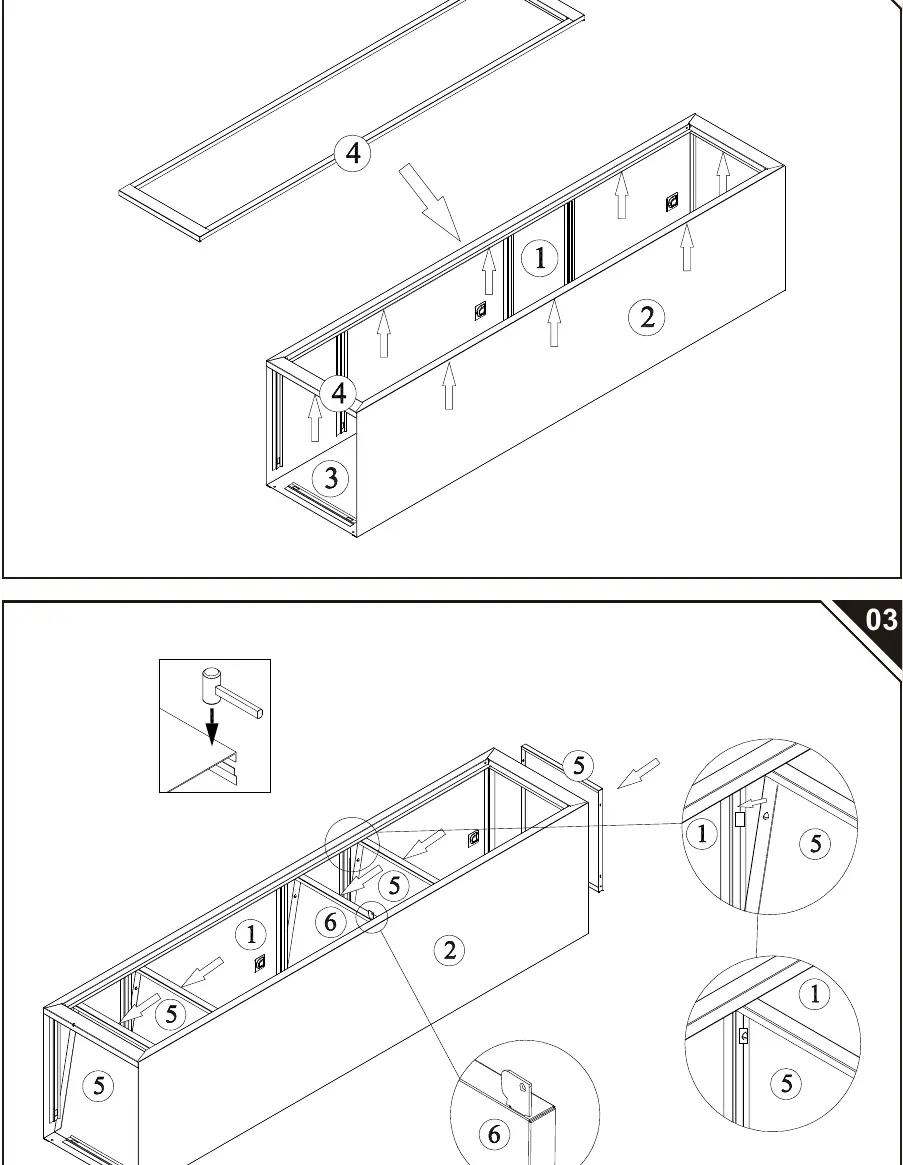
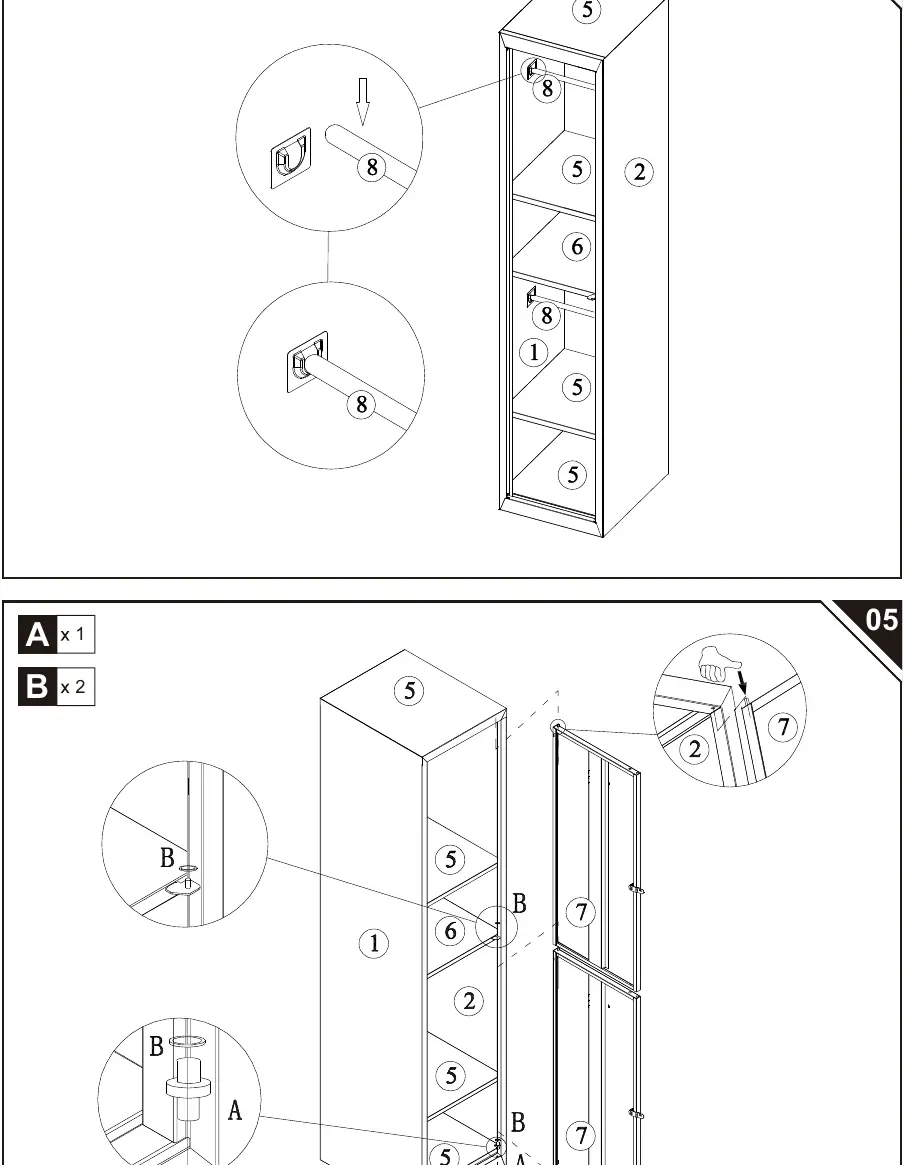
- Step 01: Align and connect the side panels (1) with the back panels (2) and the middle/bottom panel components (3).
- Step 02: Attach the top panel (4) to the assembled frame.
- Step 03: Insert the shelves (5) and the middle divider (6) into the frame. Use a mallet if necessary to secure the shelves.
- Step 04: Install the hanging rod (8) into the designated brackets inside the locker.
- Step 05: Attach the doors (7) to the frame using hardware A and B.
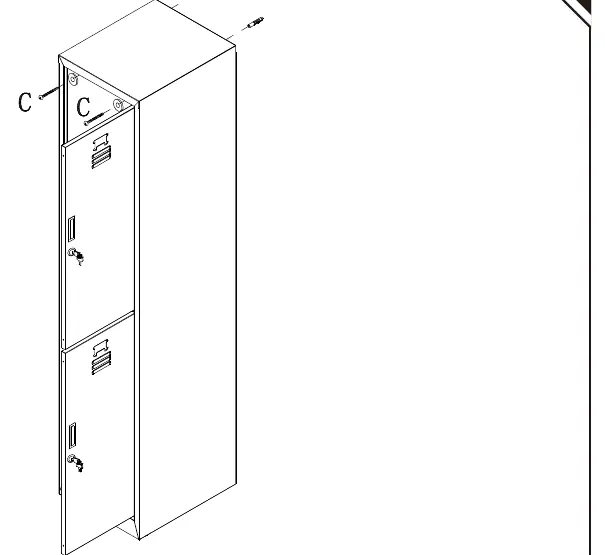
- Step 06: Secure the locker to the wall using hardware C to ensure stability.
Customer Support
If you have any questions, please contact the customer service center. For US/CA, call 001-877-644-9366 or 416-792-6088. For other regions, please refer to the contact details provided on the last page of the manual.
Practical help
Before use
- Verify all parts (1-8) and hardware (A-C) are present.
- Clear a sufficient workspace for assembly.
- Have a second person available to assist with lifting and alignment.
- Prepare a hammer or mallet for securing panels.
Images and diagrams
- The manual uses numbered parts (1-8) and lettered hardware (A-C) to guide the assembly process.
- Arrows in the diagrams indicate the direction of insertion or attachment for panels and shelves.
Model compatibility
- Designed for indoor use.

Manual page author
Emily Carter
User documentation editor
Prepares concise manual descriptions and highlights the most useful setup, operation, and maintenance information for readers.