Furniture / Storage Cabinets
Installation Guide for Vinsetto 2-Drawer File Cabinet 924-040V80
Complete assembly and installation guide for the Vinsetto 2-Drawer File Cabinet (924-040V80). Includes parts list, hardware identification, step-by-step assembly instructions, and wall-mounting safety tips.
Quick answers from the manual
Quick answer
- This is an assembly guide for the Vinsetto 2-Drawer File Cabinet. It requires approximately 1 hour and 16 steps to complete. p. 1
Key actions
- Separate inner and outer drawer runners before installation. p. 2
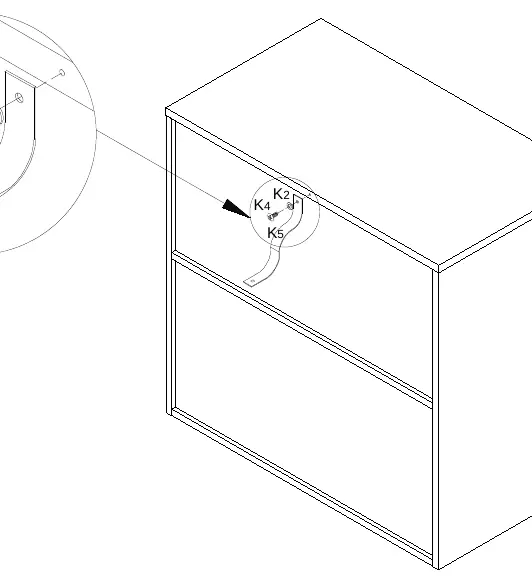
- Install the anti-dumping belt to secure the cabinet to the wall. p. 16
Problems and fixes
Drawer misalignment
Ensure screws on the drawer slide are leveled.
p. 8Where to find it in the PDF
- Parts List p. 4, 5
- Hardware List p. 6
- Assembly Steps p. 7, 17
Table of contents
Quick guide from the manual
This document provides assembly instructions for the Vinsetto 2-Drawer File Cabinet (Model 924-040V80). The assembly process consists of 16 steps and is estimated to take approximately 1 hour. It is recommended to have a screwdriver and a drill available for installation.
Parts and Hardware
Before beginning assembly, verify that all parts and hardware are present. The manual includes a detailed explosion figure on page 3, a parts list on pages 4-5, and a hardware list on page 6. Ensure you have all components before starting.
Assembly Preparation
Cam Lock and Quickfit: When installing cam locks, ensure the quickfit head is in the center of the cam lock before the panels are joined. Tighten the cam lock clockwise. Do not overtighten.
Drawer Runners: Before fixing the runners to the panels, you must separate the inner and outer runners. Press and hold the drawer lock to slide the inner runner out of the outer runner.
Assembly Steps
The assembly follows a logical sequence:
- Frame Assembly: Install cam bolts (B) into the panels as shown in step 01.
- Runner Installation: Attach the outer drawer runners (G1) to the side panels (2 and 3) using screws (E). Ensure the screws are leveled to prevent misalignment.
- Structure: Assemble the side panels, base, and support bars using cam locks (A).
- Back Panel: Slide the back panel (10) into the grooves.
- Top Panel: Secure the top panel (1) using cam locks and wooden dowels.
- Drawer Assembly: Assemble the drawer boxes using the provided hardware (D, F1, F2, A). Attach the inner drawer runners (G2) to the drawer sides.
Wall Mounting and Safety
For safety, the cabinet includes an anti-dumping belt. It is highly recommended to secure the unit to the wall to prevent tipping. The manual provides instructions for both solid walls (using expansion and self-tapping screws) and wooden walls (using self-tapping screws).
Finalizing
Once the frame is assembled and the drawers are inserted, ensure the drawer slides are aligned before pushing the drawers in completely. If you encounter any issues, contact customer service using the details provided on the final page of the manual.
Practical help
Common problems
Drawer not sliding smoothly
Ensure the drawer runners are leveled during installation. Misaligned screws on the drawer slide will affect smoothness.
Cam lock not tightening
Ensure the quickfit head is positioned in the center of the cam lock before tightening clockwise.
Before use
- Verify all parts against the parts list (pages 4-5).
- Identify all hardware (page 6).
- Prepare a clear workspace.
- Have a screwdriver and drill ready.
- Separate inner and outer drawer runners before installation.
Images and diagrams
- The explosion figure on page 3 provides an overview of all components and their relative positions.
- Pages 8-18 provide detailed, step-by-step visual instructions for each assembly phase.
Model compatibility
- The anti-dumping belt is compatible with both solid and wooden walls.

Manual page author
Michael Turner
Technical manual editor
Reviews PDF manuals for structure, safety notes, and practical product details so readers can find the right information quickly.