Tools / Soldering Stations
Weller WXair Soldering Module User Manual
Quick guide for the Weller WXair soldering module. Includes setup, operation, maintenance, troubleshooting, and technical specifications.
Table of contents
Manual images
Click an image to enlargeQuick guide from the manual
The Weller WXair is a supply unit designed for WX soldering tools. This module provides vacuum and air supply for desoldering and hot air applications. Ensure the device is switched off before connecting it to the power supply. Upon switching on, the device performs a self-test and reads parameters stored in the connected tool.
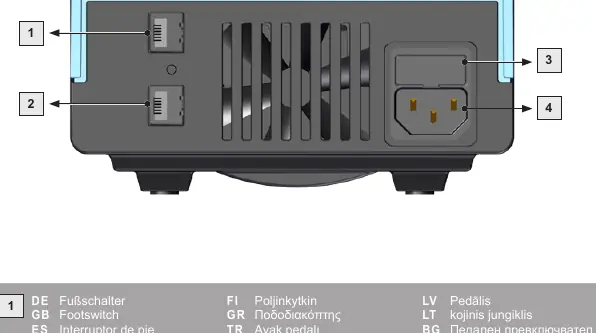
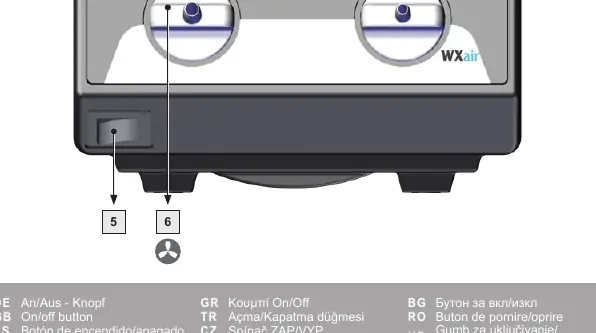
Device Description and Connections
The rear panel features the mains connection, mains fuse, interface, and footswitch connection. The front panel includes the air connection nipple for hot air tools, the vacuum connection, and the on/off button. Ensure all hoses are securely connected before operation.
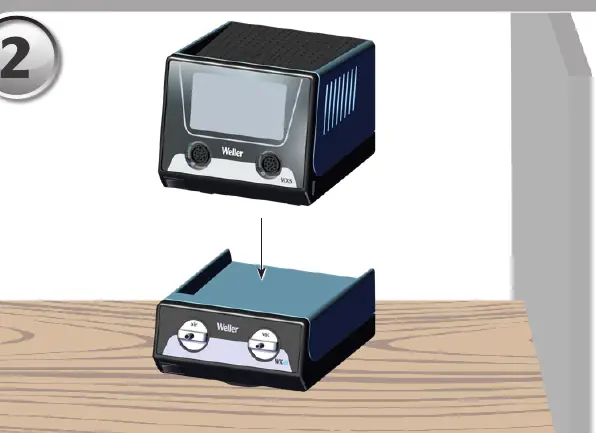
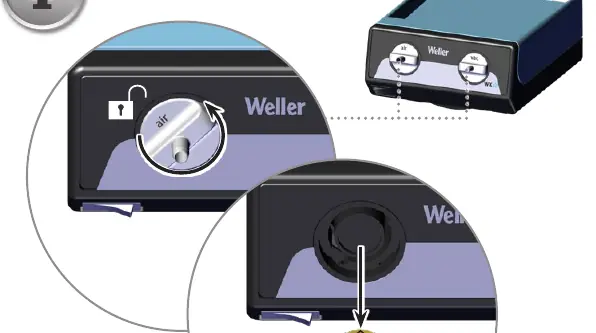
Setup and Installation
Place the WXair module on a stable surface. Connect the necessary air and vacuum hoses to the designated ports on the front panel. Ensure the main filter is correctly installed before starting any work, as operating without a filter can cause irreparable damage to the vacuum unit.

Operation
The device is operated via the connected soldering station. Set-point temperatures and fixed temperatures are stored in the tool. The actual temperature will rise to the set-point temperature upon activation. Always place soldering tools in the safety rest when not in use.
Maintenance and Care
Regularly check the main filter for vacuum and replace it if necessary. Contaminated filters must be treated as special waste. Clean the operator panel with a suitable cloth. Seal unused ports with covering caps. Repairs must only be performed by Weller-trained specialists using original spare parts.
Troubleshooting
If there is no vacuum, check the vacuum connection, ensure the desoldering nozzle is not clogged, and verify the pump is functional. If vacuum is insufficient, replace the filter cartridge on the desoldering tool or the main filter element on the soldering station. If there is no air at the hot air tool, check the air hose connection and the main filter.
Technical Data
- Dimensions: 197 mm x 153 mm x 86 mm
- Weight: 1.4 kg
- Power Consumption: 70 W
- Max. Vacuum: 70 kPA
- Max. Flow Rate: 18 l/min
- Ambient Temperature: 10 - 40°C
Manufacturer information
Weller Tools
Practical help
Common problems
No vacuum at desoldering tool
Check vacuum hose connection, clean desoldering nozzle, or check pump.
Insufficient vacuum at desoldering tool
Replace filter cartridge on the desoldering tool or replace the main filter element on the soldering station.
No air at hot air tool
Check air hose connection or replace the main filter element on the soldering station.
Before use
- Check that mains voltage matches the nameplate ratings.
- Ensure the main filter is correctly installed.
- Check all cable and hose connections.
- Ensure the device is switched off before plugging into the power socket.
Specs in practice
- Power Consumption
- 70 W
- Max. Flow Rate
- 18 l/min
Images and diagrams
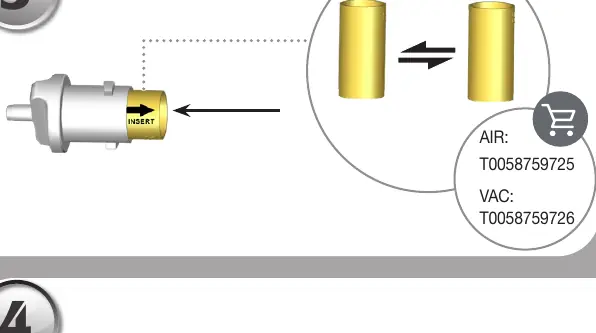
- Page 3: Rear panel connections including footswitch, interface, fuse, and mains connection.
- Page 4: Front panel controls showing air and vacuum connections and the on/off button.
- Page 6-7: Setup and connection procedures for the WXair module.
Model compatibility
- Compatible with Weller WX soldering tools.

Manual page author
Michael Turner
Technical manual editor
Reviews PDF manuals for structure, safety notes, and practical product details so readers can find the right information quickly.