Home Appliances / Kitchen Appliances
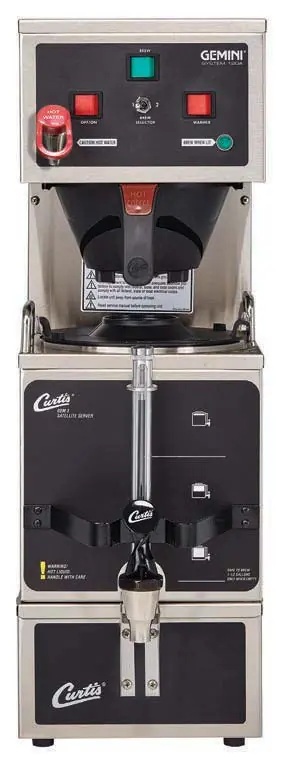
User Guide for Wilbur Curtis Gemini 120A Series Coffee Brewing System
Quick guide for the Wilbur Curtis Gemini 120A Series coffee brewer, covering installation, operation, daily cleaning, and troubleshooting steps.
Table of contents
Manual images
Jump to the sectionQuick guide from the manual
This document provides essential instructions for the installation, operation, and maintenance of the Wilbur Curtis Gemini 120A Series coffee brewing system. It is intended for commercial use by trained personnel. Key operations include proper leveling, water supply connection, and electrical wiring. Regular cleaning of the brewer and satellite server is mandatory to maintain performance and warranty coverage.
Installation and Setup
The brewer must be installed on a secure, level surface. Leveling legs should be adjusted to ensure the unit is stable. The water supply must be connected to a cold water line using a 1/4 inch flare fitting, with a shut-off valve and water filtration system recommended. Electrical installation must be performed by a qualified technician in accordance with local codes. For dual voltage units, ensure the internal wiring is configured correctly for the intended voltage (120V or 220V) before connecting power.

Operating Instructions
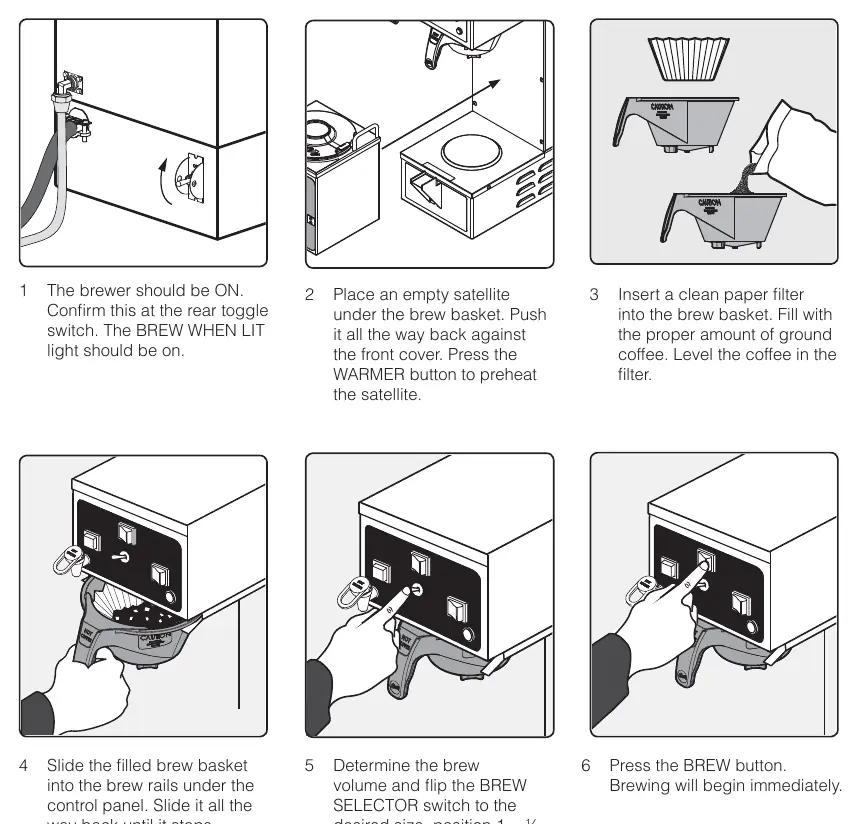
To brew coffee: 1. Ensure the brewer is turned ON. 2. Place an empty satellite server under the brew basket and press the WARMER button to preheat. 3. Insert a paper filter and add the appropriate amount of ground coffee. 4. Slide the brew basket into the rails. 5. Select the desired brew volume (1/2 gallon or 1 gallon) using the BREW SELECTOR switch. 6. Press the BREW button to start the cycle.
Cleaning and Maintenance
Daily cleaning is required for both the brewer and the satellite server. For the brewer, wipe exterior surfaces, clean the brew basket in mild detergent, and wipe the spray head area. For the satellite, wash the liner with detergent, rinse, and sanitize using approved tablets (e.g., TABZ Z95). Do not immerse the brewer or satellite in water. Weekly cleaning involves removing and cleaning the spray head and brew basket rails.
Troubleshooting
If the brewer does not start, check the water tank level and ensure the power is connected. If the water is not hot enough, verify the thermostat setting. If the water tank does not fill, check the water supply line and inlet valve. For detailed electrical issues, refer to the provided electrical schematics in the manual.
Practical help
Common problems
Brewer does not start when BREW button is pressed
Check water tank level, ensure the unit is powered, and verify the brew switch and wiring.
Water not hot enough
Check the thermostat temperature setting and inspect the heating element for high resistance.
Water tank does not fill
Ensure water supply is turned on, check for a plugged water line, filter, or inlet valve.
Dispenser overflows
Ensure the dispenser is empty before brewing and check if the dump valve is stuck open.
Before use
- Ensure the unit is installed on a secure, level surface.
- Verify the water supply line is flushed and connected to a cold water source.
- Confirm the electrical circuit meets the specifications for your specific model.
- Ensure the brewer is properly grounded.
- Purge air from the tubing by dispensing hot water through the faucet before the first brew cycle.
Specs in practice
- Water Pressure
- Must be between 20-90 psi (138-620 kPa) for proper operation.
- Brew Temperature
- Factory preset to 200°F (92°C); adjust for high elevations.
- Electrical Requirements
- Varies by model (120V, 230V, or dual voltage); refer to the electrical rating table on the unit.
Images and diagrams
- The manual includes detailed electrical schematics for different models and versions (Newer vs. Older units).
- Rough-in drawings provide precise dimensions for installation planning.
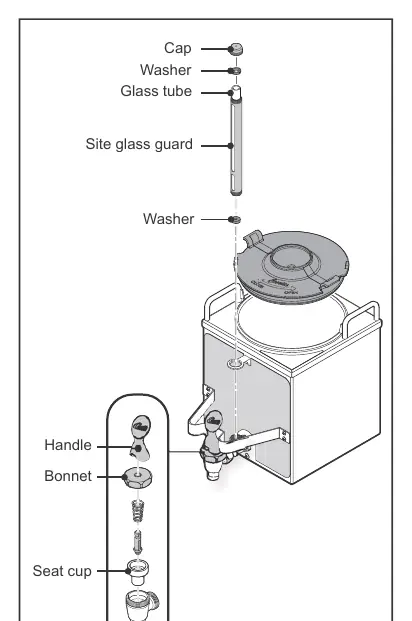
- Exploded view diagrams are provided for the main chassis and tank assemblies to assist in identifying parts.
Model compatibility
- Do not use IntelliFresh satellites on non-IntelliFresh brewers.
- Use only Wilbur Curtis approved water filters.
- Ensure the power cord is compatible with the electrical outlet; do not use extension cords.

Manual page author
Michael Turner
Technical manual editor
Reviews PDF manuals for structure, safety notes, and practical product details so readers can find the right information quickly.