Lighting / Emergency Lighting
Installation and User Guide for Ansell UKES Disco EVO 2 LED Bulkhead
Quick guide for the Ansell UKES Disco EVO 2 LED bulkhead. Includes installation steps, wiring diagrams, sensor settings, and reset procedures.
Quick answers from the manual
Quick answer
- This manual provides installation, wiring, and configuration instructions for the Ansell ACAE/1 and ACAE/1/PIR LED fixtures. p. 3, 4
Key actions
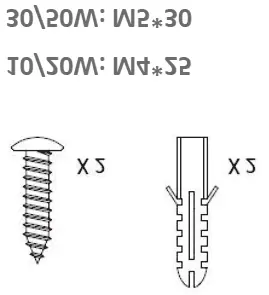
- Mount the fixture by drilling holes according to the wattage (10W: 32mm, 20W: 62mm, 30W: 63mm, 50W: 103mm) and securing the bracket. p. 3
- Connect the wiring to the Live (L), Neutral (N), and Earth terminals. p. 4
First start
- Ensure the mains power is switched off before installation. Mount the bracket, attach the light, and configure sensor settings (Sens, Lux, Time) after installation. p. 1, 3, 4
Maintenance and reset
- To reset, toggle the power Off/On twice within 3 seconds. p. 4
Technical specifications
| Parameter | Value | Meaning | Pages |
|---|---|---|---|
| Sensor Range (Sens) | 6-10M | Detection distance | p. 4 |
| Lux | 10-1000 | Light level threshold | p. 4 |
| Time | 10 Sec - 7 Min | Duration light stays on | p. 4 |
| Installation Height | 1M - 3M | Recommended mounting height | p. 4 |
Where to find it in the PDF
- Warranty Information p. 1, 2
- Installation Instructions p. 3
- Wiring and Sensor Settings p. 4
Table of contents
Manual images
Click an image to enlargeQuick Guide
The Ansell UKES Disco EVO 2 is an LED bulkhead designed for wall mounting. Key operational parameters include an installation height of 1m to 3m. The integrated sensor features adjustable sensitivity (6-10m), ambient light threshold (10-1000 lux), and duration (10 seconds to 7 minutes). Always ensure mains power is switched off before installation or maintenance.
Installation
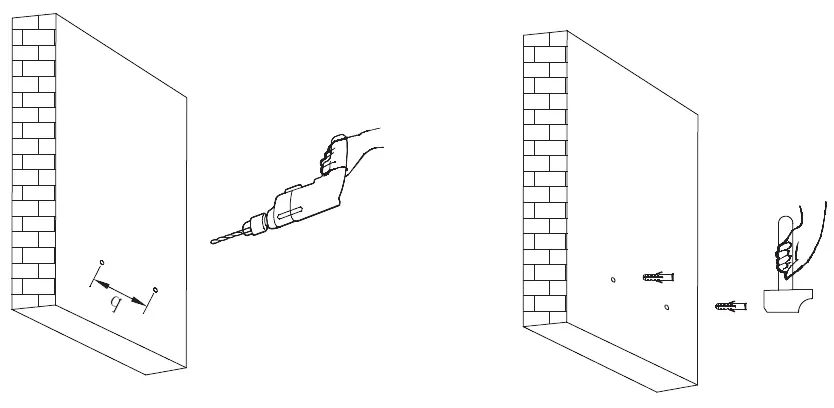
- Ensure the mains power is switched off.
- Prepare the wall by drilling holes according to the required spacing: 10W (32mm), 20W (62mm), 30W (63mm), 50W (103mm).
- Insert the provided wall plugs into the drilled holes.
- Secure the mounting bracket to the wall using the provided screws.
- Attach the bulkhead fitting to the bracket.
Wiring
Connect the mains supply to the terminal block inside the fitting. Ensure the connections are secure:
- L: Live
- N: Neutral
- Earth: Ground connection
Sensor Settings
The sensor can be adjusted using the three knobs located on the unit:
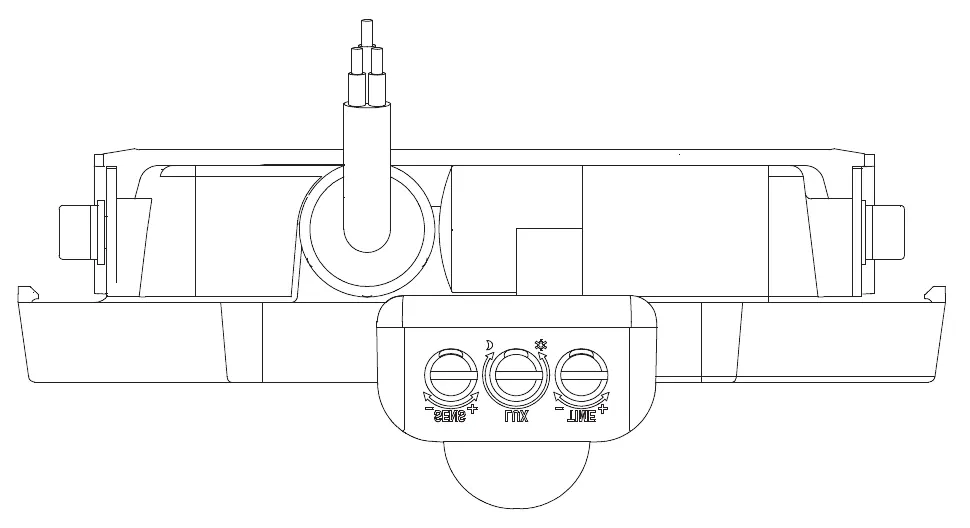
- Sens: Adjusts the detection range between 6 and 10 meters.
- Lux: Adjusts the ambient light threshold between 10 and 1000 lux.
- Time: Adjusts the duration the light remains on, from 10 seconds to 7 minutes.
Reset Procedure
To reset the unit, perform the following sequence:
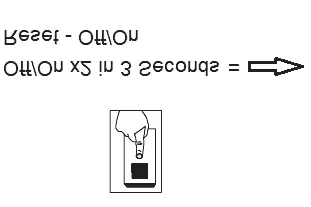
- Switch the power Off and On twice within 3 seconds.
Safety and Maintenance
The light source contained in this luminaire must only be replaced by the manufacturer, their service agent, or a similarly qualified person. If the external flexible cable or cord of this luminaire is damaged, it must be replaced by the manufacturer or their service agent. Do not attempt to repair the unit yourself if you are not qualified.
Manufacturer information
Ansell Lighting
Practical help
Common problems
Light does not turn on
Ensure mains power is switched on and check all wiring connections (L, N, Earth).
Sensor not detecting motion
Check the 'Sens' knob setting and ensure the installation height is within the recommended 1m to 3m range.
Light stays on for too long
Adjust the 'Time' knob to decrease the duration.
Before use
- Switch off mains power before starting installation.
- Verify the installation height is between 1m and 3m.
- Ensure you have the correct tools (drill, screwdriver).
- Check that wiring connections are secure and correct (L, N, Earth).
- Confirm the product is suitable for the intended environment.
Images and diagrams
- Step 1: Tools required (drill, screwdriver, screws, wall plugs).
- Step 2: Drilling dimensions for different wattage models.
- Step 7: Wiring diagram showing L, N, and Earth connections.
- Step 9: Sensor adjustment knobs for Sens, Lux, and Time.
Model compatibility
- Installation height must be between 1m and 3m.
- Light source replacement must be performed by a qualified person.

Manual page author
Emily Carter
User documentation editor
Prepares concise manual descriptions and highlights the most useful setup, operation, and maintenance information for readers.