Tools / Power Tools
Bosch EasyChain 18V-15-7 Chain Saw Service Manual
A comprehensive service and parts guide for the Bosch EasyChain 18V-15-7 chain saw, featuring detailed exploded views, component identification, and assembly sequences.
Table of contents
Manual images
Jump to the sectionQuick guide from the manual
This document serves as an official service and parts reference for the Bosch EasyChain 18V-15-7 (3 600 HB8 900). It provides exploded diagrams for maintenance and repair, a complete spare parts list, and specific torque requirements for assembly.
Device overview and assembly
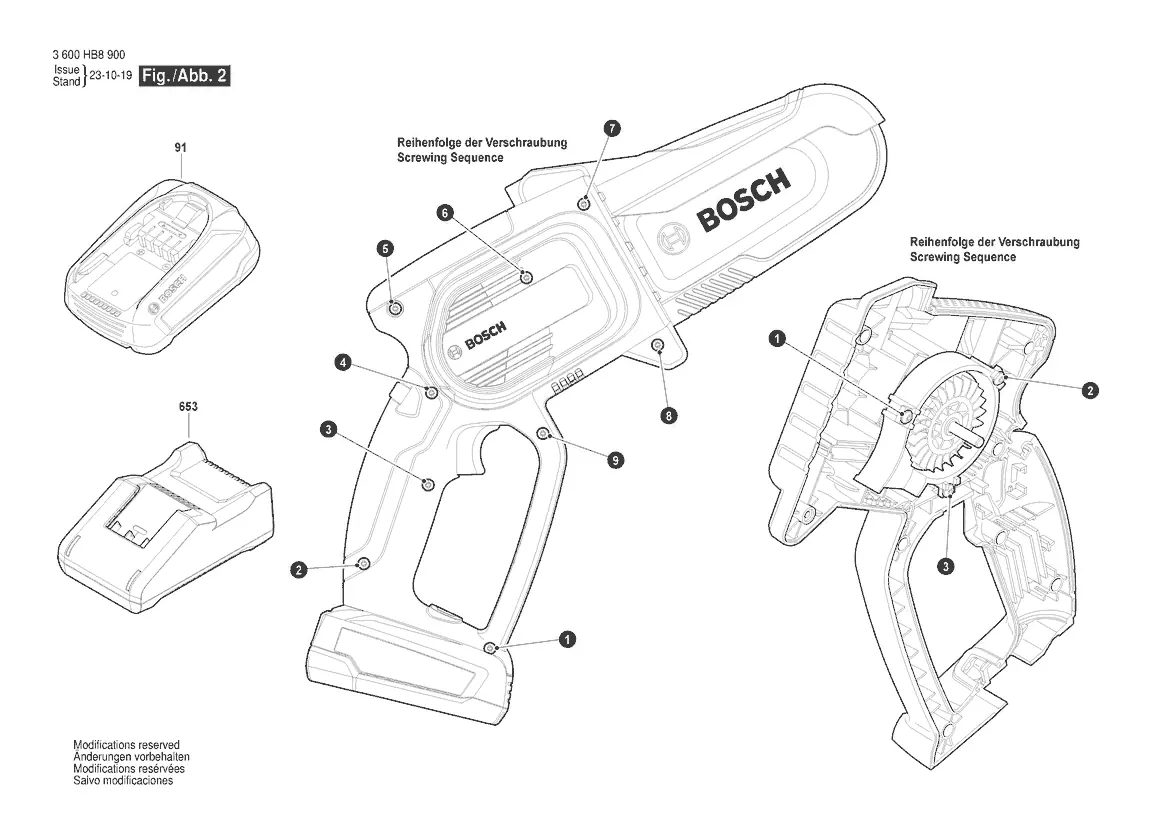
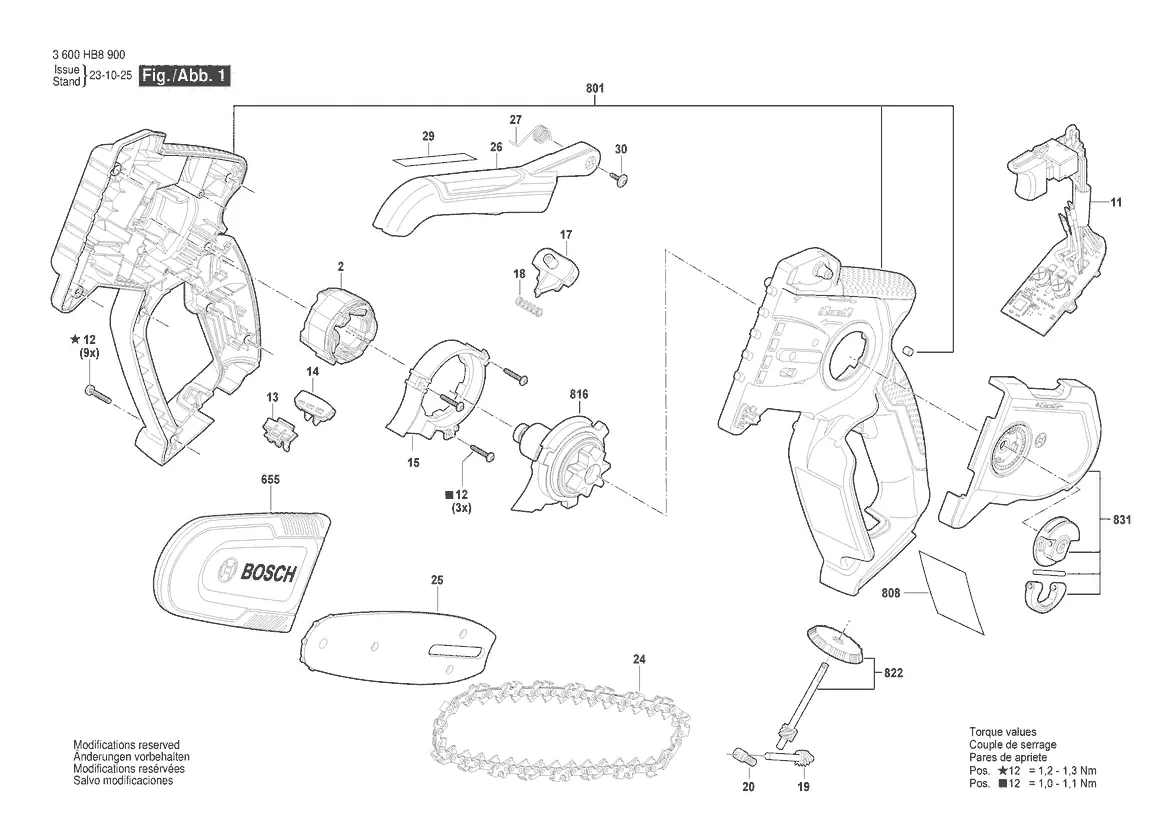
The manual provides detailed exploded views showing the internal structure of the tool. Key components include the drive unit, tensioning device, guide rail, and chain. When reassembling the housing, follow the numbered screwing sequence indicated in the illustrations to ensure proper alignment and structural integrity.
Technical specifications and torque values
Proper assembly requires adherence to specific torque settings for the housing screws:
- Torx Oval-Head Screws (Pos. 12, 9x): 1.2 - 1.3 Nm
- Torx Oval-Head Screws (Pos. 12, 3x): 1.0 - 1.1 Nm
Spare parts list
The following components are identified for service and replacement:
- Stator (1 619 P17 817)
- Printed-Board Assembly (1 600 A02 D4P)
- Drive Unit (1 600 A03 1PH)
- Tensioning device (1 607 000 F3G)
- Chain (1 600 A02 CP6)
- Guide Rail (1 600 A02 BF4)
- Battery Pack (1 607 A35 0RU / 1 607 A35 1C9)
- Charger (2 607 226 517 / 519 / 593)
Contact and support
For further technical assistance or to locate authorized service centers, visit the official Bosch support website at https://www.boschtoolservice.com.
Official resources from the manual
Manufacturer information
Bosch
Practical help
Common problems
Housing misalignment during assembly
Follow the numbered screwing sequence (1-9) provided in the illustration to ensure even pressure distribution.
Incorrect screw torque
Use a torque wrench to tighten the 12x Torx screws to the specified 1.0-1.3 Nm range depending on the specific position.
Before use
- Verify all internal components (stator, drive unit) are correctly seated.
- Ensure the chain and guide rail are properly tensioned using the tensioning device.
- Check that the battery pack is compatible (1 607 A35 0RU or 1 607 A35 1C9).
- Confirm all housing screws are tightened to the specified torque values.
Specs in practice
- Torque values (Pos. 12)
- Specific tightening force required for housing screws to prevent casing damage or vibration.
- 3 600 HB8 900
- The specific machine identification number required when ordering spare parts.
Images and diagrams
- Fig. 1: Exploded view of the internal mechanical and electrical components.
- Fig. 2: Housing assembly sequence showing the order in which screws must be tightened.
Model compatibility
- Only use original Bosch battery packs and chargers listed in the spare parts section.

Manual page author
Michael Turner
Technical manual editor
Reviews PDF manuals for structure, safety notes, and practical product details so readers can find the right information quickly.