Furniture / Dining Room
Assembly Instructions for Brayden Studio 11-Piece Dining Set
Comprehensive assembly guide for the Brayden Studio 11-Piece Dining Set (Model 861-030). Includes parts list, step-by-step assembly instructions, safety warnings, and weight capacity specifications.
Table of contents
Manual images
Click an image to enlargeQuick Guide from the Manual
This dining set is designed for assembly by two adults. Please read the entire manual before beginning. The estimated assembly time is 90 minutes. Always assemble the furniture on a soft, non-abrasive surface, such as a carpet, to prevent damage to the finish.
Important Safety Information:
- Maximum Weight Capacity: 350 lbs / 160 kg per seat.
- Assembly Requirement: Due to the weight of the items, it is recommended that two adults perform the assembly.
- Preparation: Verify all parts are present against the parts list before starting. If any parts are missing or damaged, do not attempt assembly and contact customer service immediately.
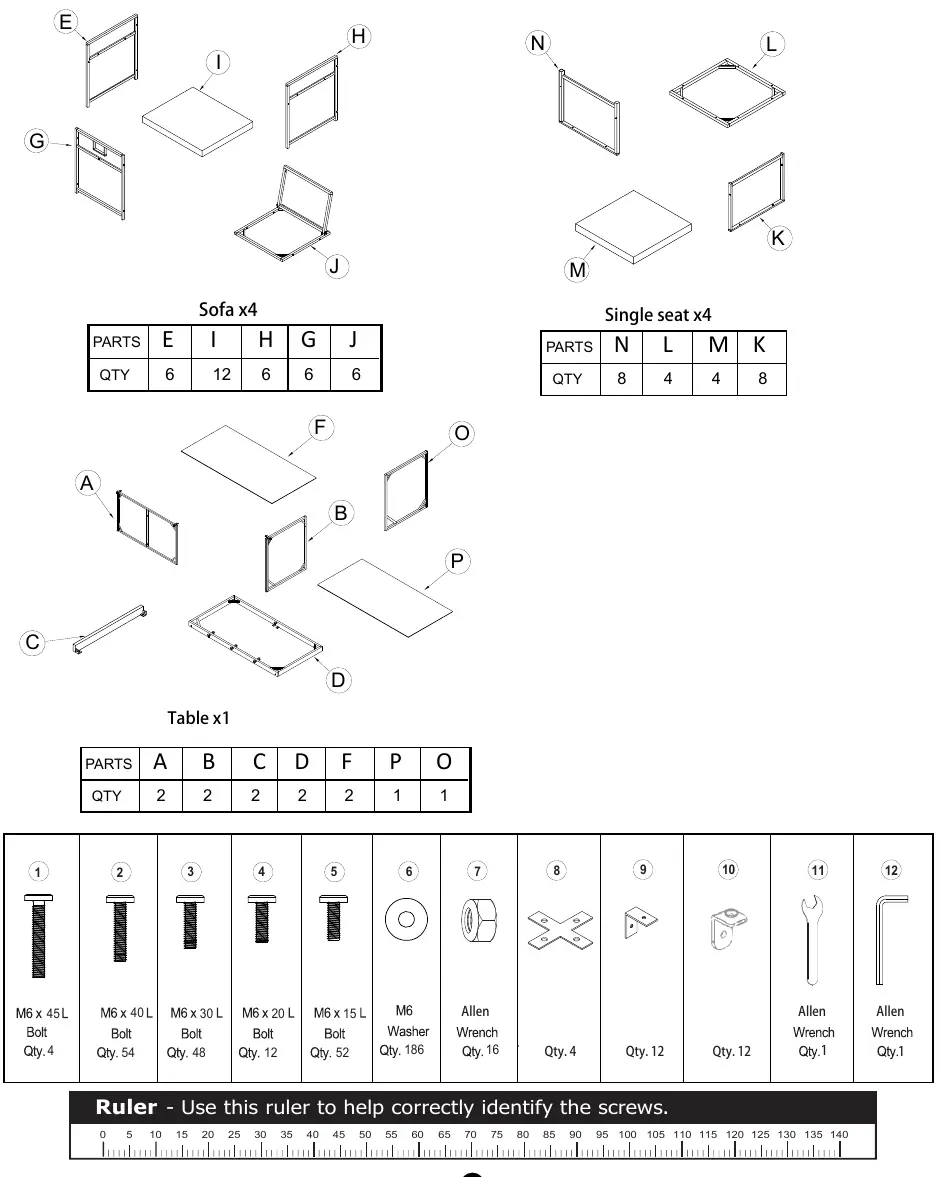
Parts List
The set includes various components labeled A through P and hardware labeled 1 through 12. Please refer to the parts list on page 4 of the manual to identify all screws, bolts, washers, and structural components before beginning assembly. Use the provided ruler on page 4 to correctly identify the screws.
Assembly Instructions
Follow these steps to assemble your dining set:
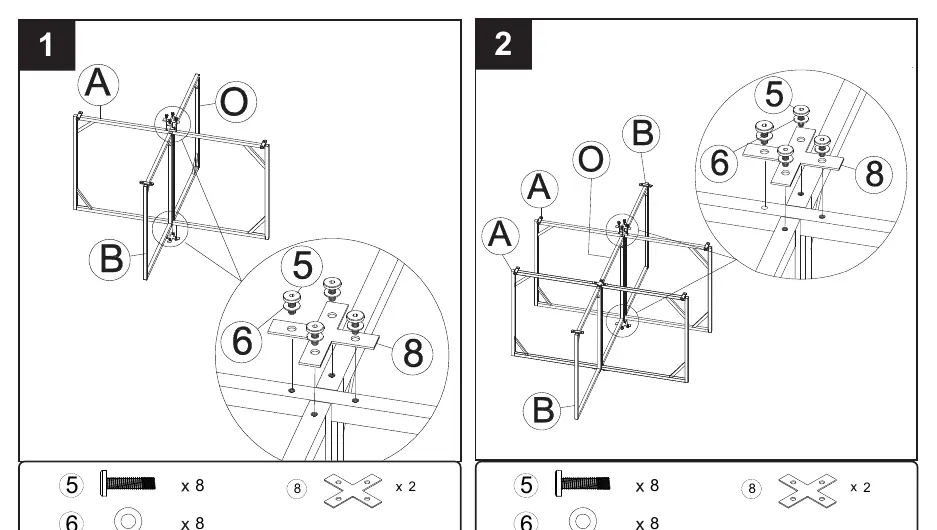
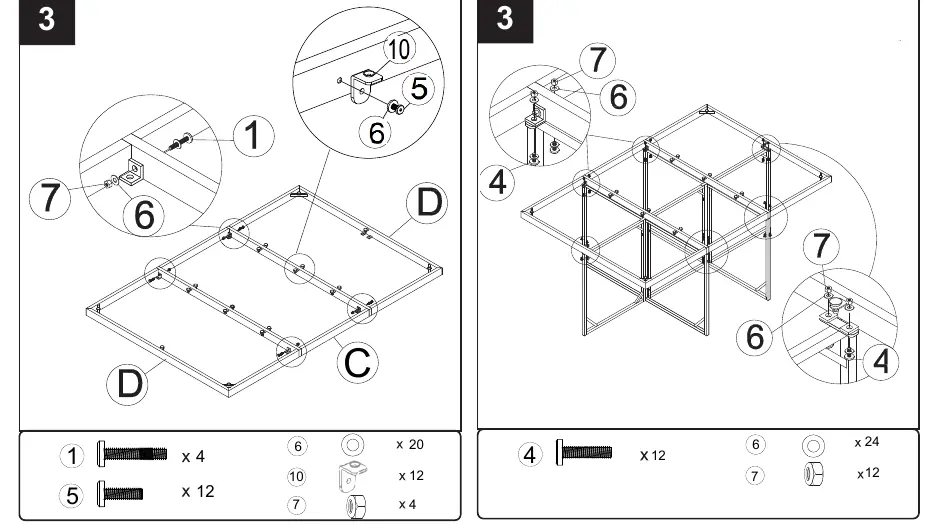

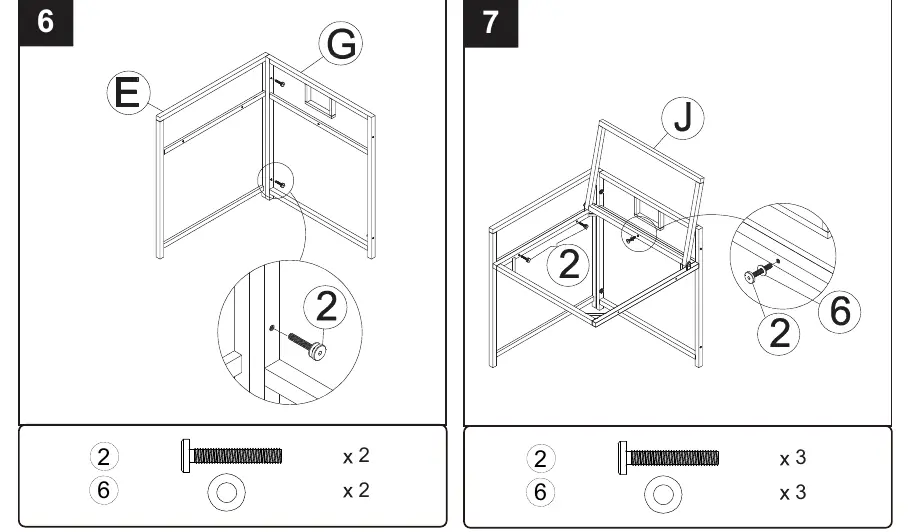
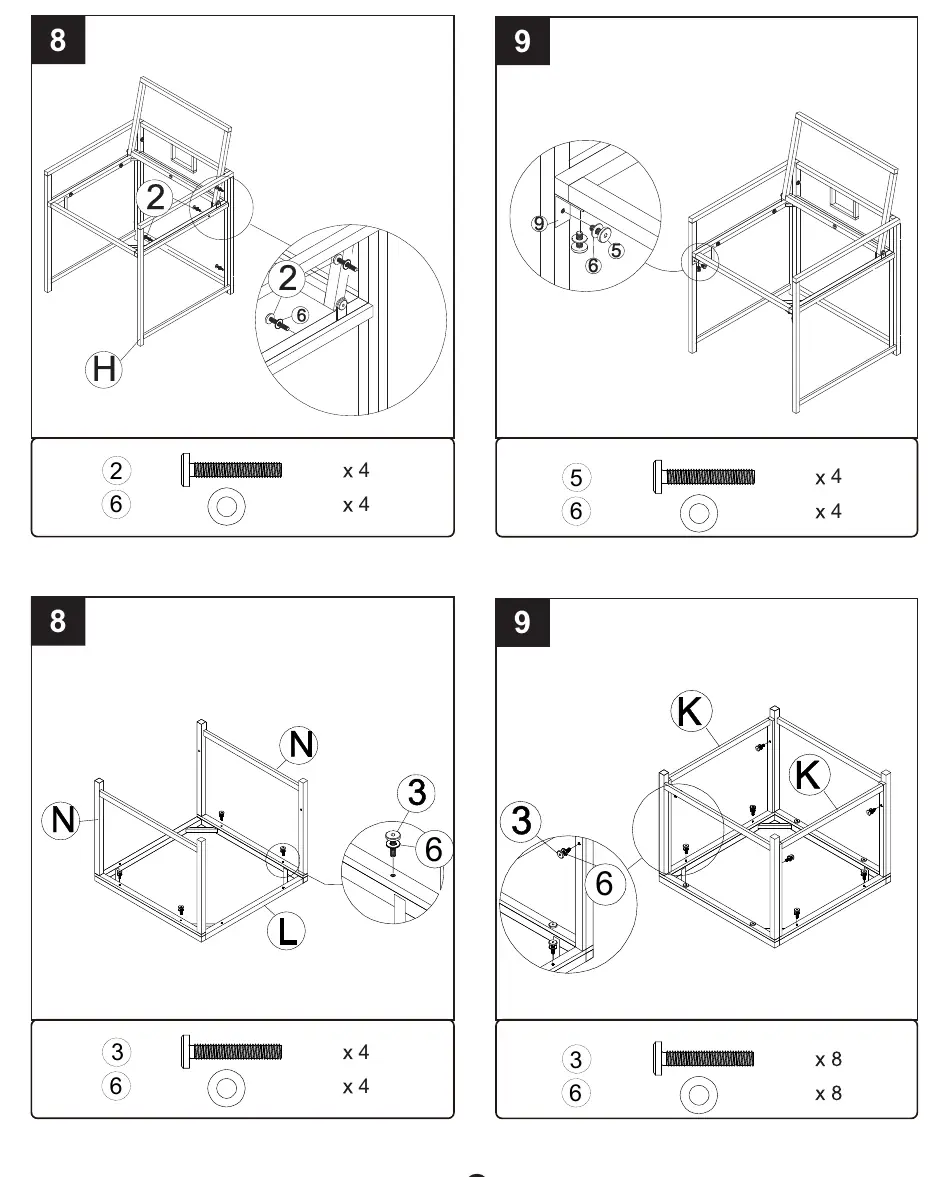
Table Assembly
- Step 1: Connect parts A, B, and O using hardware 5, 6, and 8.
- Step 2: Continue connecting parts A, B, and O using hardware 5, 6, and 8.
- Step 3: Assemble the table frame using parts C and D with hardware 1, 5, 6, 7, and 10.
- Step 3 (Table Top): Secure the table top frame using hardware 4, 6, and 7.
- Step 4: Place panels F and P onto the assembled table frame.
Chair/Stool Assembly
- Step 6: Connect parts E and G using hardware 2 and 6.
- Step 7: Attach part J to the frame using hardware 2 and 6.
- Step 8: Attach part H using hardware 2 and 6.
- Step 9: Complete the assembly by attaching parts K and N using hardware 3, 5, and 6.
Maintenance and Warranty
To ensure warranty coverage, keep pictures of any damaged parts and have the model number (861-030) ready before contacting customer service. Handle all parts with care during assembly to avoid scratches or structural damage.
Practical help
Common problems
Missing or damaged parts
Do not attempt to assemble the product. Contact customer service immediately with the model number.
Heavy components
The item is heavy; it is recommended that two adults perform the assembly to ensure safety.
Before use
- Verify all parts are present using the parts list on page 4.
- Ensure you have two adults available for assembly.
- Prepare a soft, non-abrasive surface (e.g., carpet) to prevent damage.
- Read the entire manual before starting assembly.
- Use the ruler provided on page 4 to identify the correct screws.
Specs in practice
- Maximum Sitting Weight
- 350 lbs / 160 kg per seat.
- Estimated Assembly Time
- 90 minutes.
Images and diagrams
- The manual provides an exploded view of parts and hardware on page 4.
- Assembly steps 1-9 provide detailed visual guides on how to connect specific parts using the corresponding hardware.

Manual page author
David Miller
Documentation analyst
Organizes user manual content into clear summaries, with attention to model details, product context, and everyday usability.