Electronics / Trail Cameras
User Manual for Bushnell Core Trail Camera
A comprehensive user guide for the Bushnell Core Trail Camera (models 119936C, 119938C, 119975C, 119977C). Includes setup instructions, menu configurations, mounting tips, and troubleshooting steps.
Table of contents
Manual images
Click an image to enlargeQuick Start Guide
To get started with your Bushnell Core Trail Camera, follow these steps:
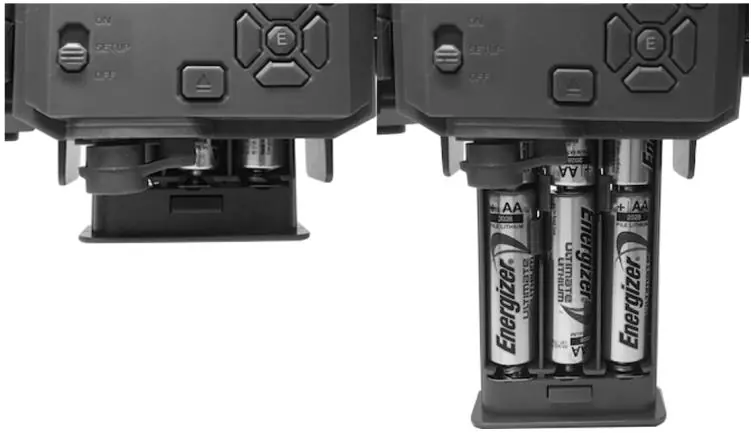
- Install Batteries: Open the latch on the right side, press the battery release button, and slide out the tray. Insert 6 AA batteries (lithium recommended for best performance).
- Insert SD Card: With the power switch in the OFF position, insert an SD card (up to 32GB, class 6 or higher recommended). Ensure the write-protect switch is in the 'off' position.
- Power On: Move the switch to the ON position. The motion indicator LED will blink for 10 seconds, allowing you time to close the cover and leave the area.
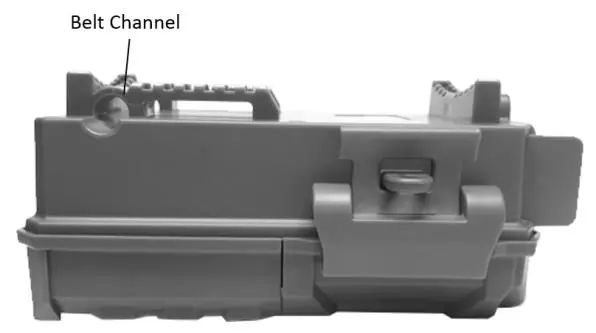
- Mounting: Use the provided web belt to secure the camera to a tree, or use the tripod socket on the bottom.
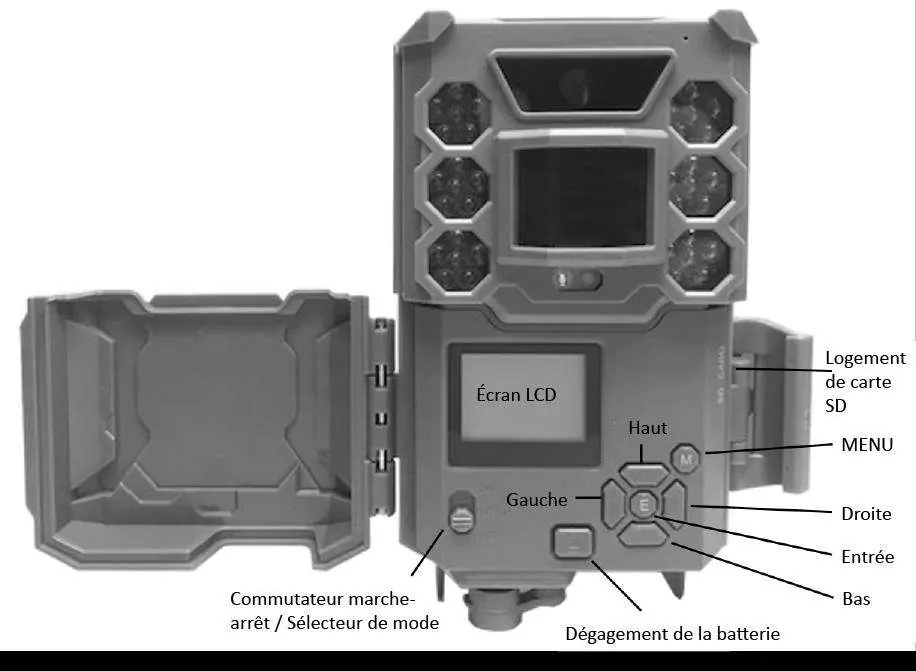
Parts and Controls
The camera features a 3-way power switch (OFF, SETUP, ON) and a D-Pad interface for menu navigation. The SETUP mode allows you to configure settings using the built-in LCD screen. Shortcut keys in SETUP mode include:
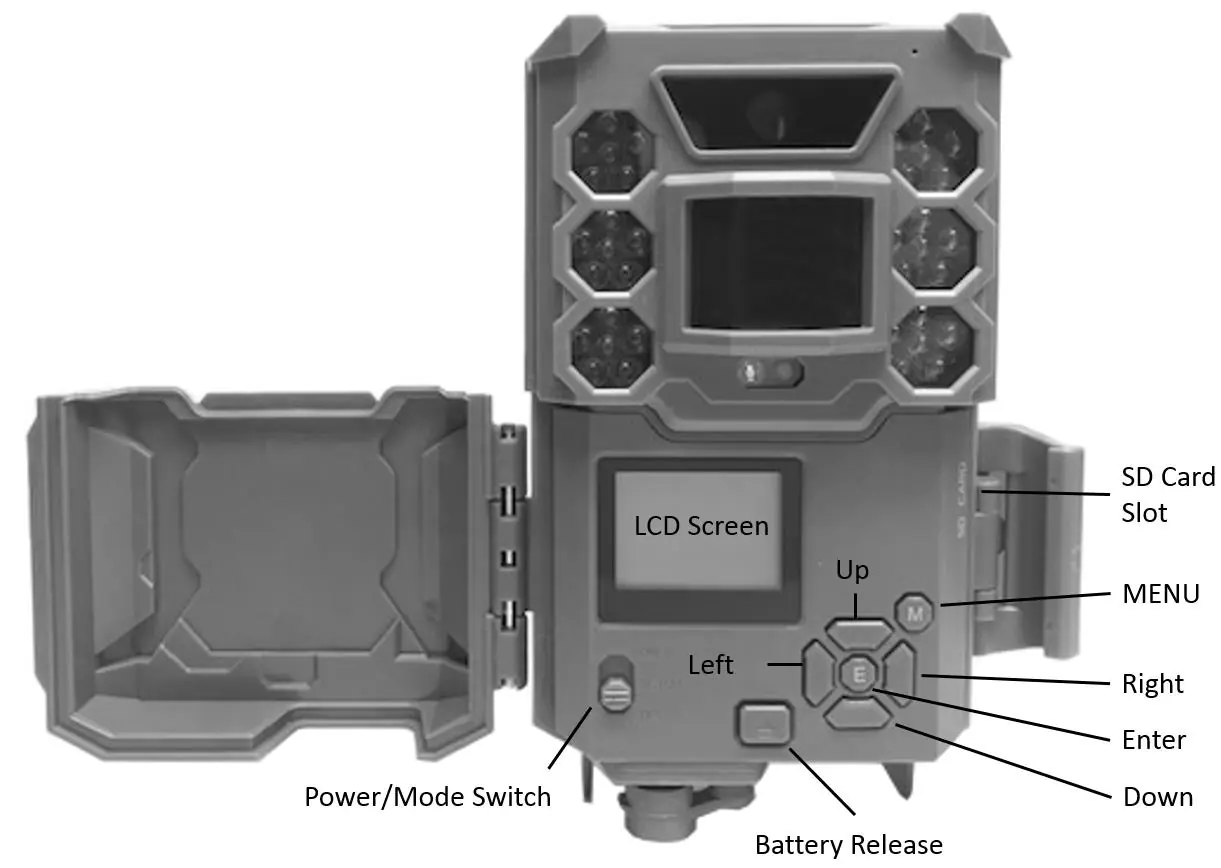
- UP: Set to Video mode.
- DOWN: Set to Photo mode.
- RIGHT: Manually trigger the shutter (SHOT).
Setup Menu Configuration
To change settings, move the switch to SETUP and press the MENU button. Use the D-Pad to navigate and change parameters:
- Set Clock: Set date and time.
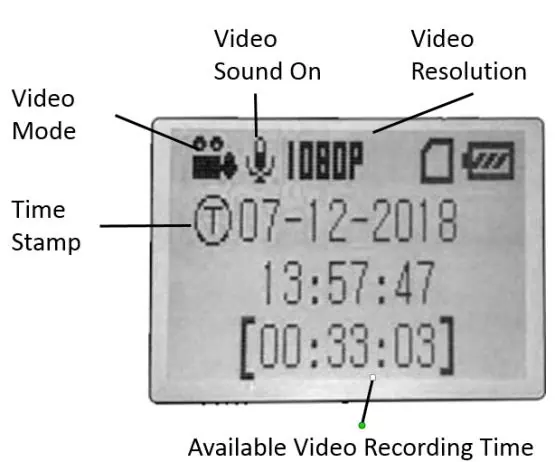
- Mode: Choose between Camera (still photos) or Video.
- Image Size: Select resolution (3MP, 8MP, 24MP/30MP).
- Capture Number: Number of photos per trigger.
- Video Size: Select resolution (up to 1920x1080).
- Video Length: Fixed (5-60s) or Dynamic variable length.
- Interval: Time the camera waits between triggers (0.6s to 60m).
- Format: Erase all files on the SD card.
- Sensor Level: Adjust PIR sensitivity (Auto, Low, Normal, High).
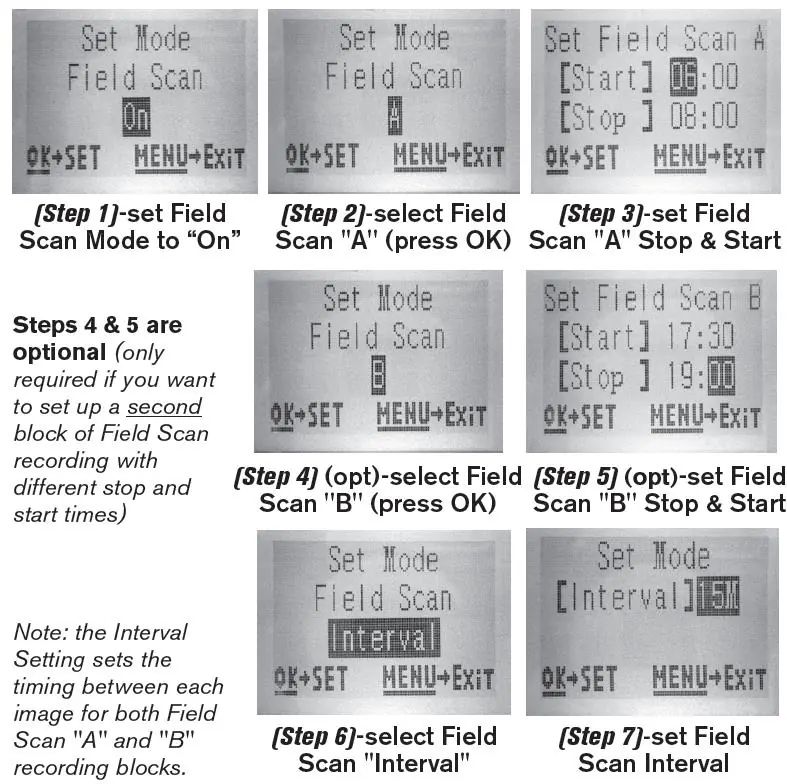
Field Scan 2x Feature
Field Scan allows you to monitor food plots or field edges with time-lapse images or video without requiring an animal trigger. You can define two time blocks (A and B) with specific start/stop times and intervals. Ensure the current time is set correctly before using this feature.
Mounting and Positioning
For optimal results, mount the camera on a sturdy tree about 6 inches in diameter, 5-6.5 feet (1.5-2m) from the ground, and 16-17 feet (5m) away from the monitored area. Ensure the camera is not aimed at heat sources or branches that may move in the wind.
Troubleshooting
If you encounter issues:
- Camera takes continuous images of no subject: Move the camera to avoid heat sources or moving branches, or adjust the sensor level.
- Battery life is short: Use new lithium AA batteries, avoid 0.6s interval, and ensure the camera is not left in SETUP mode.
- Camera stops taking images: Check if the SD card is full, ensure the write-protect switch is off, or format the card.
Manufacturer information
Bushnell
Practical help
Common problems
Camera takes continuous images of no subject
Move the camera to an area without heat sources or moving branches, or adjust the sensor level in the menu.
Battery life is shorter than expected
Use new lithium AA batteries, avoid the 0.6s interval setting, and ensure the camera is not left in SETUP mode.
Camera stops taking images
Check if the SD card is full, ensure the write-protect switch is off, or format the card using the 'Format' parameter.
Before use
- Install 6 AA batteries (lithium recommended)
- Insert SD card (up to 32GB, class 6 or higher)
- Set date and time in SETUP mode
- Format SD card before first use
- Test sensing angle in SETUP mode
Specs in practice
- PIR Sensitivity
- Adjusts motion sensor sensitivity based on ambient temperature.
Images and diagrams
- Front view showing lens, PIR sensor, and LED IR flash
- Control panel layout showing LCD screen and D-Pad buttons
- Battery tray installation
- Mounting with web belt
Model compatibility
- Supports SD/SDHC cards up to 32GB
- Compatible with optional Bushnell Solar Panel (model 119756C)
- Not recommended for NiMh rechargeable batteries

Manual page author
David Miller
Documentation analyst
Organizes user manual content into clear summaries, with attention to model details, product context, and everyday usability.