Electronics / Cameras
Bushnell 119986C Solar Panel Instruction Manual
Quick guide for the Bushnell 119986C Solar Panel, covering installation, camera connection, USB charging, troubleshooting, and technical specifications.
Table of contents
Manual images
Jump to the sectionQuick guide from the manual
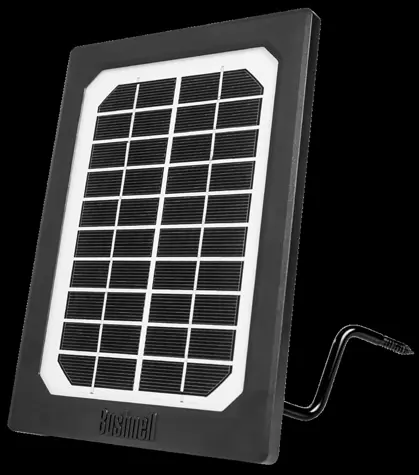
The Bushnell Solar Panel (#119986) is a supplemental power accessory designed to extend the battery life of compatible Bushnell trail cameras. It features an internal lithium-ion battery that is continuously charged by solar cells. Once connected, the camera draws power from the solar panel first, switching to its internal batteries only when the panel's charge is low.
Mounting and Camera Connection
To install the solar panel:
- Screw the provided mounting bracket into a tree above the camera, ensuring the panel has unobstructed sun exposure.
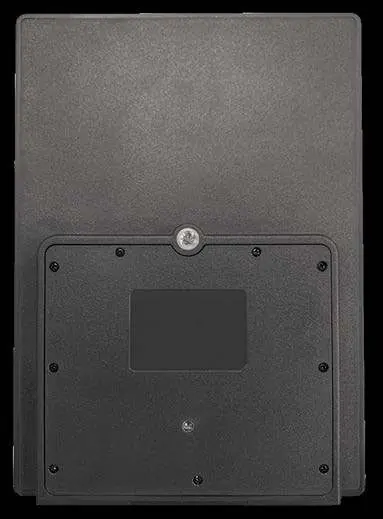
- Attach the swivel head to the bracket and connect the threaded bolt to the mounting socket (1/4-20) on the back of the panel.
- Loosen the swivel head knob to aim the solar cells directly at the sun, then tighten the locking collars.
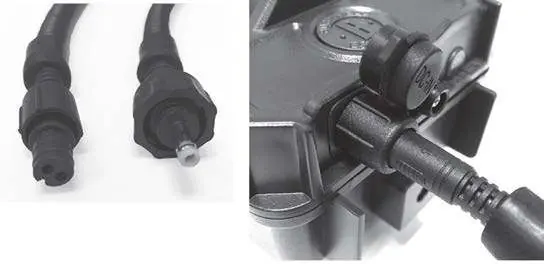
- Connect the appropriate cable to both the solar panel and the camera's external power port.
- Secure any excess cable slack.
Charging the Solar Panel Via USB
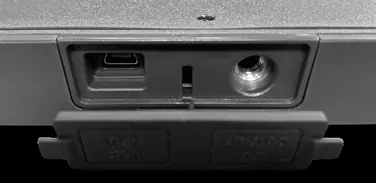
The internal power core can be pre-charged before field use using a USB Mini cable (not included) connected to a computer or power source. The charging indicator LED on the back glows red during charging and turns green when complete.

Troubleshooting
If the charge indicator light flashes red, excessive output current has been detected. Disconnect the USB cable until the light stops flashing, then try again. If the issue persists, try a different power source or contact customer service.
Technical Specifications
- Power Requirement: 5V @ min 500mA
- USB Charging Voltage: 4V – 6V
- Discharging Voltage: 7V - 8.4V
- Max. Current Discharge: 2A
- Operating Temperature: -20 – 40° C
- Operating Humidity: 5% - 90%
Manufacturer information
Bushnell
Practical help
Common problems
Charge indicator light is flashing red.
Excessive output current detected. Disconnect the USB cable until the light stops flashing and try again. If it persists, try a different power source.
Solar panel not working in shade or at night.
The panel requires full, unrestricted sun exposure to keep the internal battery charged. It will continue to provide power at night only if the internal battery was fully charged during the day.
Before use
- Ensure your trail camera has an external power port.
- Choose the correct cable connector for your specific camera model.
- Mount the panel in a location with unobstructed sun exposure.
- Optionally, pre-charge the internal battery via USB before field use.
Specs in practice
- Power Requirement (5V @ 500mA)
- Minimum input required for effective USB charging.
- Max. Current Discharge (2A)
- The maximum power output the panel can provide to the camera.
- Operating Temperature (-20 to 40°C)
- The environmental temperature range in which the panel functions correctly.
Images and diagrams
- The rear view shows the standard 1/4-20 mounting socket and the charge indicator LED.
- The connections panel includes a USB charging port and a camera connection jack.
Model compatibility
- Compatible with Bushnell trail cameras featuring an external power port.
- Supported series include Trophy Cam HD, Trophy Cam HD Aggressor, Impulse, Core, CelluCore, and Prime.

Manual page author
Emily Carter
User documentation editor
Prepares concise manual descriptions and highlights the most useful setup, operation, and maintenance information for readers.