Electronics / Cameras
Bushnell 119936C Core Trail Camera Instruction Manual
Quick guide for the Bushnell 119936C Core Trail Camera, covering battery and SD card installation, operating modes, setup menu parameters, mounting instructions, and troubleshooting.
Table of contents
Manual images
Jump to the sectionQuick guide from the manual
This document provides essential instructions for setting up and operating your Bushnell Core Trail Camera. Key steps include installing batteries and an SD card, mounting the camera, and configuring settings via the built-in LCD screen.
Device Description
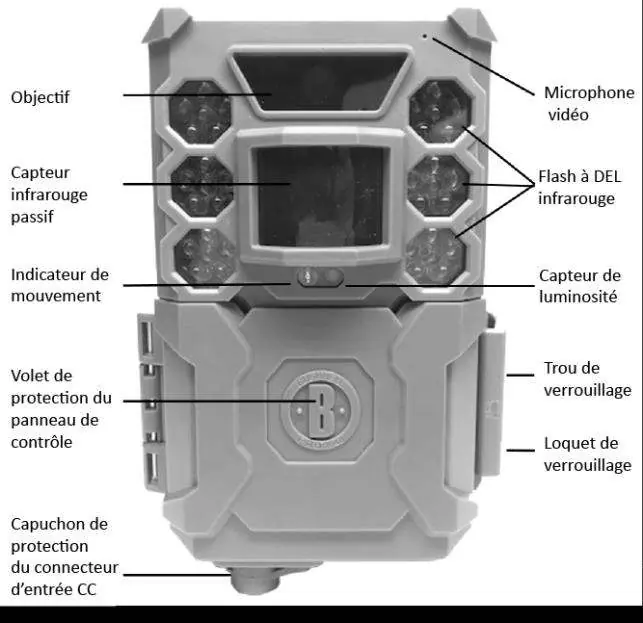
The Bushnell Core Trail Camera is a digital scouting camera designed for outdoor use. It features a highly sensitive Passive Infra-Red (PIR) motion sensor to detect game and capture high-quality photos or videos. It is resistant to water and snow.
Installing Batteries and SD Card
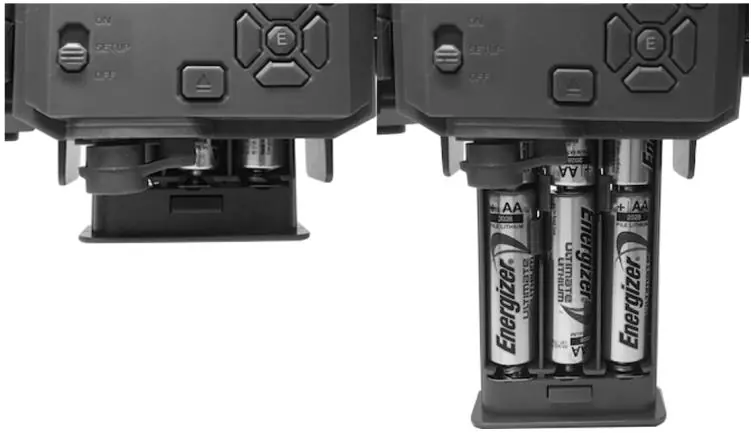
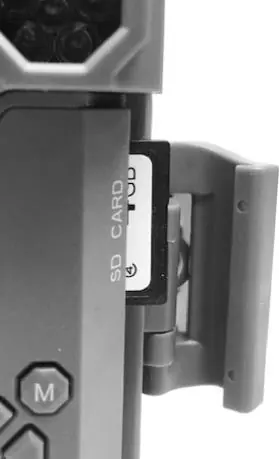
Before use, install 6 AA batteries (lithium recommended) and an SD card (up to 32GB capacity, Class 6 or faster recommended). Ensure correct polarity when inserting batteries. Insert the SD card with the label facing up until it clicks. Always ensure the camera is in the OFF position when inserting or removing batteries or the SD card.

Operating Modes
- OFF: Safe mode for transport, changing batteries/SD card, or connecting to a computer.
- ON: Active mode. The camera automatically captures photos or videos when triggered by the PIR sensor.
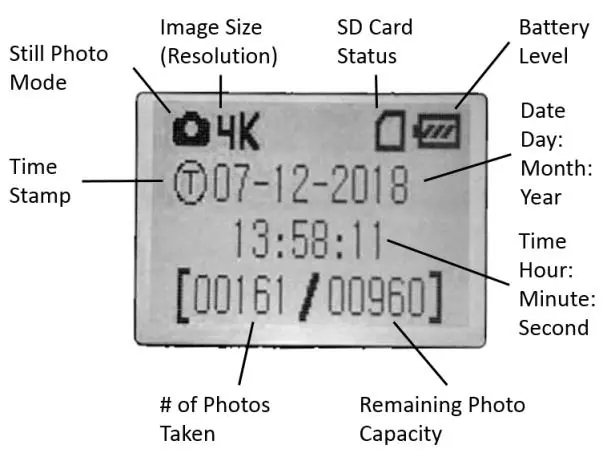
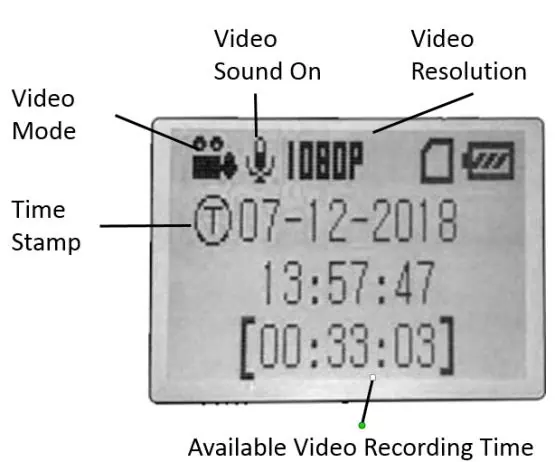
- SETUP: Used to check and change camera settings via the built-in LCD screen.
Setup and Settings
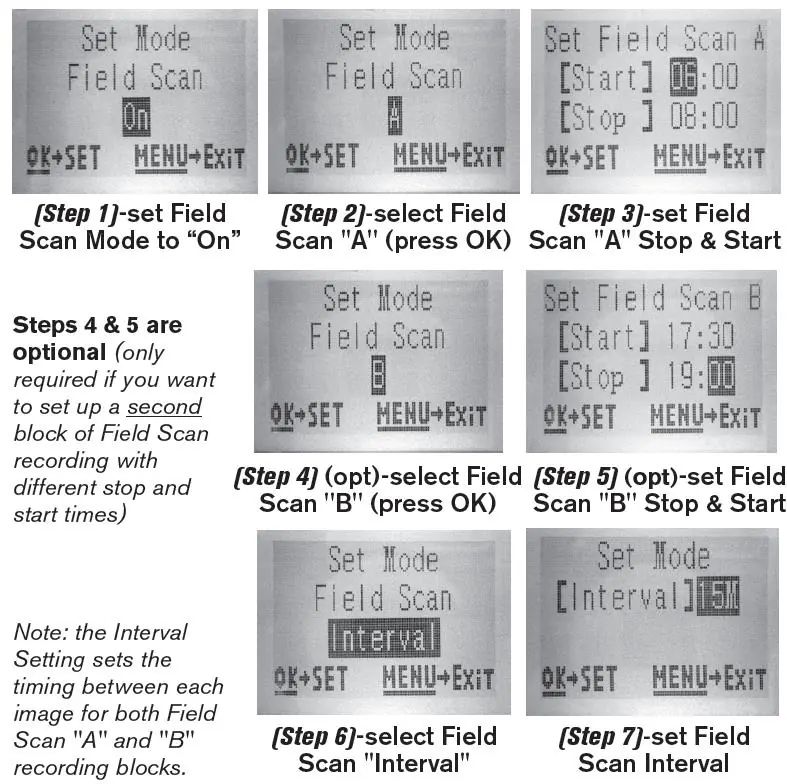
Switch the camera to SETUP to access the menu. Use the D-Pad keys to navigate and change parameters such as photo/video resolution, interval, and time stamp. Press ENTER to save changes. Always move the switch from OFF to SETUP to avoid potential lockups.
Mounting and Positioning
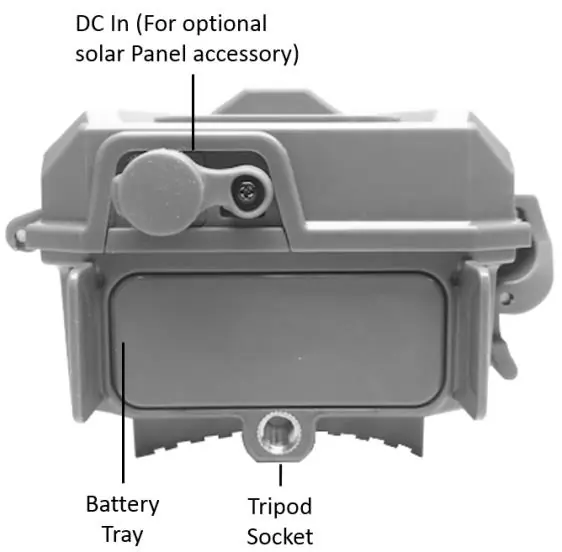
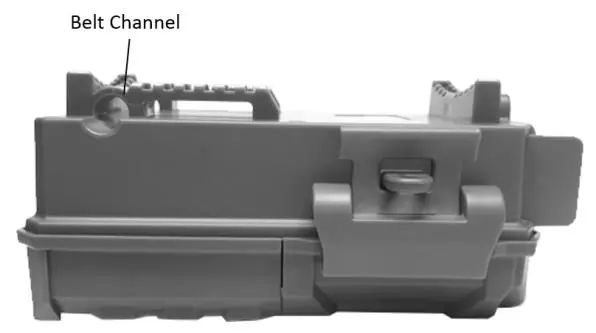
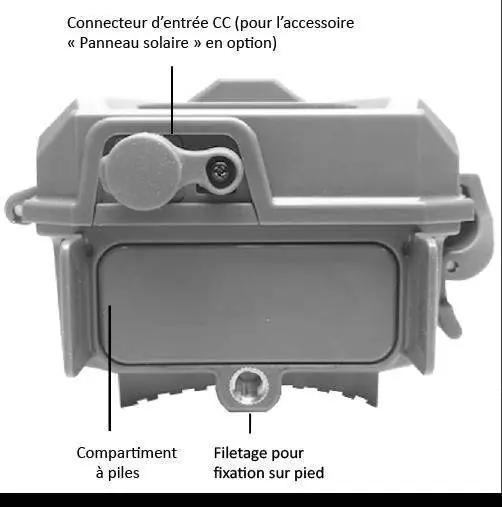
Mount the camera on a sturdy tree, approximately 16-17 feet (5 meters) from the monitored area, at a height of 5-6.5 feet (1.5-2 meters). Use the provided adjustable web belt or the tripod socket.
Troubleshooting
If the camera is not functioning properly, check the Troubleshooting/FAQ section. Common issues include false triggers (often caused by heat or wind-blown branches), short battery life (avoid 0.6s interval), or the camera failing to capture images (check if the SD card is full or locked).
Technical Specifications
The camera supports resolutions up to 24MP or 30MP (depending on model) and HD video. Operating temperature range is -20°C to 60°C. It features a PIR sensor with adjustable sensitivity levels.
Manufacturer information
Bushnell
Practical help
Common problems
Camera takes continuous images of no subject (false triggers)
Move the camera to an area without heat sources or wind-blown branches, or adjust the sensor level in the menu.
Battery life is shorter than expected
Use new lithium AA batteries, avoid the 0.6s interval setting, and ensure the camera is not left in SETUP mode.
Camera stops taking images
Check if the SD card is full, ensure it is not write-protected (locked), or format the card using the SETUP menu.
Night photos/videos appear too dark
Ensure batteries are full, subject is within the ideal flash range (up to 100ft/30m), and LED Control is set to High.
Before use
- Install 6 new AA lithium or alkaline batteries.
- Insert a high-quality SD card (up to 32GB, Class 6 or faster).
- Ensure the SD card write-protect switch is in the OFF position.
- Set the date and time in the SETUP menu.
- Test the sensing angle and distance in SETUP mode before final mounting.
Specs in practice
- PIR Sensitivity
- Adjusts the motion sensor's sensitivity based on ambient temperature; use High for warm conditions and Low for cold.
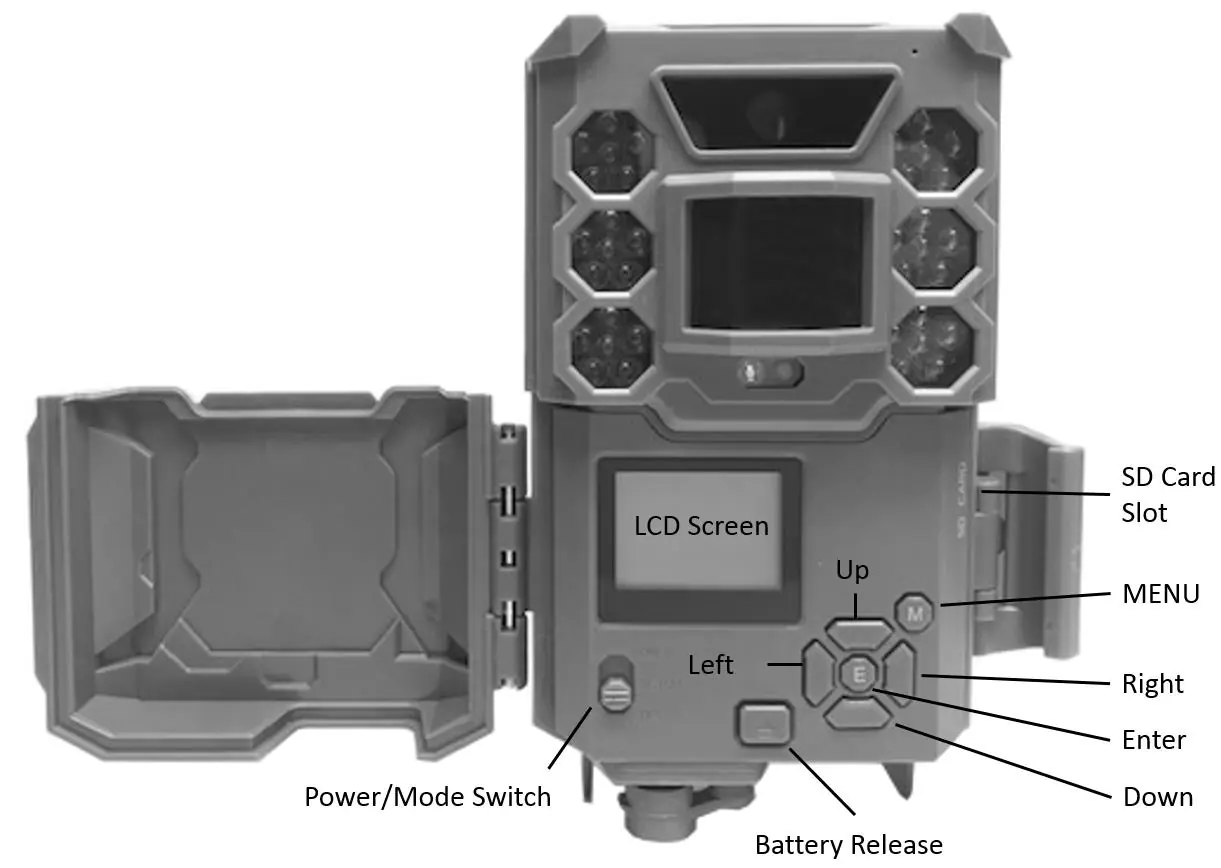
Images and diagrams
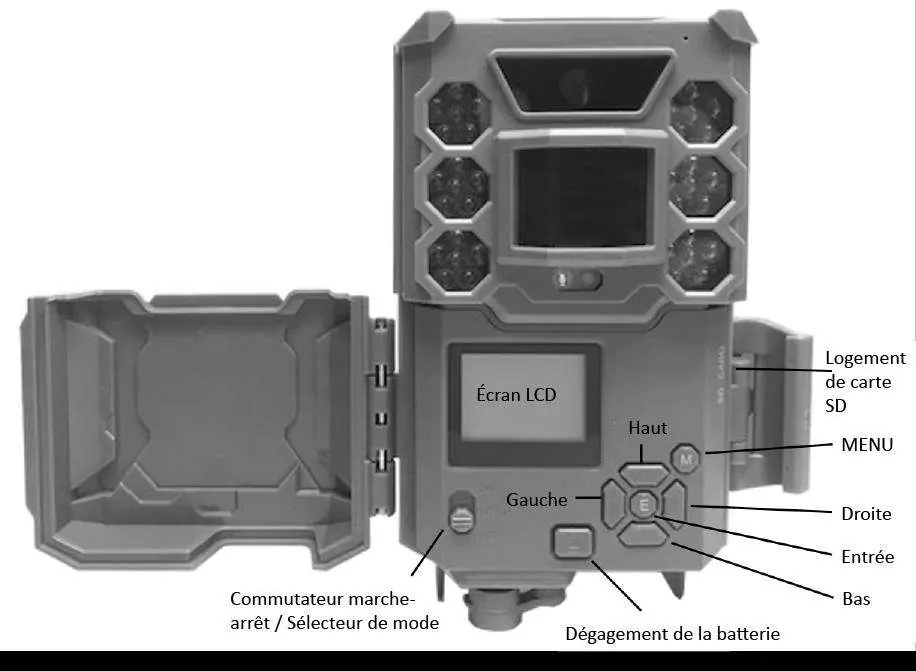
- The camera features a 3-way power switch (OFF, SETUP, ON) and a D-Pad interface for menu navigation.
- The battery tray is released by pressing a button on the side of the camera.
- The SD card slot is located on the side of the camera, accessible when the front cover is open.
Model compatibility
- Supports SD/SDHC cards up to 32GB.
- Class 6 or faster SD cards are recommended for HD video recording.
- NiMH rechargeable batteries are not recommended due to lower voltage.

Manual page author
David Miller
Documentation analyst
Organizes user manual content into clear summaries, with attention to model details, product context, and everyday usability.